Choose the campaign recipients
Pick the audience
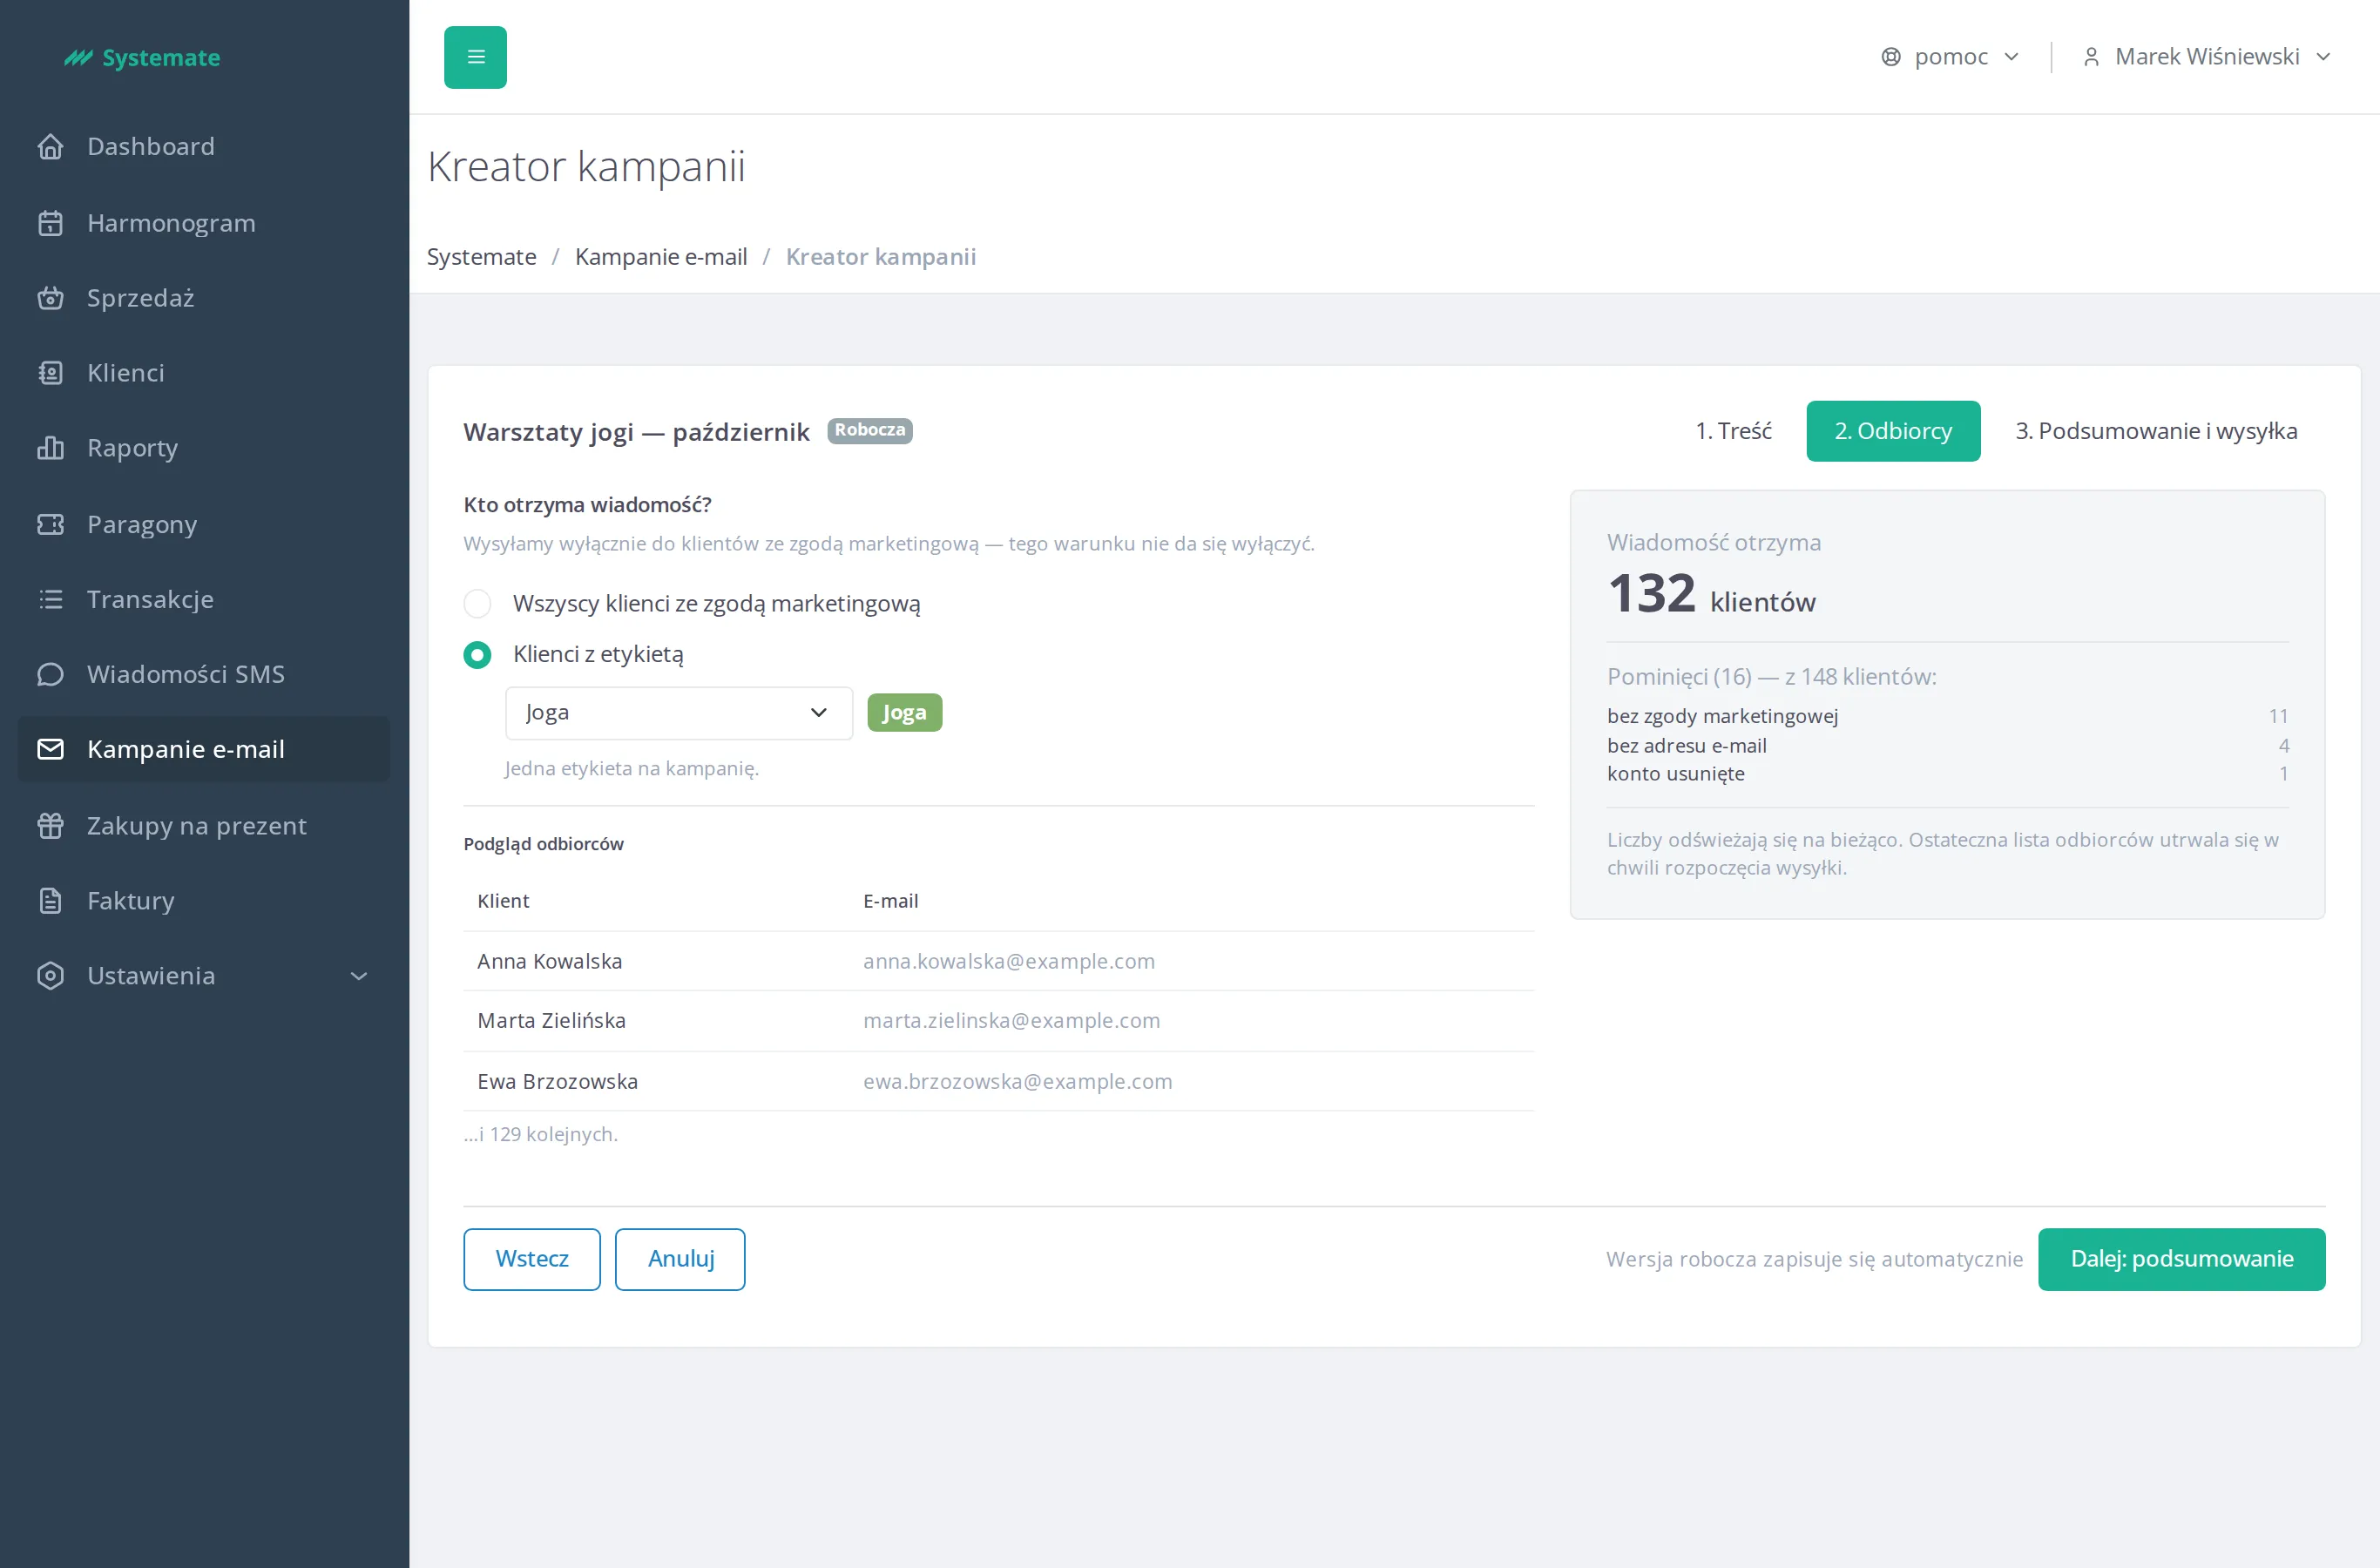
Section titled “Pick the audience”In the campaign creator go to step 2. Recipients and select one option:
- All customers with marketing consent — the studio’s whole customer base.
- Customers with a tag — only people carrying the tag you pick from the dropdown; one tag per campaign. See Manage customer tags.
If a previously saved tag is gone (it was deleted), you will see The saved tag is unavailable — pick another one.
Check how many people will get the message
Section titled “Check how many people will get the message”The right-hand column shows the Will receive the message tile with the number of customers, and below it the Skipped list broken down by reason:
- without marketing consent,
- without an email address,
- deleted account.
Below the audience choice there is also a Recipients preview — the first few people with their name and email address, plus a note saying how many more are on the list.
When the recipient list closes
Section titled “When the recipient list closes”The numbers on this screen refresh continuously and show the state of the customer base right now. The final recipient list is fixed only at the moment sending starts — a customer tagged after the campaign was scheduled will still get the message, and one who withdraws consent in the meantime will not.
Once the recipients are settled, click Next: summary — see Schedule and send a campaign.