Create a pass type
-
In the office panel go to Settings → Passes.
-
Click Add.
-
Fill in the required fields:
- Name, Pass type, and Category — pick an existing category (create one first in Settings → Passes categories if none exists),
- Tax and Price gross,
- Entries count (or check no limits) and Validity (days) — use the 30 / 60 / 90 shortcuts, or check no limits,
- Valid for class types — check the class types the pass applies to, or use Select all / Deselect all.
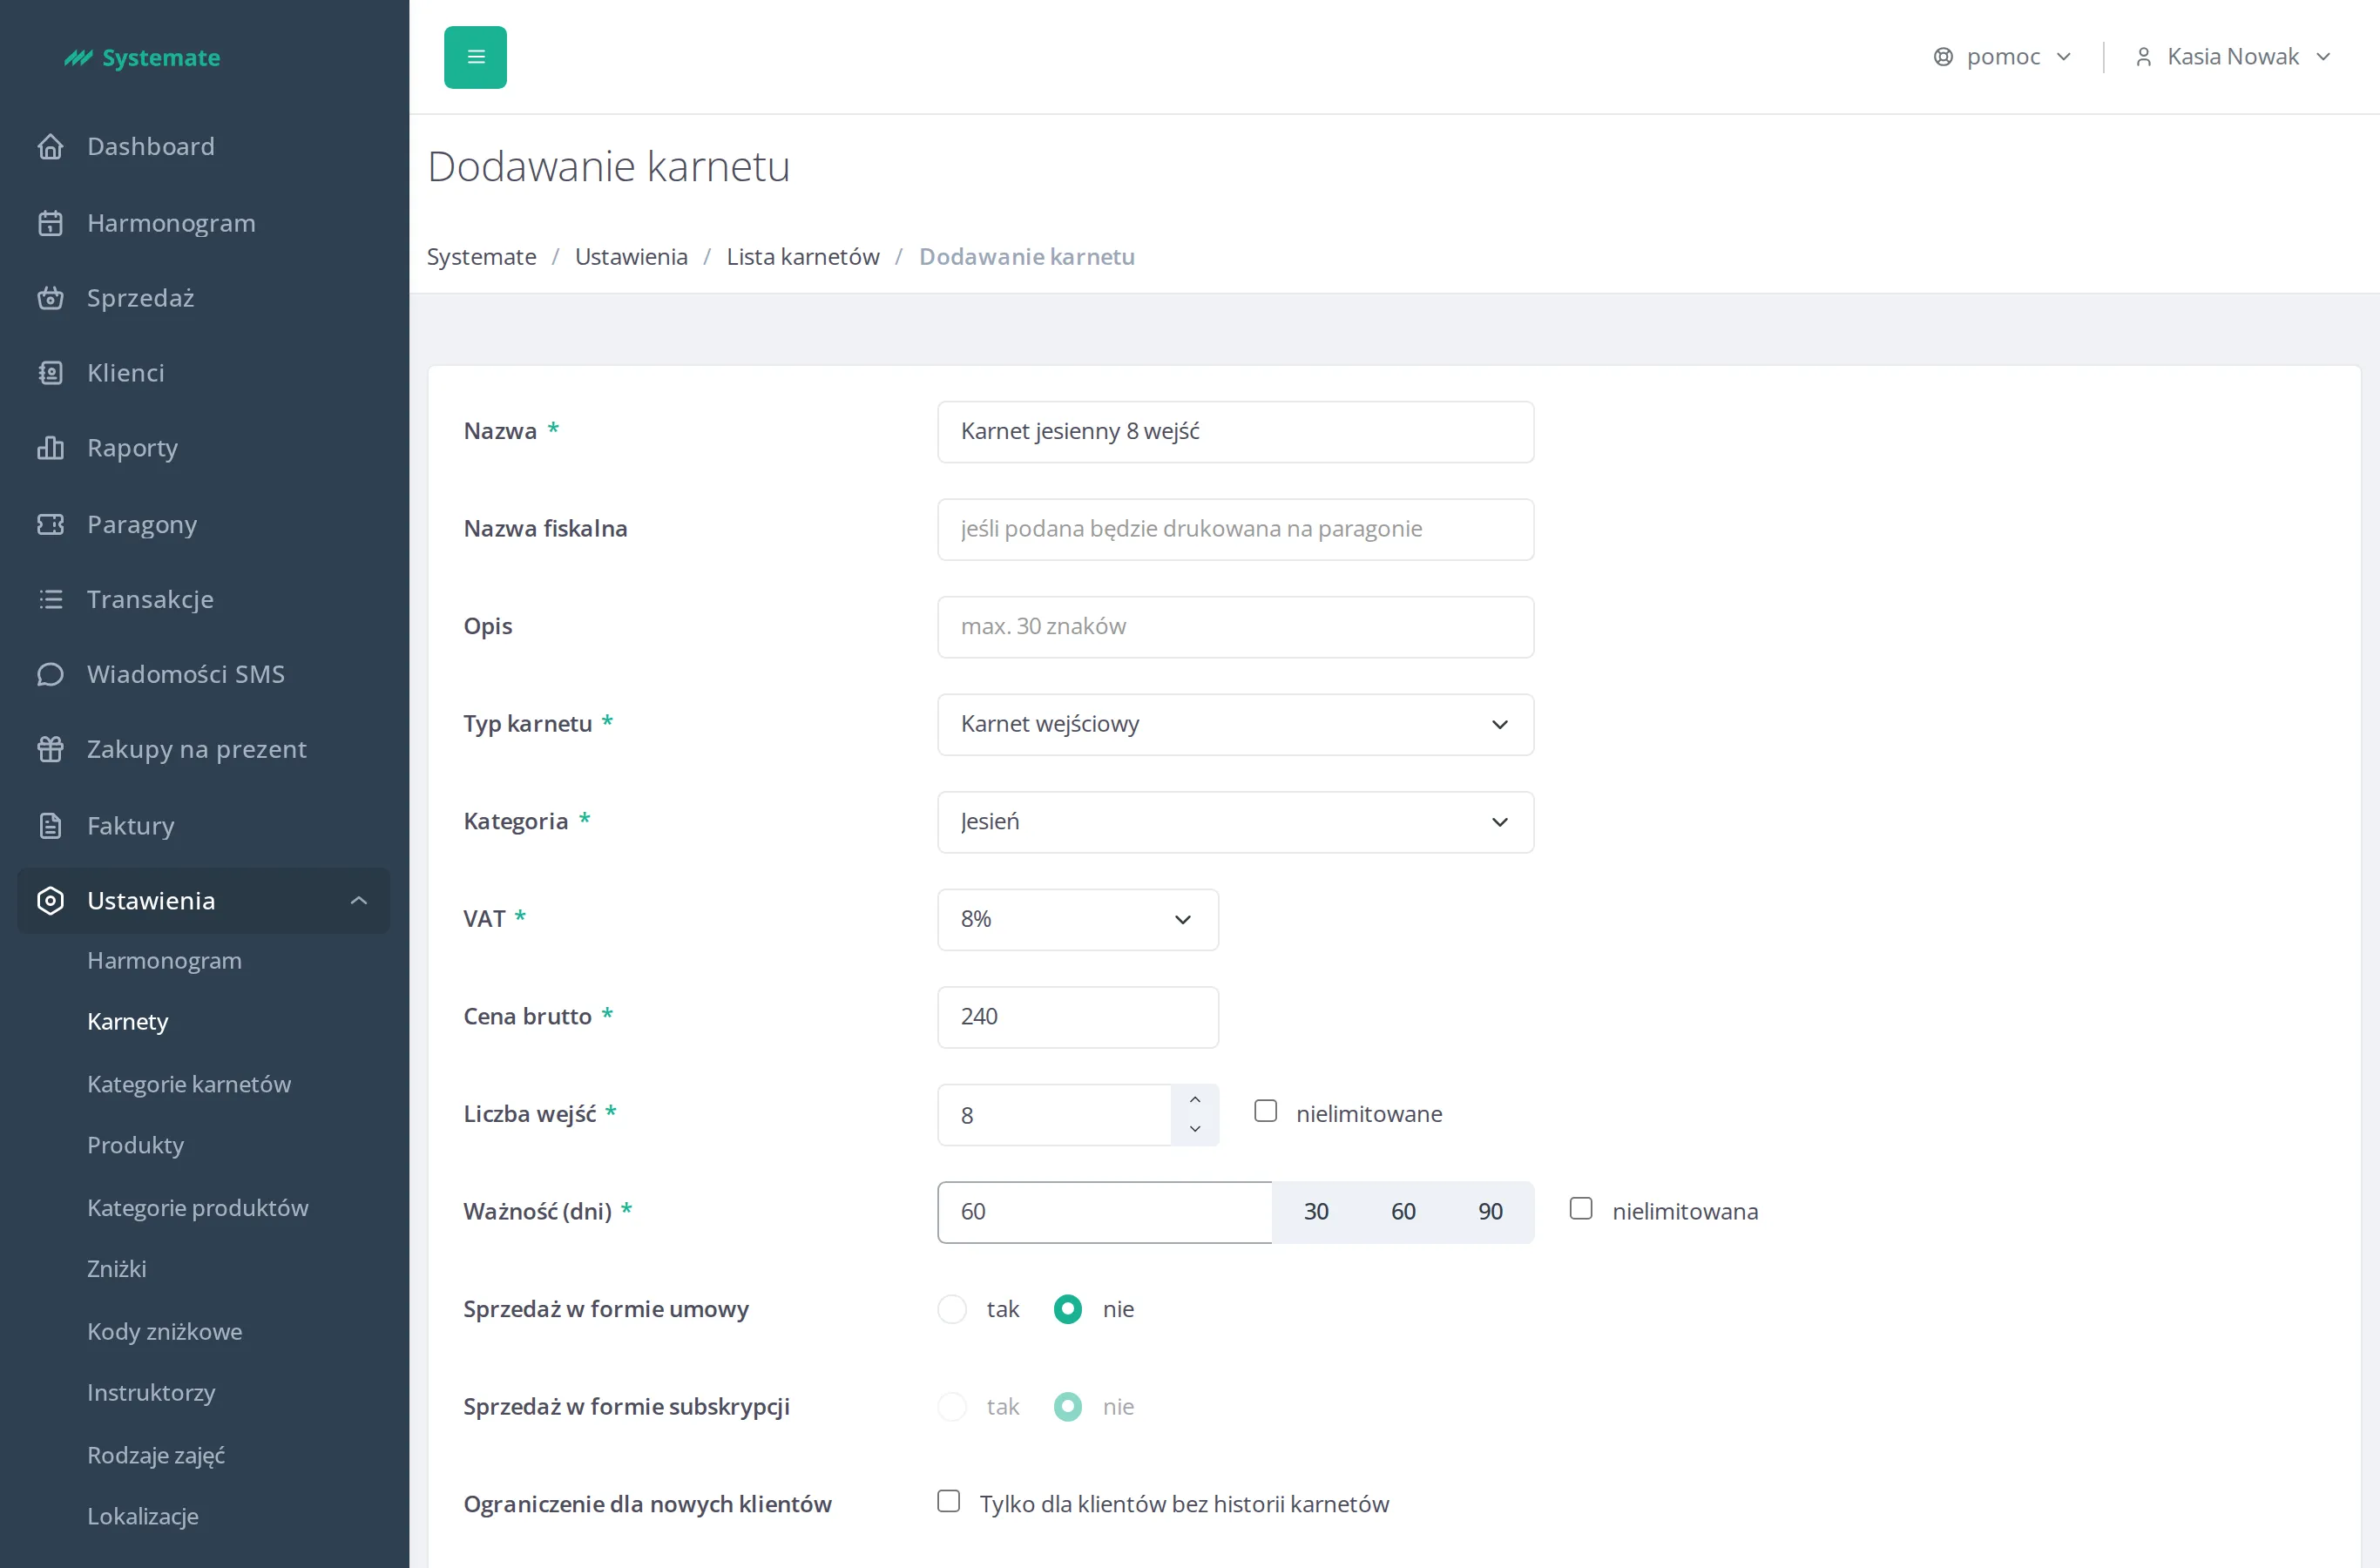
-
Optionally set Visibility: Everywhere or Only office panel.
-
Optionally limit sale of the pass with Sale from date / Sale to date, and Limited sale to (pcs) (uncheck no limits to set a maximum).
-
Click Save.
A pass only for clients with a tag
Section titled “A pass only for clients with a tag”When client tags are enabled in the studio, the pass form has a Who can purchase section.
- Choose Only clients with tags.
- In the Tags field, search for and select at least one tag — each shows whether it is assigned by an automatic rule or manually. A client can buy the pass online if they have at least one of the selected tags.
- Set Visibility in the client dashboard: the pass can also be visible to users who are not logged in (labeled “Offer for selected clients”), or only after logging in and only to clients with the selected tag.
- Click Save.
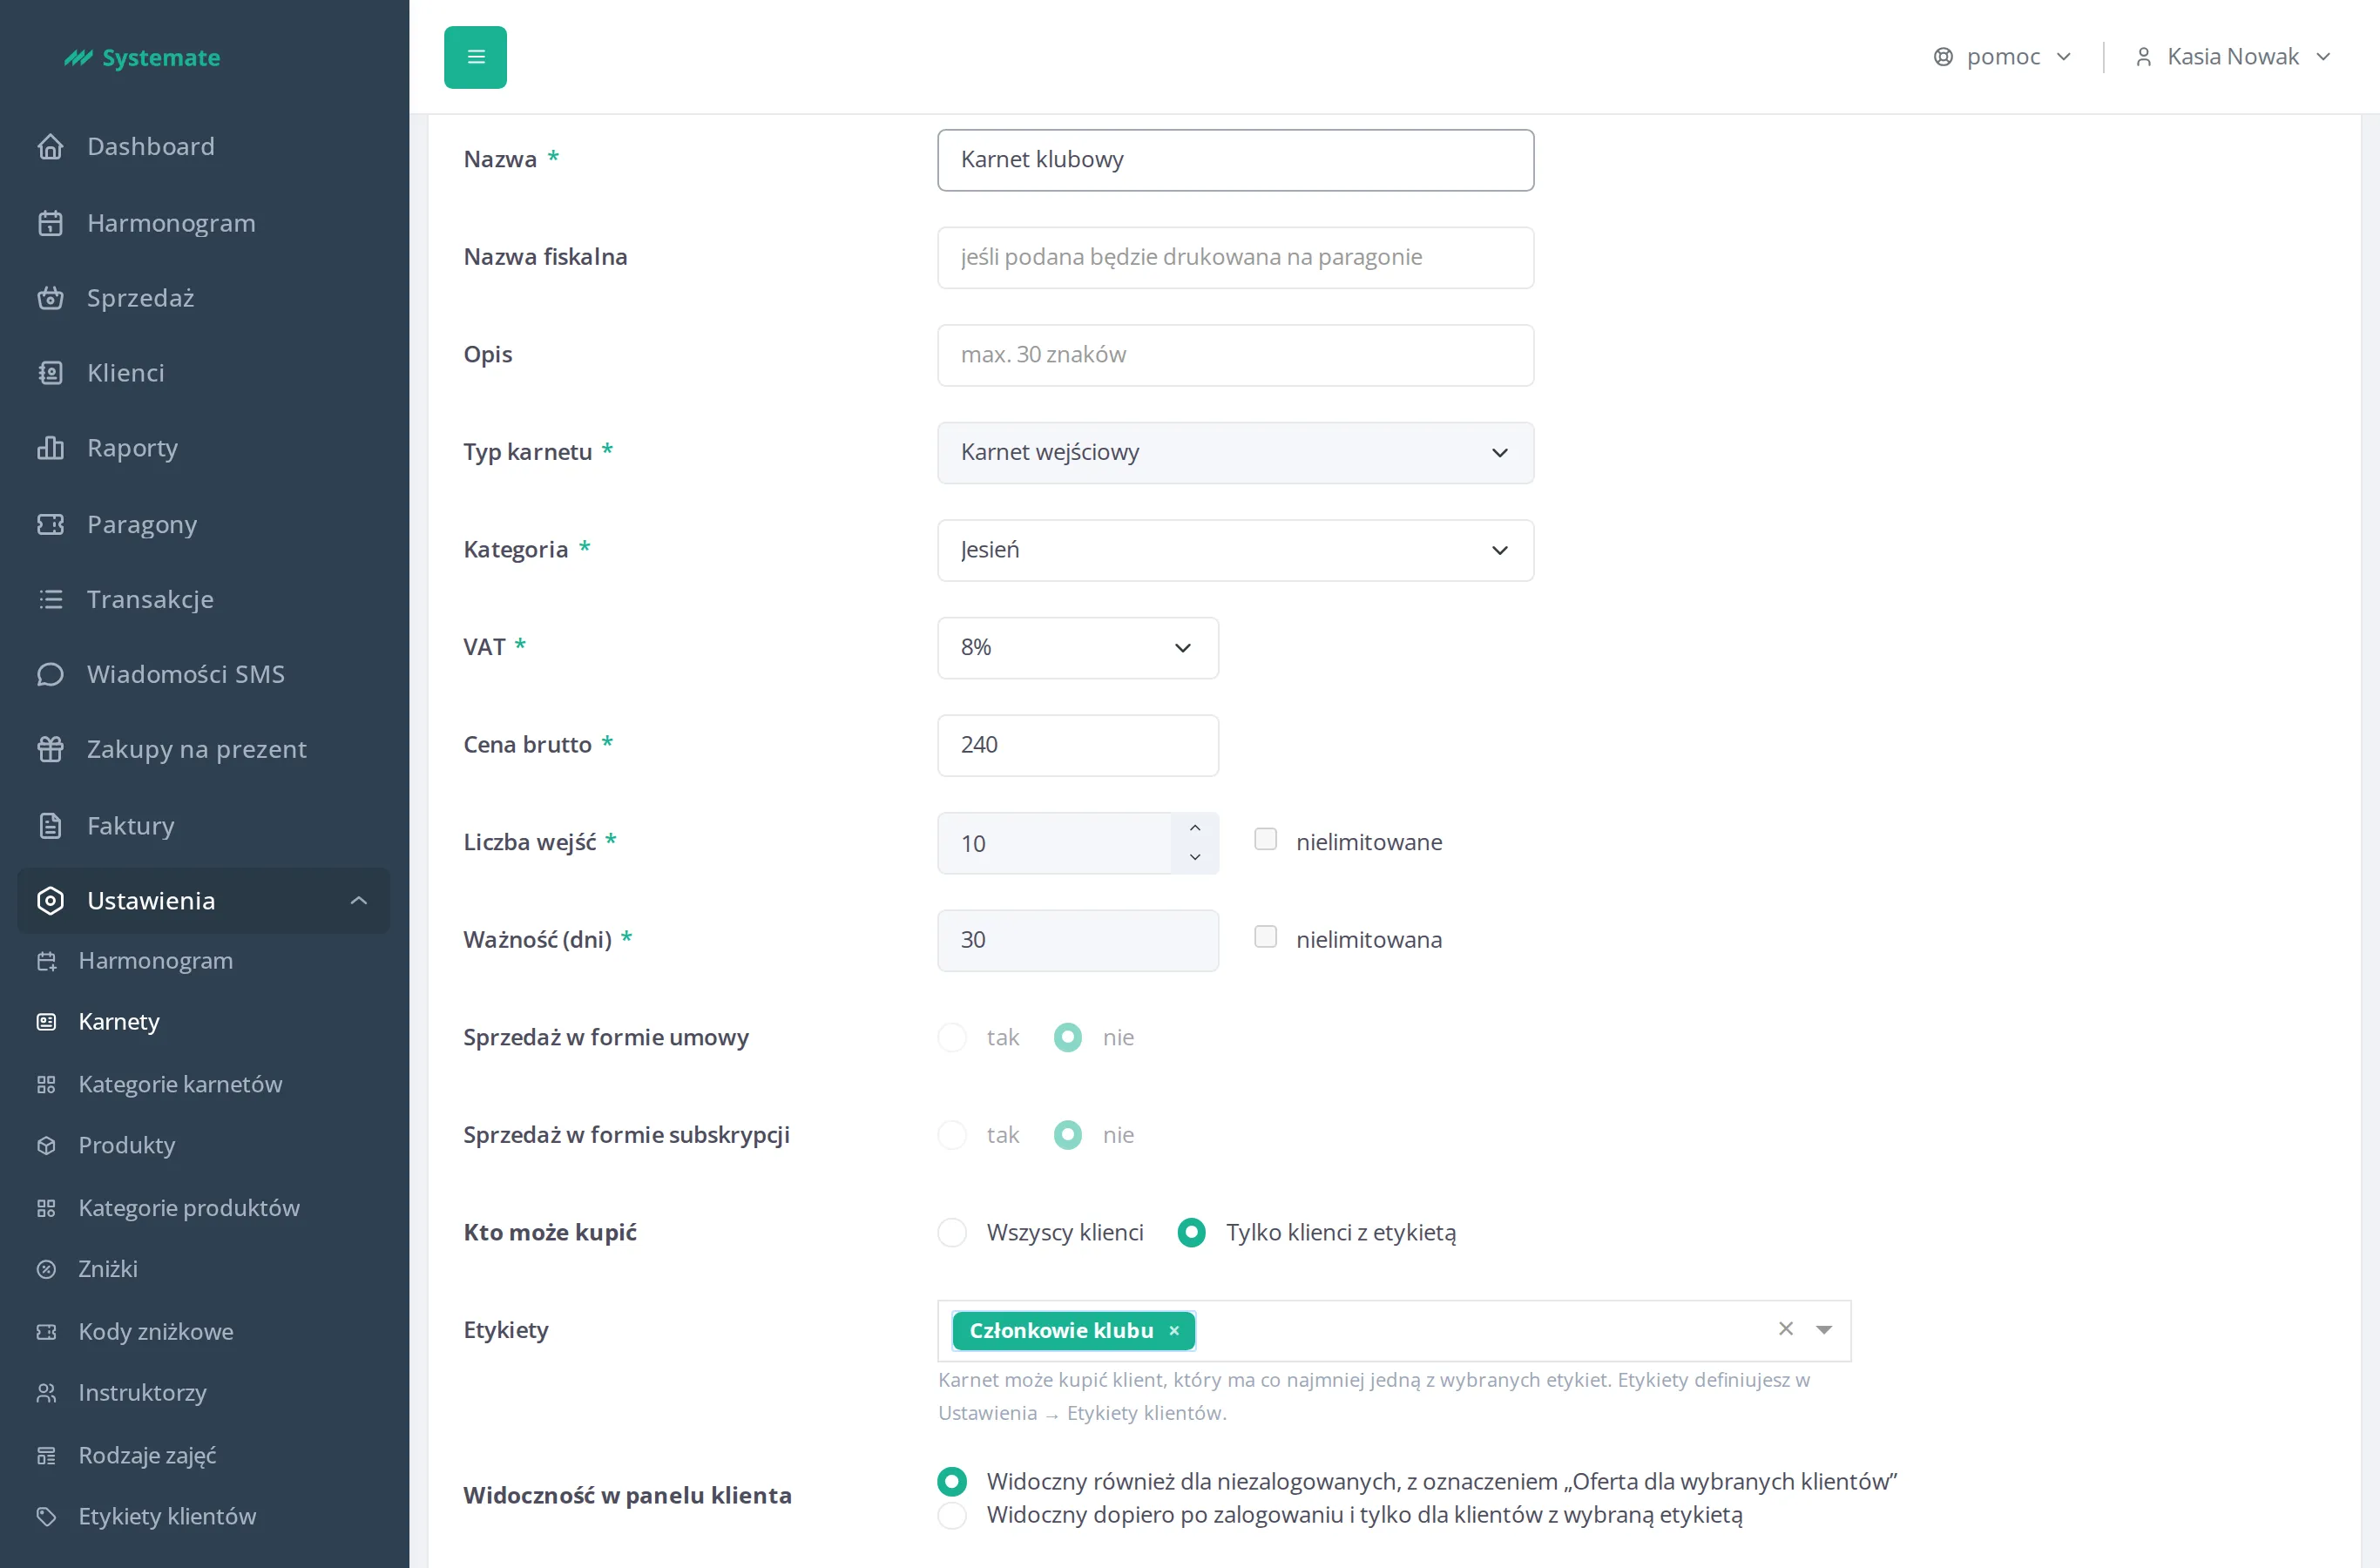
In the pass list such a pass has an Only with tag: row with the tag names. At the front desk it can be sold to any client — when the selected client has none of the tags, the sale window only shows a warning.
Sell it as a subscription
Section titled “Sell it as a subscription”A pass type can renew itself: the customer subscribes once and their card is charged automatically every renewal period.
-
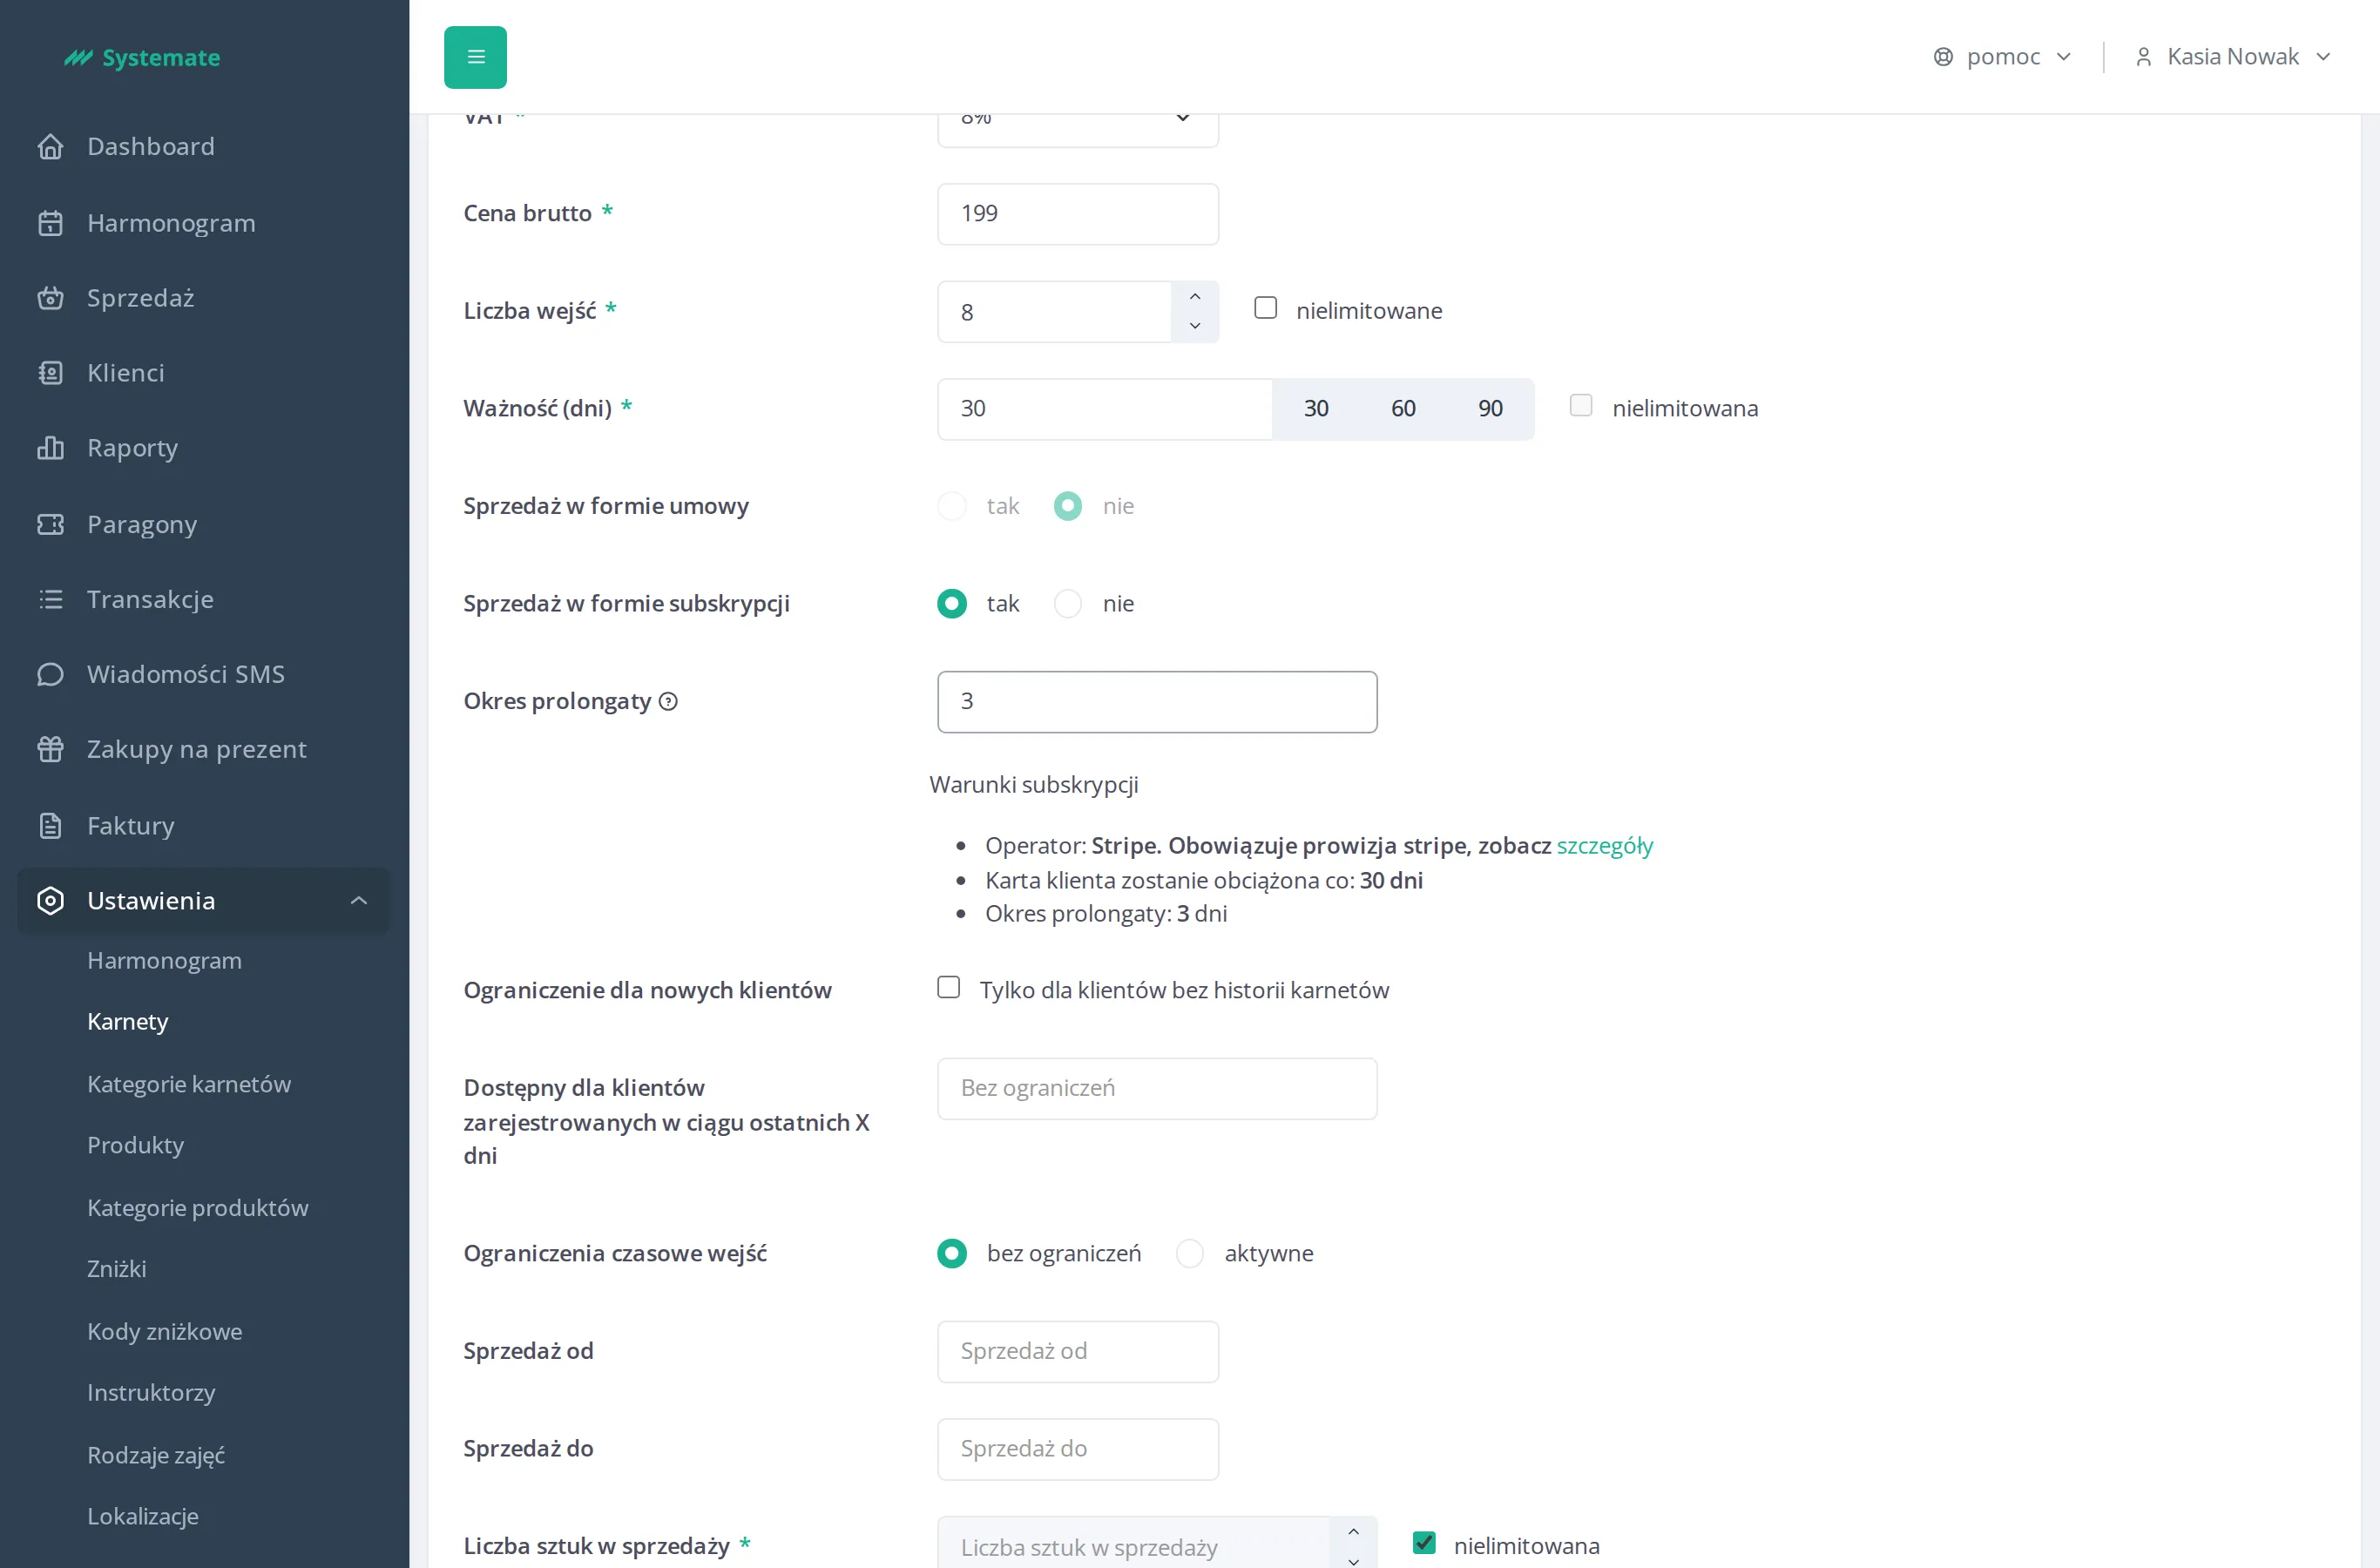
Set As subscription to yes. The option is enabled only when the studio has online payments connected — see Configure online payments — and it can’t be combined with Sale as contract (selecting one disables the other).
-
Make sure Validity (days) is filled in — for a subscription it is required (the no limits option is unavailable) and doubles as the billing interval: the customer is charged the Price gross every that many days.
-
Optionally set a Grace period — the number of days by which the pass validity will be additionally extended after each charge.
-
Review the Subscription conditions summary shown under the fields — the payment Operator (Stripe), how often the customer is charged, and the Grace period — then Save.
Customers see a subscription pass in the offer with its renewal period and a Subscribe button instead of Buy — see Manage your subscription.