Schedule and send a campaign
Set the sending time
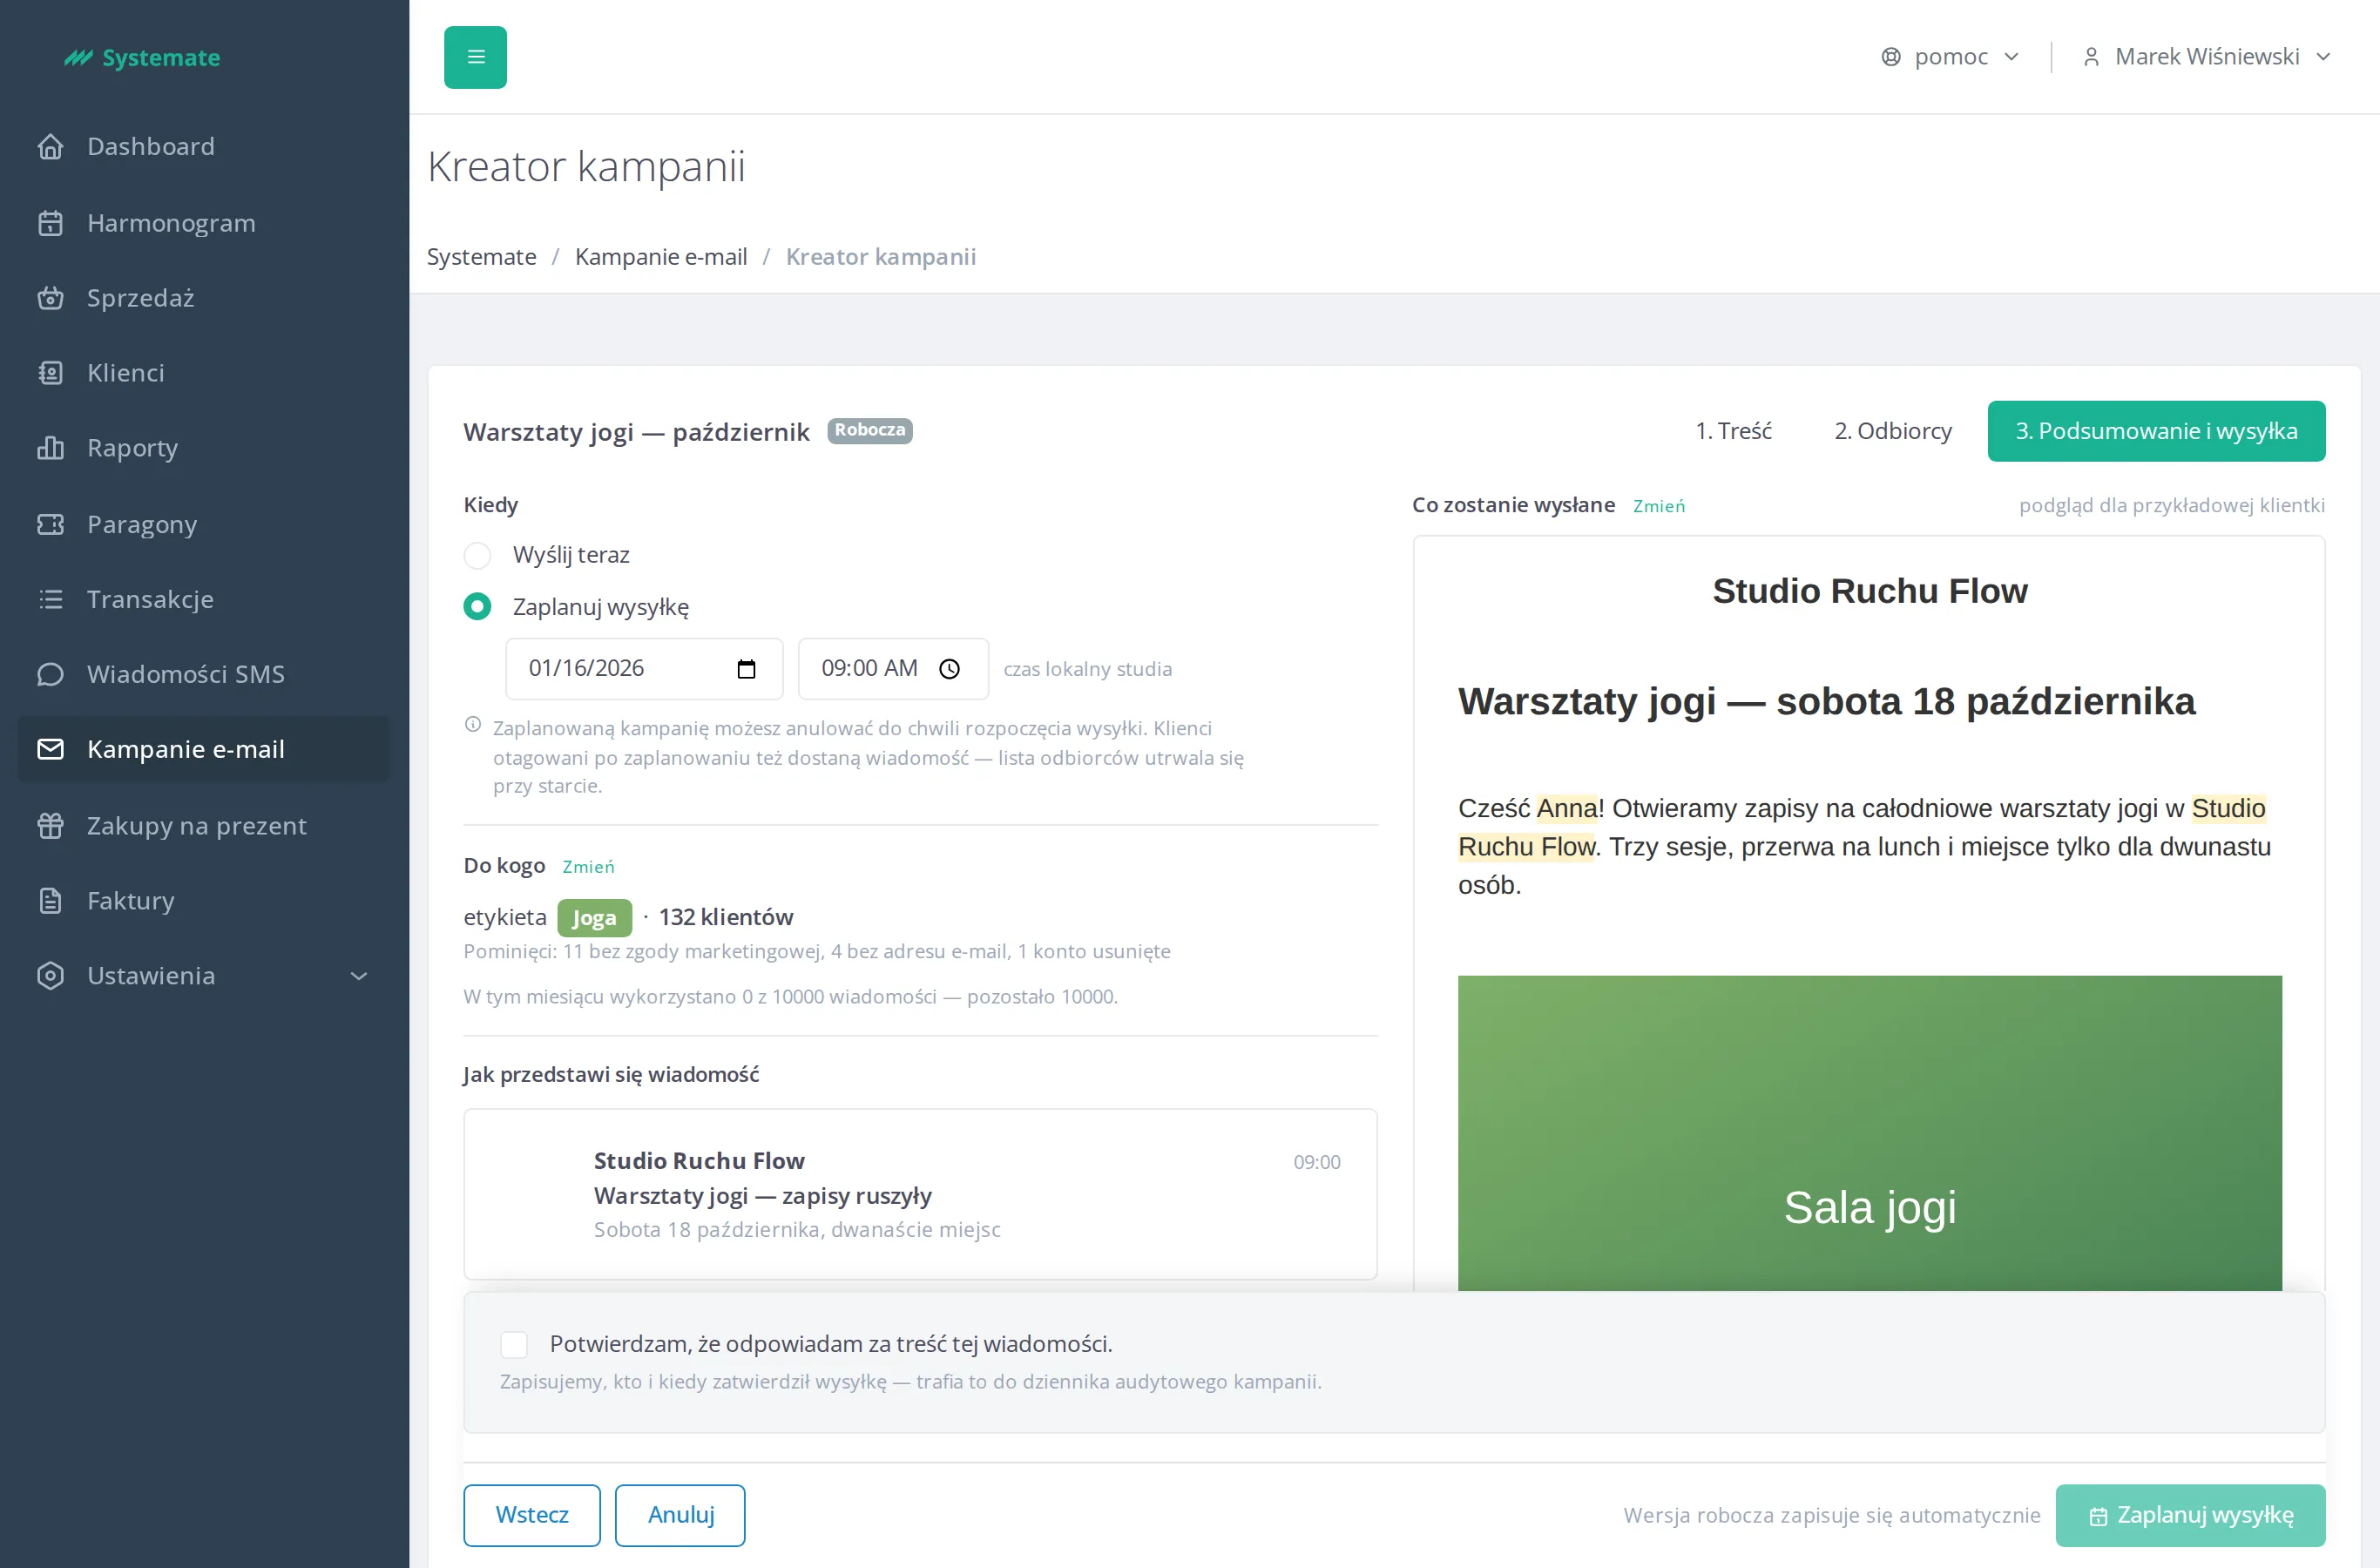
Section titled “Set the sending time”In the campaign creator go to step 3. Summary and sending and, under When, choose:
- Send now — sending starts right after you confirm.
- Schedule sending — enter a date and time. The deadline must be in the future, and the time is the studio’s local time.
Review what goes out and to whom
Section titled “Review what goes out and to whom”The Who to section repeats the decisions from the recipients step: the audience (everyone or a tag), the number of customers, and the skipped list. The Change button goes back to step 2. Recipients.
The How the message will introduce itself section shows the campaign as the customer will see it in their inbox — sender, subject, and preview text — with the exact values below:
- “From” field — the sender name and address,
- Reply-To address — customer replies go to the studio.
The sender is not set in the creator. By default campaigns go out from the platform’s address, and you connect the studio’s own domain under Settings → Email sending — see Connect your own sender domain. A campaign whose send has already started keeps the sender it had at the start.
The What will be sent section is a preview of the finished message for a sample customer. Its Change button goes back to step 1. Content.
Confirm and send
Section titled “Confirm and send”- Tick I confirm that I am responsible for the content of this message. We record who approved the sending and when — it goes into the campaign’s audit log.
- Click Send now or Schedule sending.
The button stays disabled until the campaign has a subject and settled recipients — the message below it points to the step that is missing something.
Below the Who to section sits the month’s use of the sending limit — this month X of Y messages have been used — Z remain. When this campaign does not fit in what is left, the button is disabled and the message below it gives the numbers and points you at platform support, who can raise the limit. A campaign that comes to more than half the monthly limit only warns — you approve the send as usual. See Campaign sending rules.
It also stays disabled while Systemate has your studio’s sending paused. A banner with the pause and its reason then sits above the creator, and the message below the button reads campaign sending is paused — you will be able to approve the send once it resumes. Content and recipients can be edited and saved as usual; the pause is lifted by platform support. See Campaign sending rules.
Cancel or stop a send
Section titled “Cancel or stop a send”In the Email campaigns list, in the actions column:
- a Scheduled campaign has a Cancel sending button — it works until sending starts and moves the campaign to the Cancelled status;
- a Sending campaign has a Stop sending button — it halts a send in progress. Customers the message has not reached yet will not receive it, and the campaign gets the Stopped status. The same button is on the campaign details page.
- a Draft campaign has Edit and Delete buttons. Deleting cannot be undone.
A message that has been sent cannot be recalled.
Once sending has started, follow its progress — see Track a campaign send.