Check the attendance list
-
In the office panel open the Schedule.
-
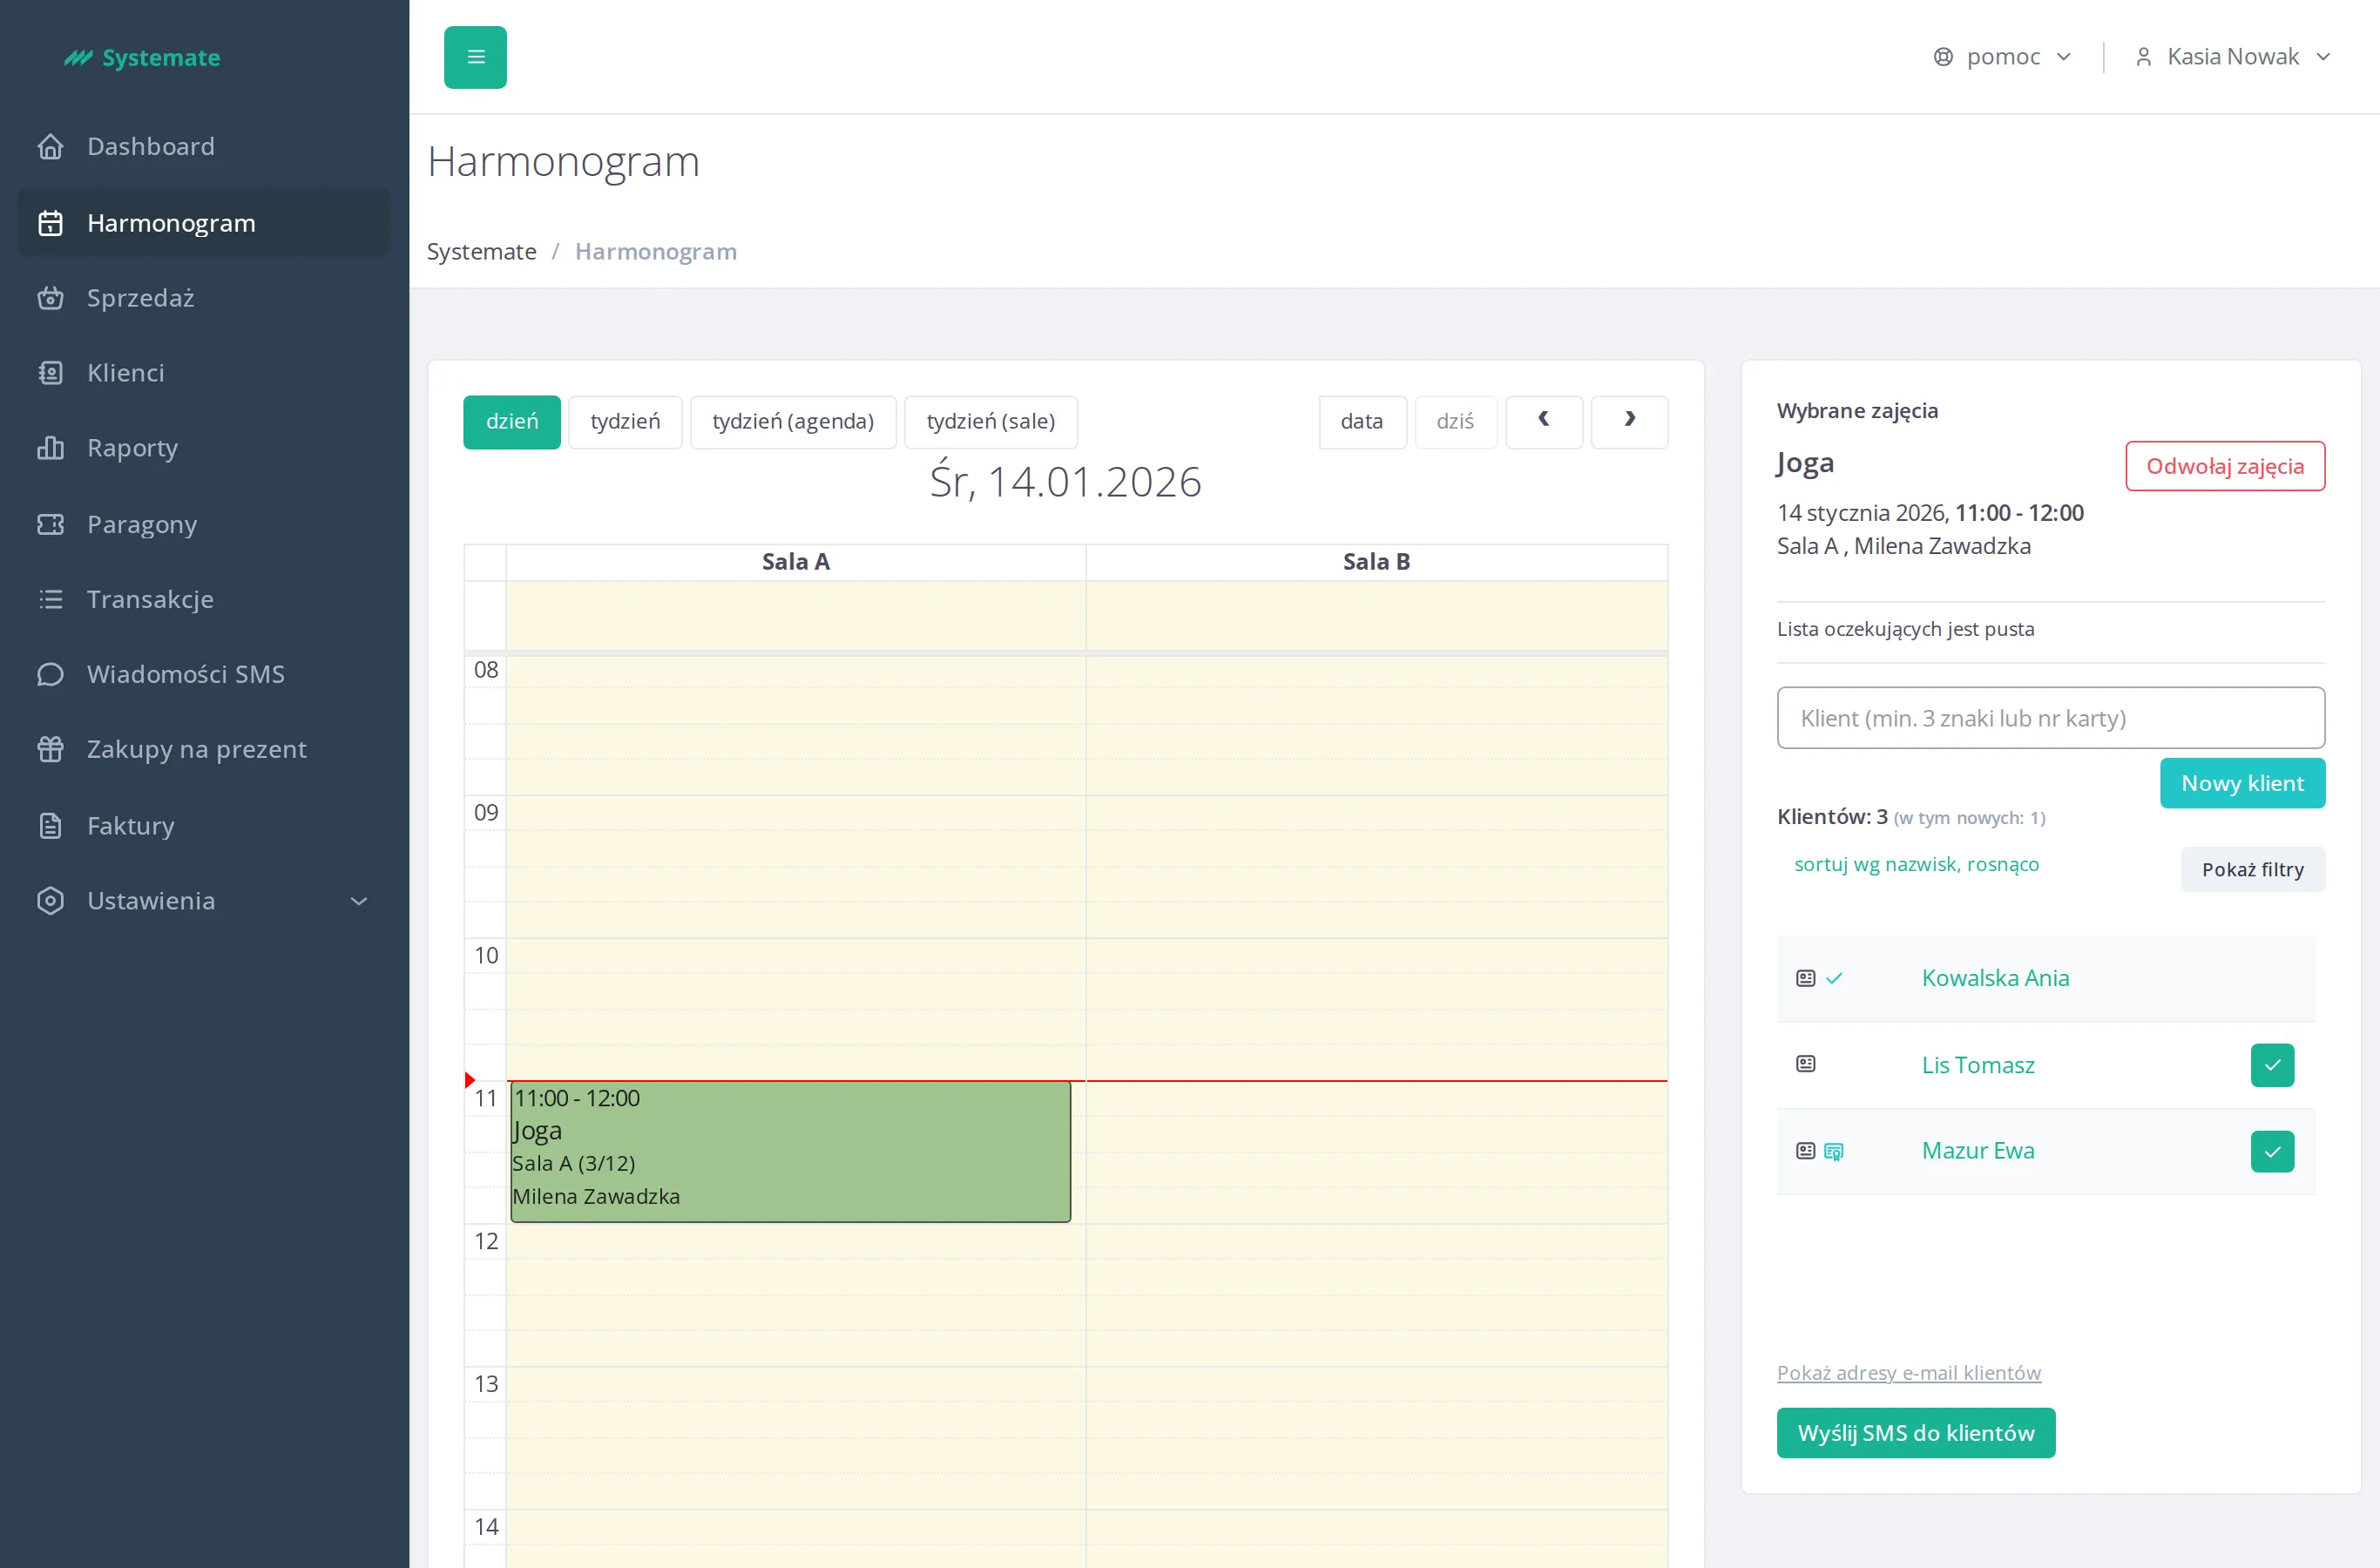
Click a class in the calendar — on the right you will see Selected classes with the list of signed-up customers.
-
Record attendance by clicking ✓ next to a name. A customer’s first visit is specially marked.
-
To add a walk-in customer, type their name (min. 3 characters) or card number into the Client (min. 3 characters or card number) field — or create an account with the New client button.
Cancel the class from this screen
Section titled “Cancel the class from this screen”Next to the class name, on the right, sits the Cancel the class button — you don’t have to go to Settings → Schedule, and you don’t need the schedule-planning permission. The panel asks how many customers lose their booking and how to tell them, and once you confirm it releases the bookings and returns the entries to the passes. The details: Cancel a class.
Confirming attendance — and taking it back
Section titled “Confirming attendance — and taking it back”Each row on the list has small action buttons:
- ✓ (Mark as present) — confirms the customer showed up. A check mark appears next to their name; hover it to see Presence confirmed by: and the name of the staff member who confirmed.
- Revert presence confirmation — shown for already-confirmed customers. It takes the confirmation back: the customer stays signed up for the class, just no longer counts as present.
- Remove client from attendance list — removes the sign-up from the class entirely.
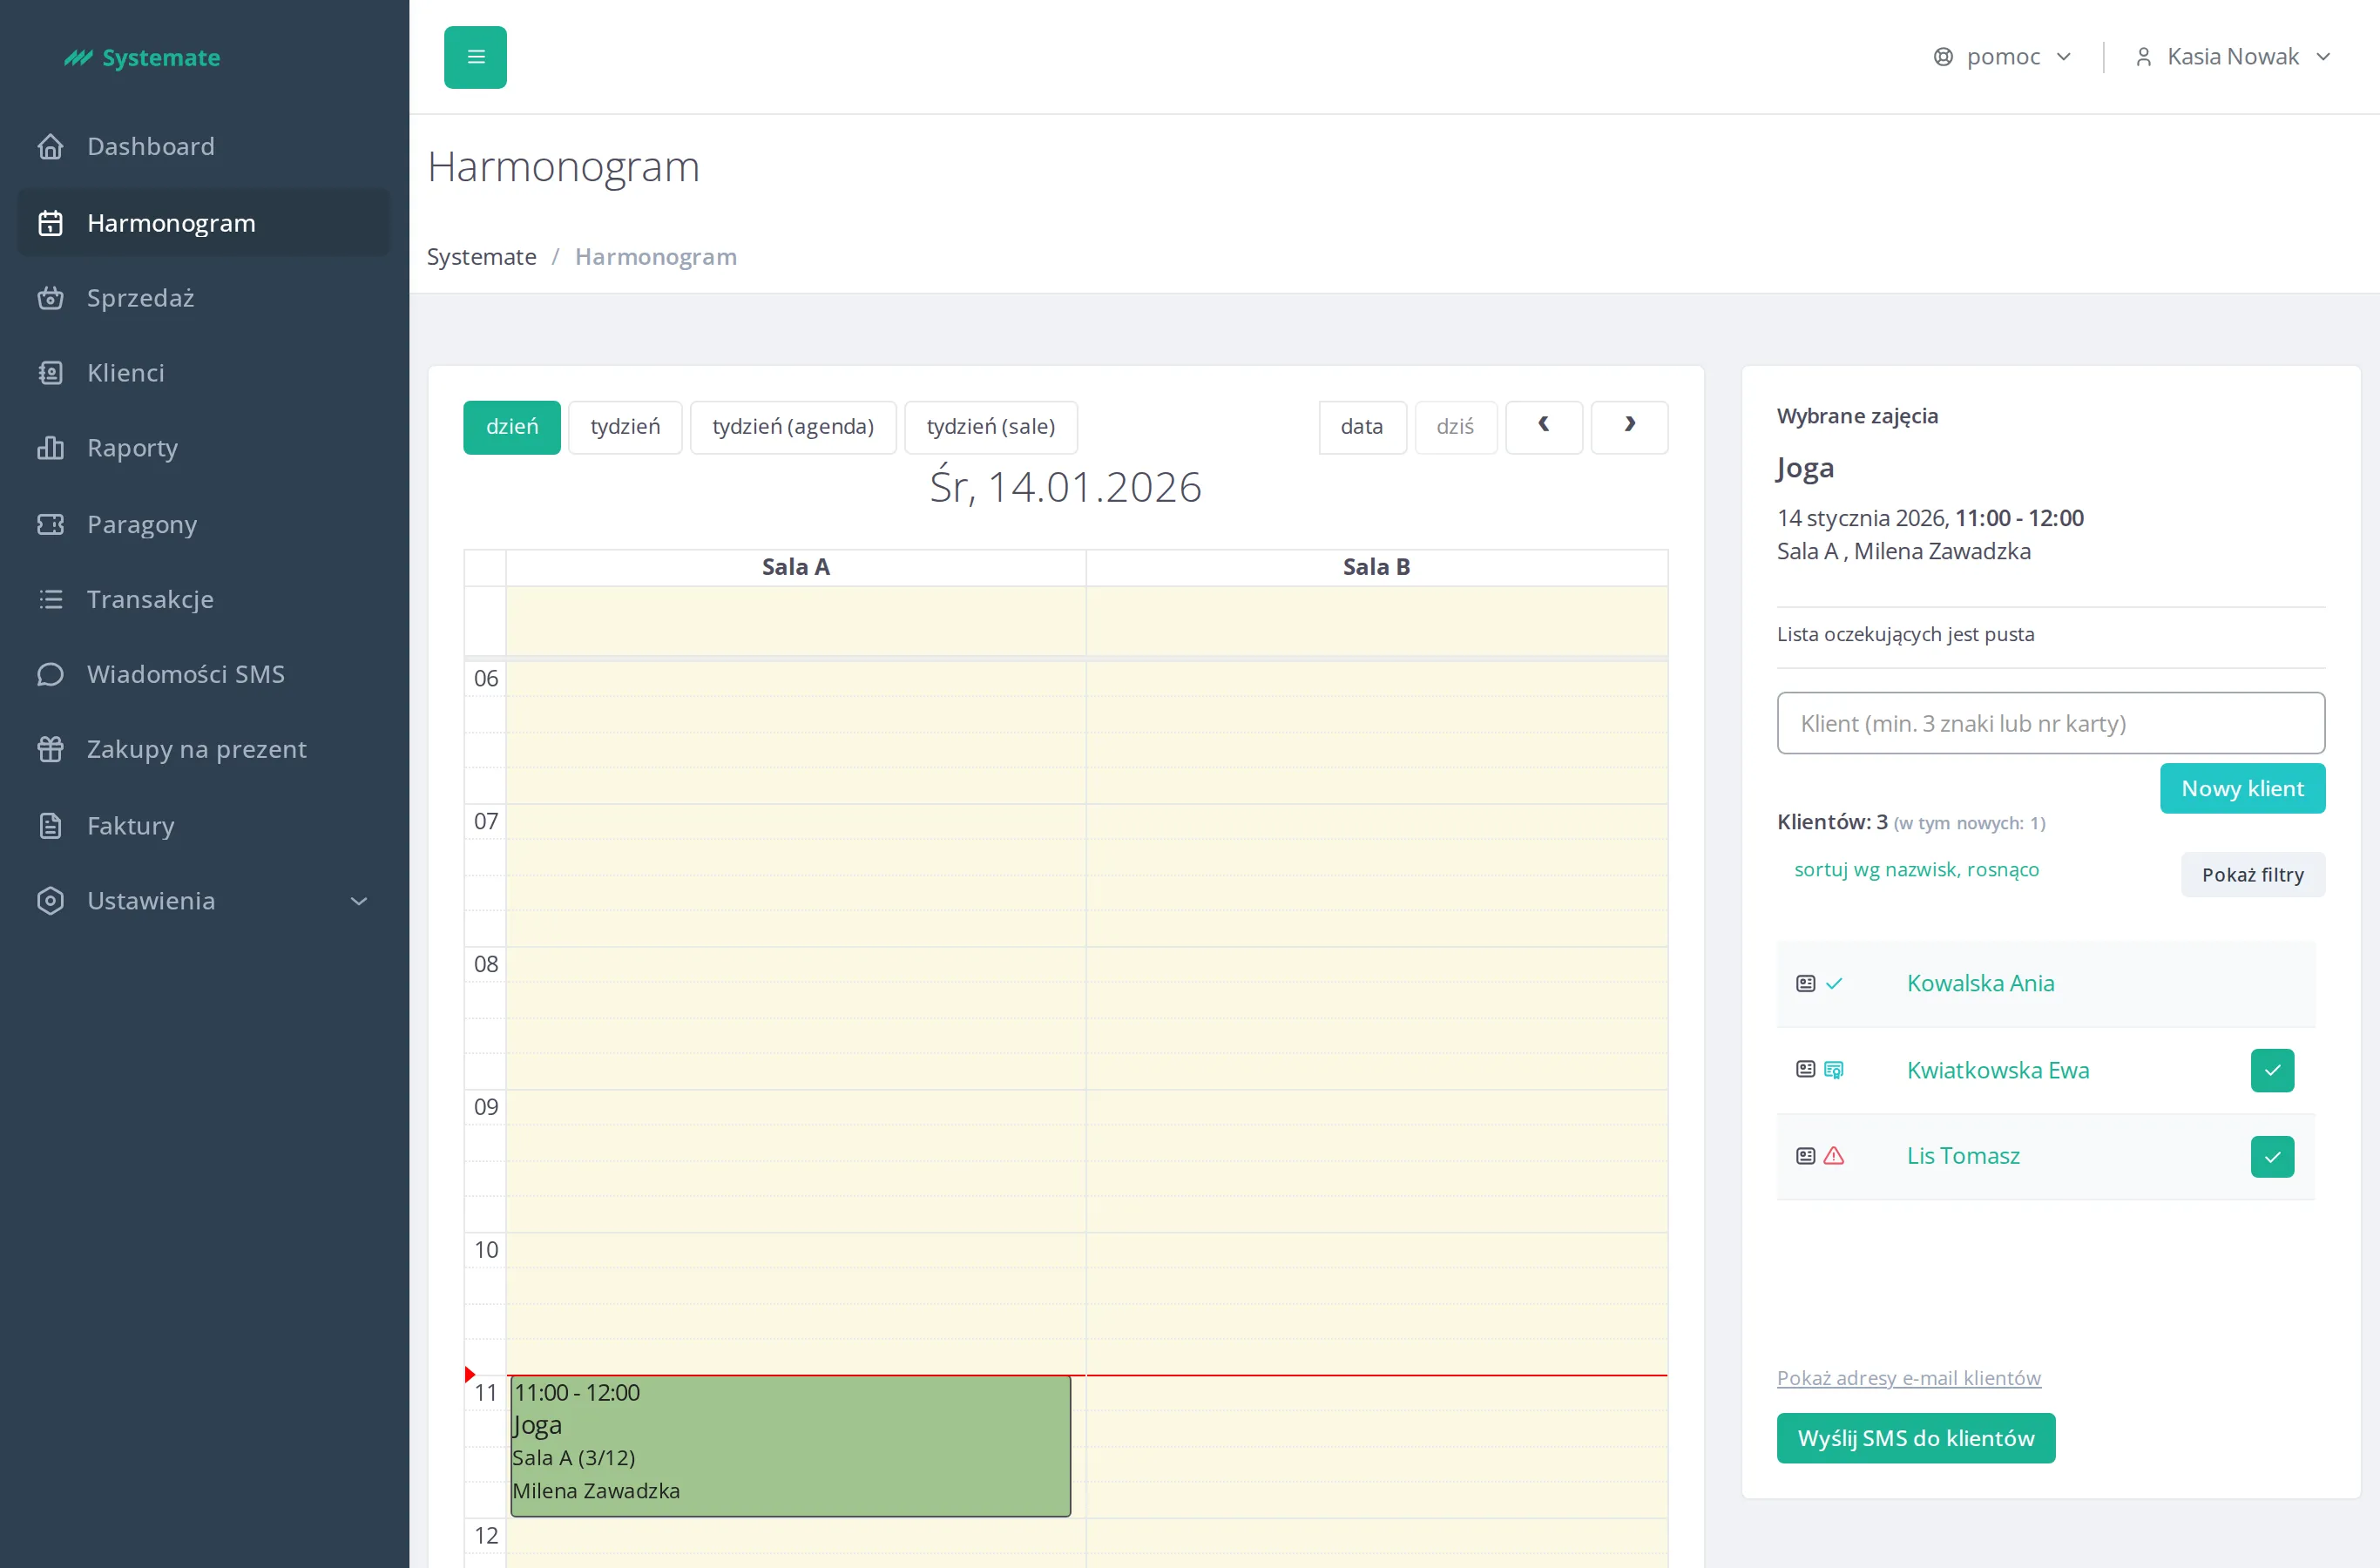
Confirming a customer can open the Additional information window — see below.
The first-visit marker
Section titled “The first-visit marker”A customer visiting your studio for the first time gets a badge next to their name — hover it to see New client - first visit. The list header counts them too: Clients: 12 (including new: 2). With Show filters you can narrow the list to only new clients or filter it by name, and the sort link switches between last-name and sign-up-time order.
What the icons next to a name mean
Section titled “What the icons next to a name mean”- The card icon shows the pass used for this sign-up — hover it for the pass name, Left visits, and Valid to date; click it to open the pass details.
- A red warning triangle means money: hover it to see whether it’s Unsettled payments or Overpayment.
Clicking the customer’s name opens their profile in a new browser tab.
The Additional information window
Section titled “The Additional information window”When you confirm a customer (or add them to the list), Systemate may open a window titled Additional information with things worth knowing before the class starts:
- The client has outstanding payments — with a Check button that opens the customer’s Transactions tab.
- The client has an overpayment on the account — also with Check.
- The client has assigned notes — lists the notes marked to warn at sign-up, with a Go to note button. See Add a note to a customer.
- The pass validity expires soon — shown with the pass name when the customer is using the last entry on their pass, or the pass validity ends today.
- Extra information configured for the pass type, if there is any.
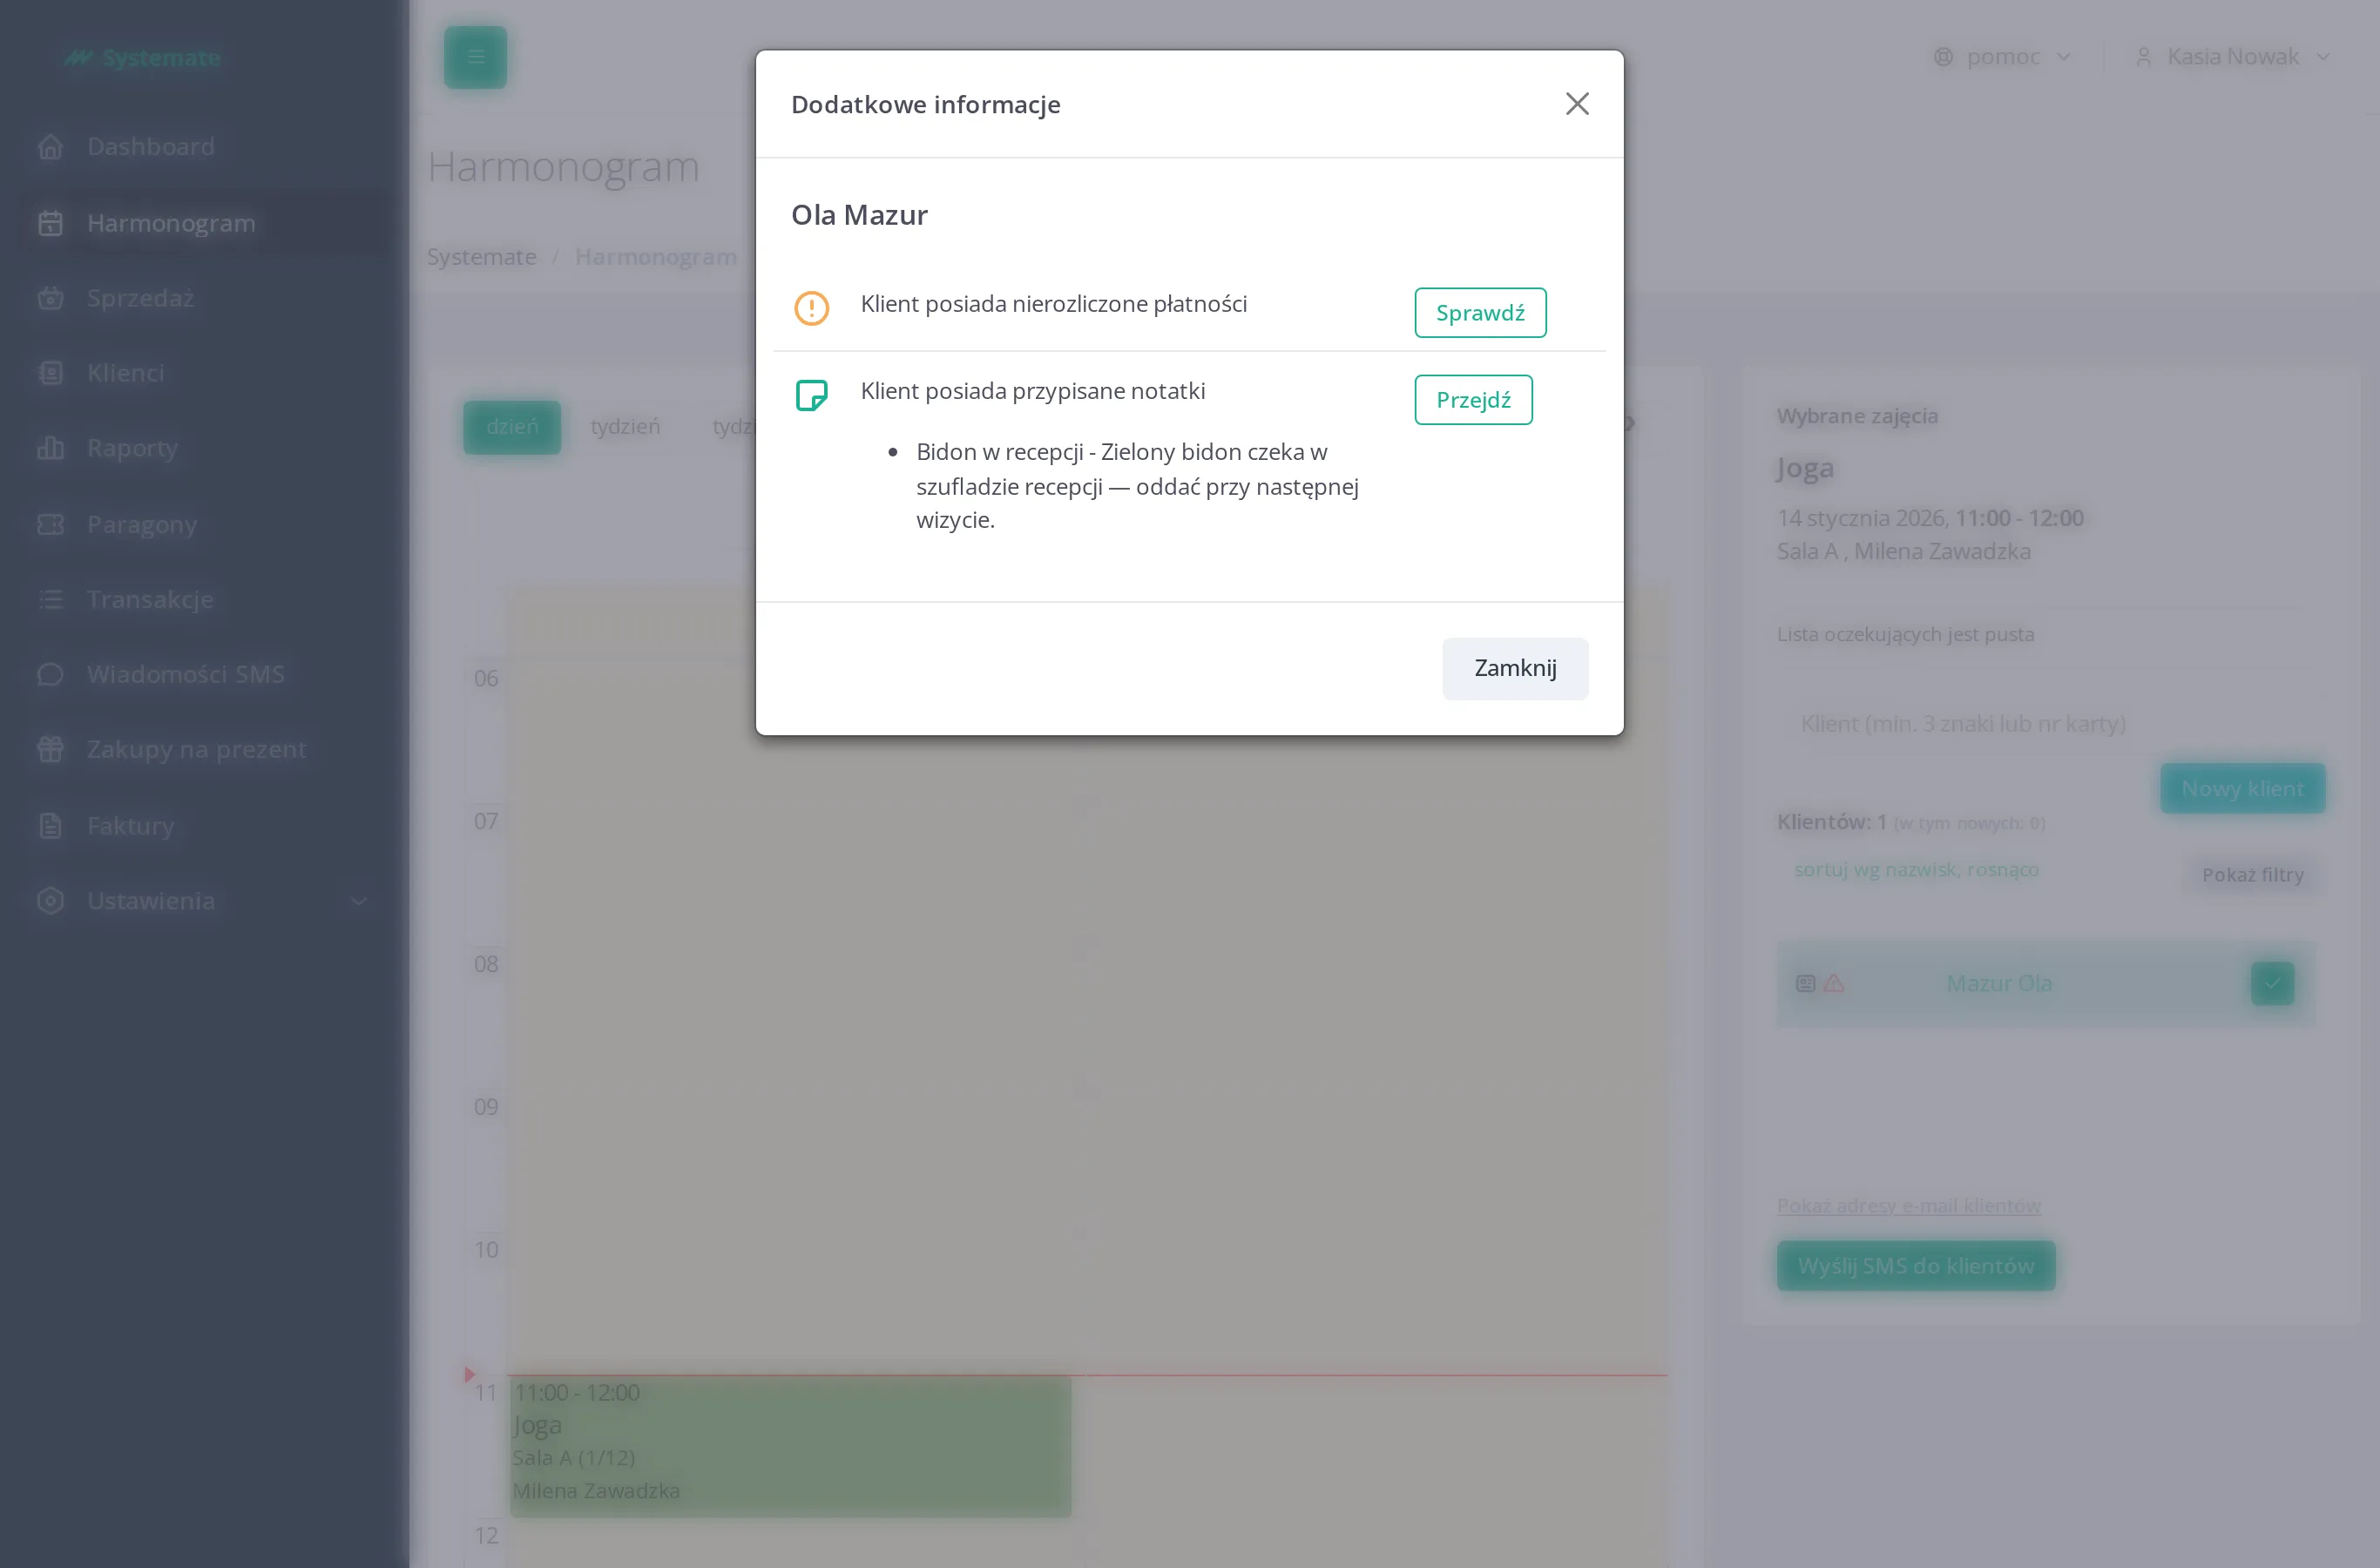
If none of these apply, no window appears — the customer is simply confirmed.