Add a class to the schedule
-
In the office panel go to Settings → Schedule.
-
Click + Add.
-
Fill in the form:
- Date and Hours (from–to),
- Course type — e.g. Joga,
- Location — the room where the class takes place,
- Instructor (optional) and Capacity.
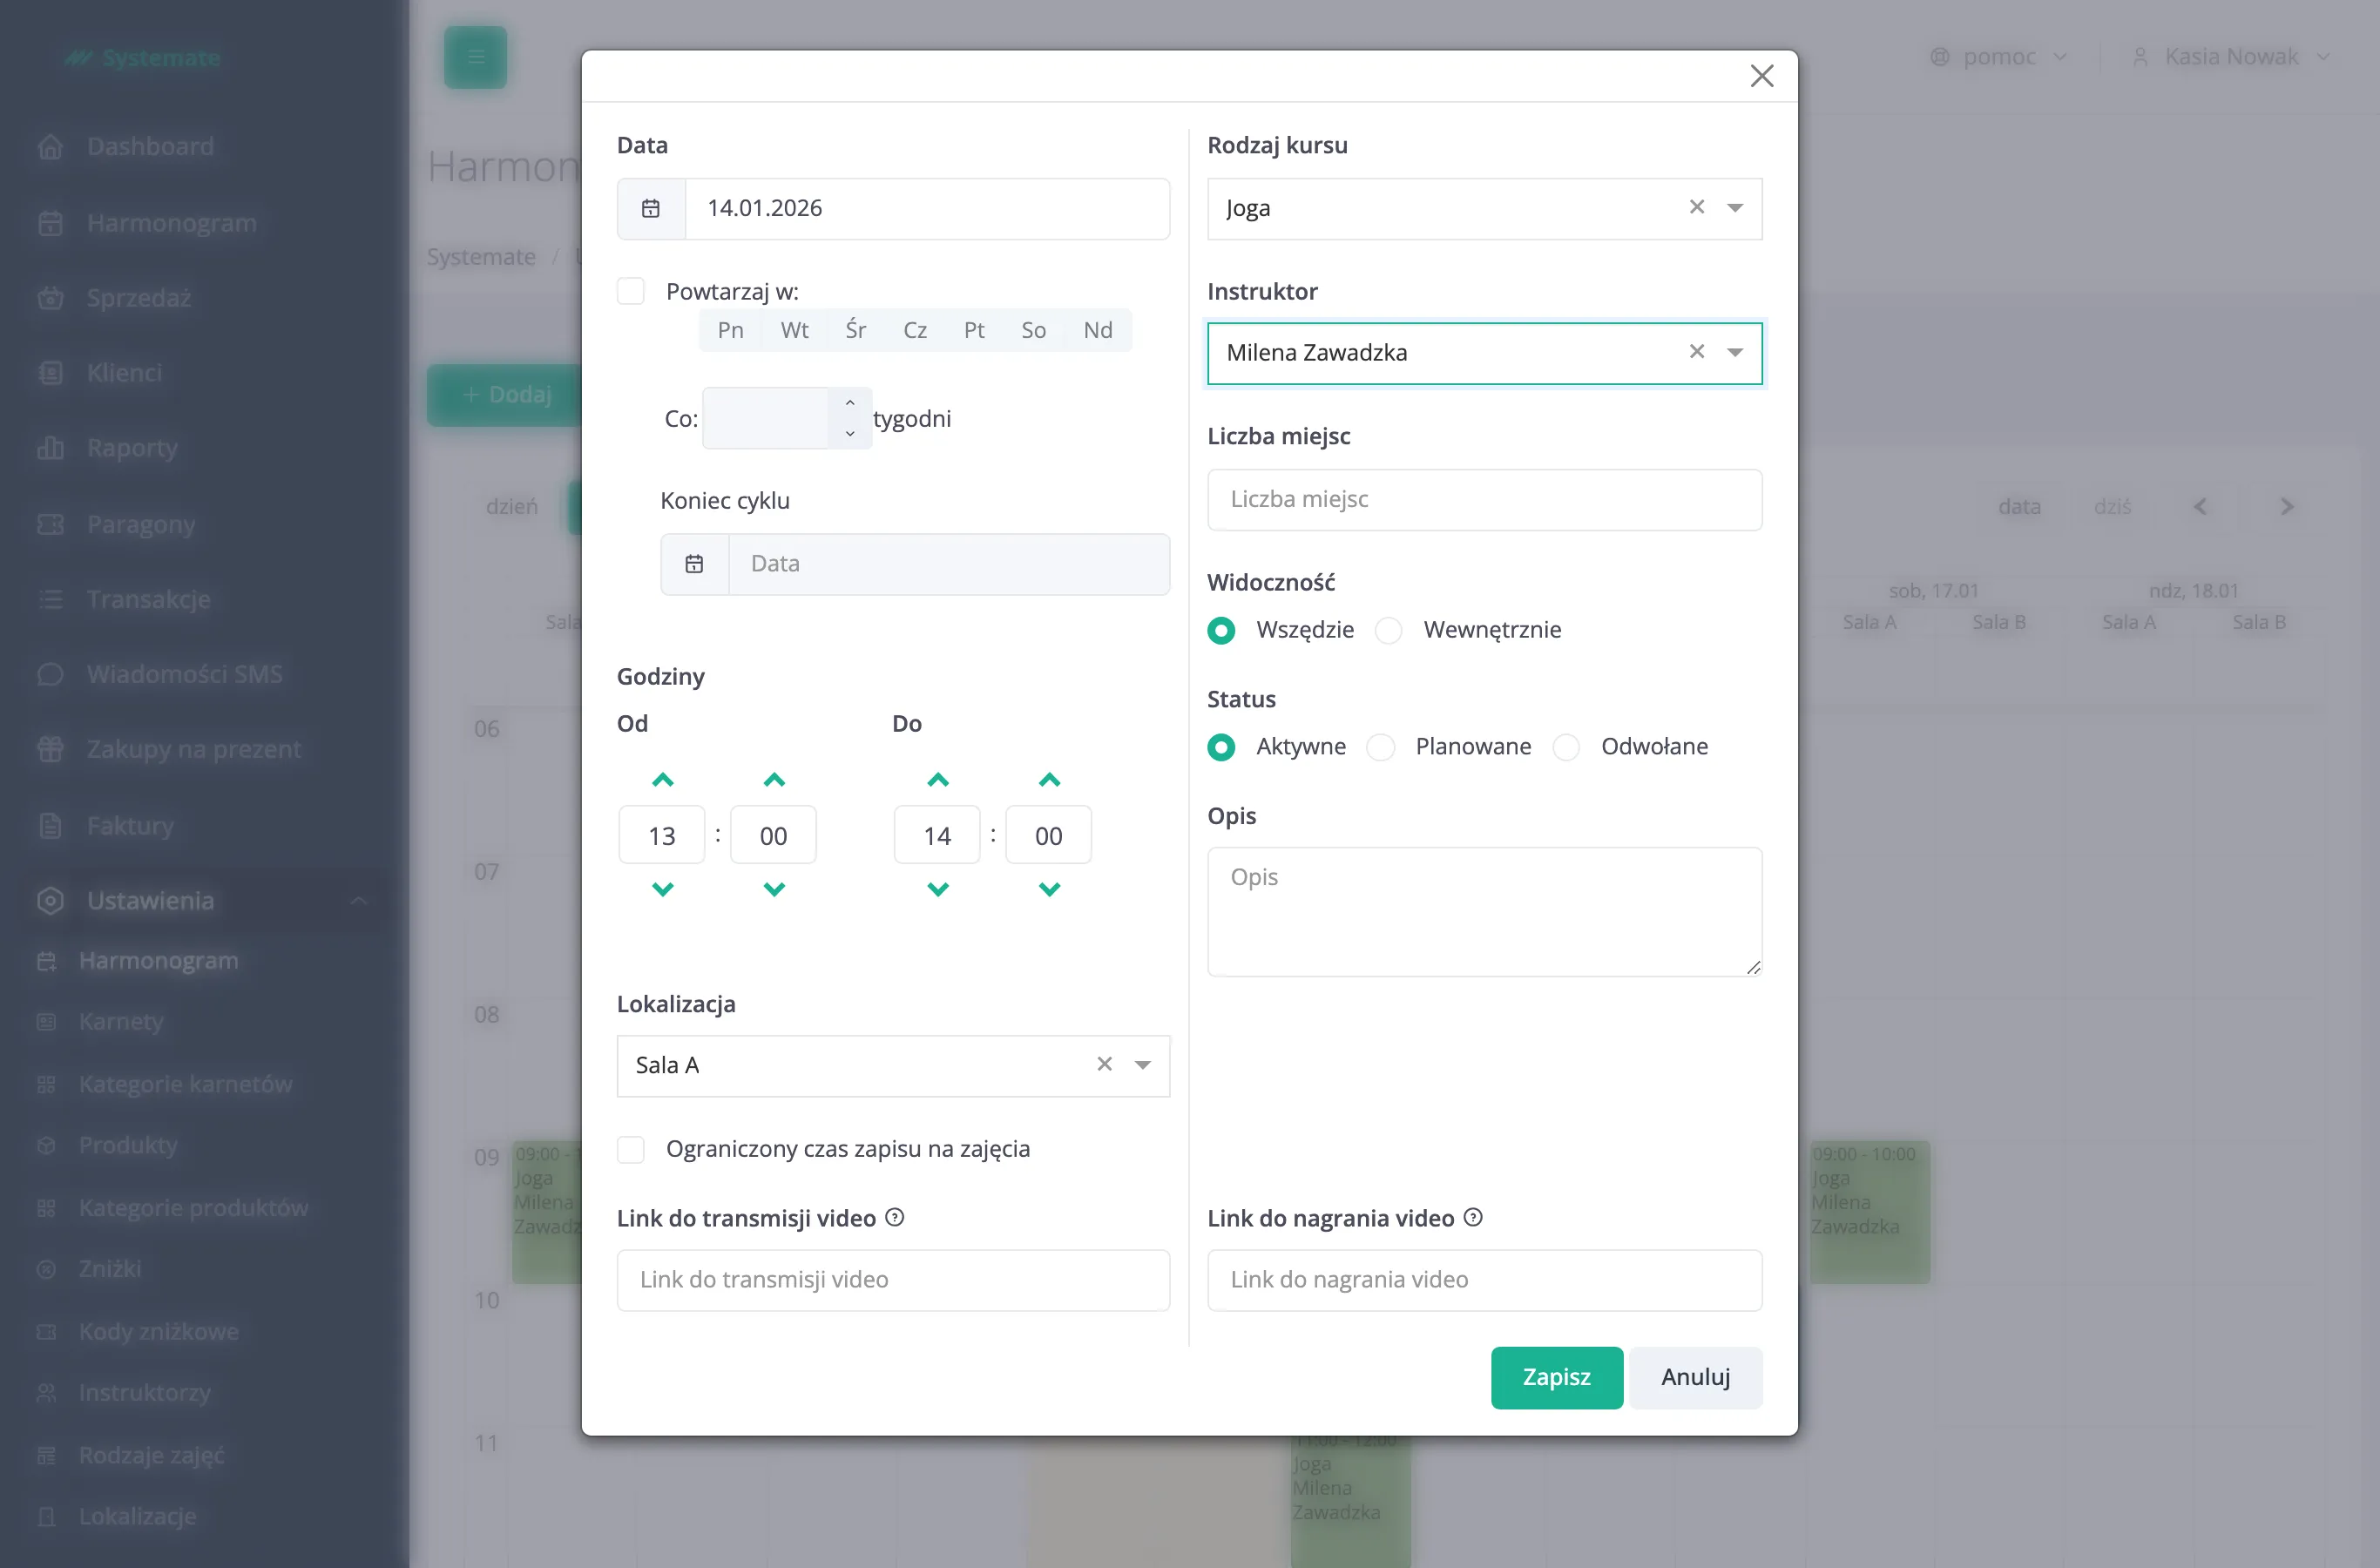
-
Click Save — the class appears in the schedule and in the customer panel.
Its own cancellation window
Section titled “Its own cancellation window”By default a class follows the cancellation window set for the whole studio (see Set the cancellation window). Turn on Own cancellation window when this particular class needs a different one: shorter for a class that fills easily, longer for a workshop with a hired room and bought materials. A value of 0 means the customer may cancel right up until the class starts.
The form does not stop at the number of minutes — under the switch it spells out what that number means for customers: until when they can cancel their booking themselves in the customer panel and the app, and that after that time only the front desk can remove the booking in the office panel. The description is recalculated with every change of the field, reads long values in hours as well, and appears with the switch turned off too — then it describes the studio setting the class follows.
Classes added in the legacy form and classes belonging to a workshop always follow the studio’s window — the field appears in this form only.
Weekly classes: create a cycle
Section titled “Weekly classes: create a cycle”For a class that repeats every week you don’t add it date by date — one form creates the whole series:
-
Fill in the form as for a single class and check Repeat.
-
Pick the weekdays on the Mo–Su buttons — the weekday of the chosen Date is already selected for you.
-
Every … week(s) controls the rhythm: leave 1 for weekly classes, or raise it (up to 52) for classes every second, third… week.
-
Set Ends at — the last day of the cycle. It is pre-filled four weeks ahead and must be later than the start date.
-
Click Save.
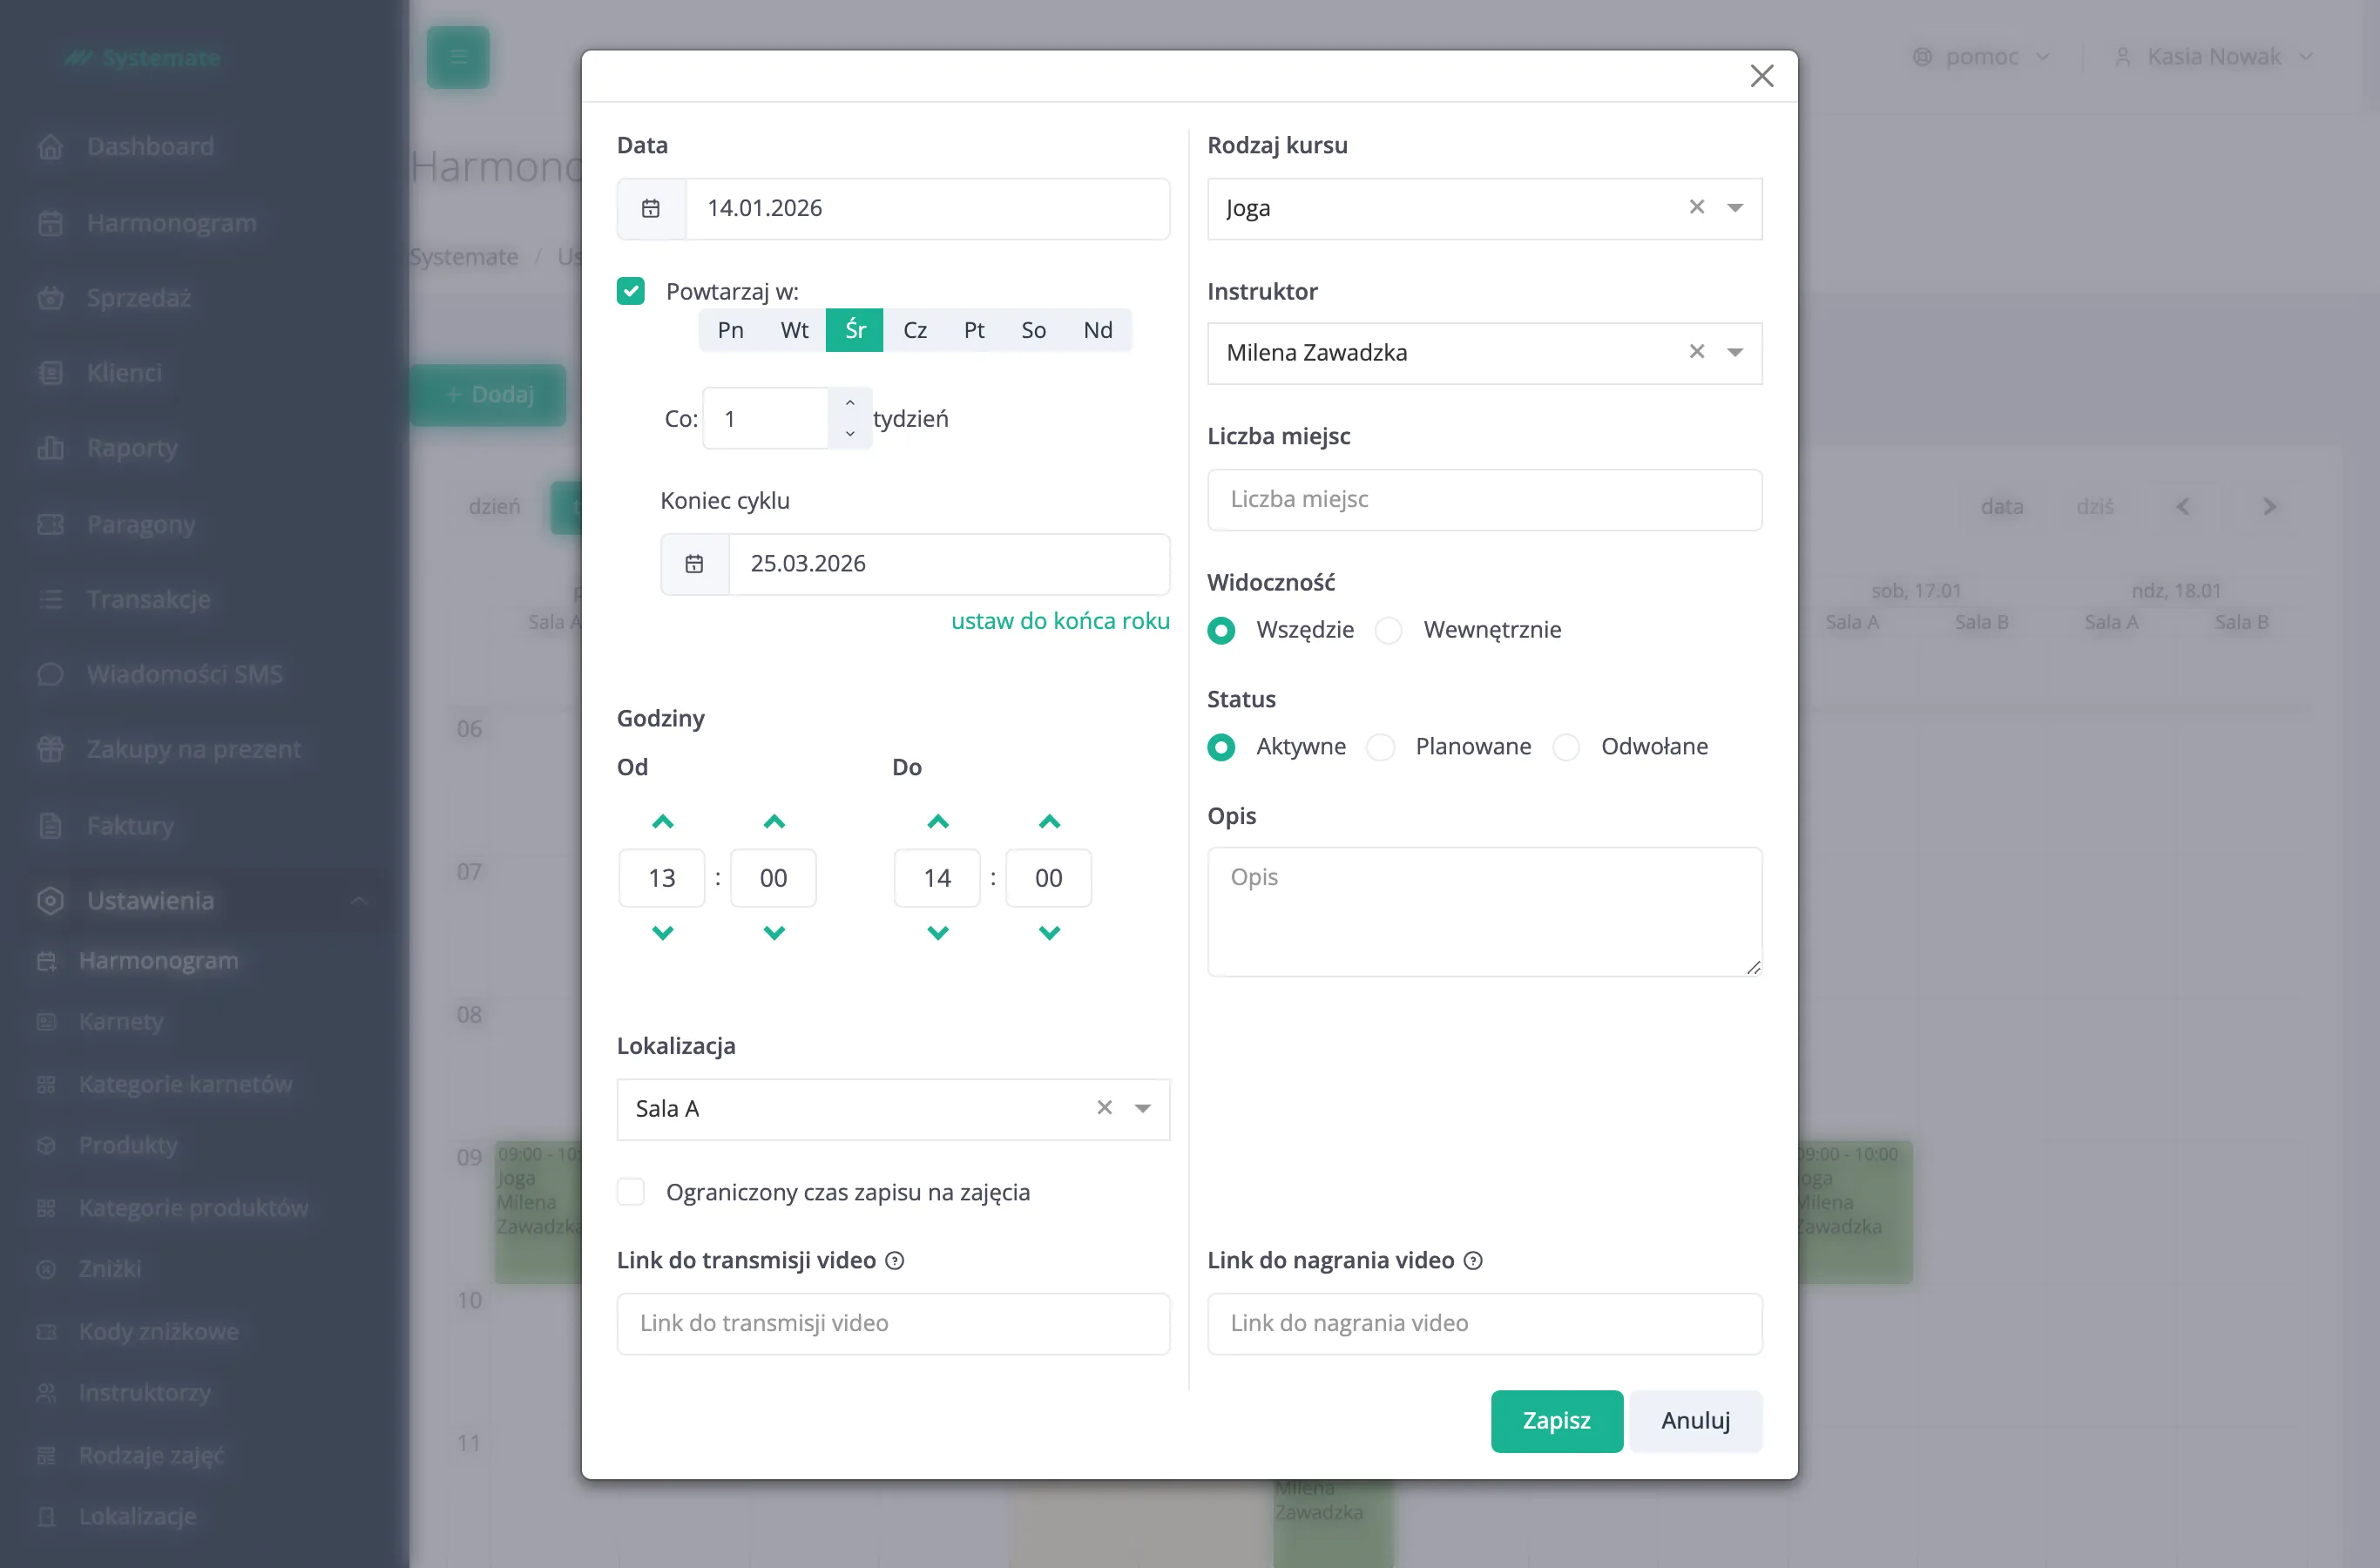
Saving creates a cycle: a single definition from which the system immediately generates an individual class for every selected weekday between the start date and Ends at. All of them share the course type, hours, location, instructor, capacity, and the other settings from the form.
Each generated class is a regular class in the schedule — you can later reschedule or cancel a single occurrence without touching the rest, or change the whole series at once. See Edit a class and Cancel a class.