Manage the image library
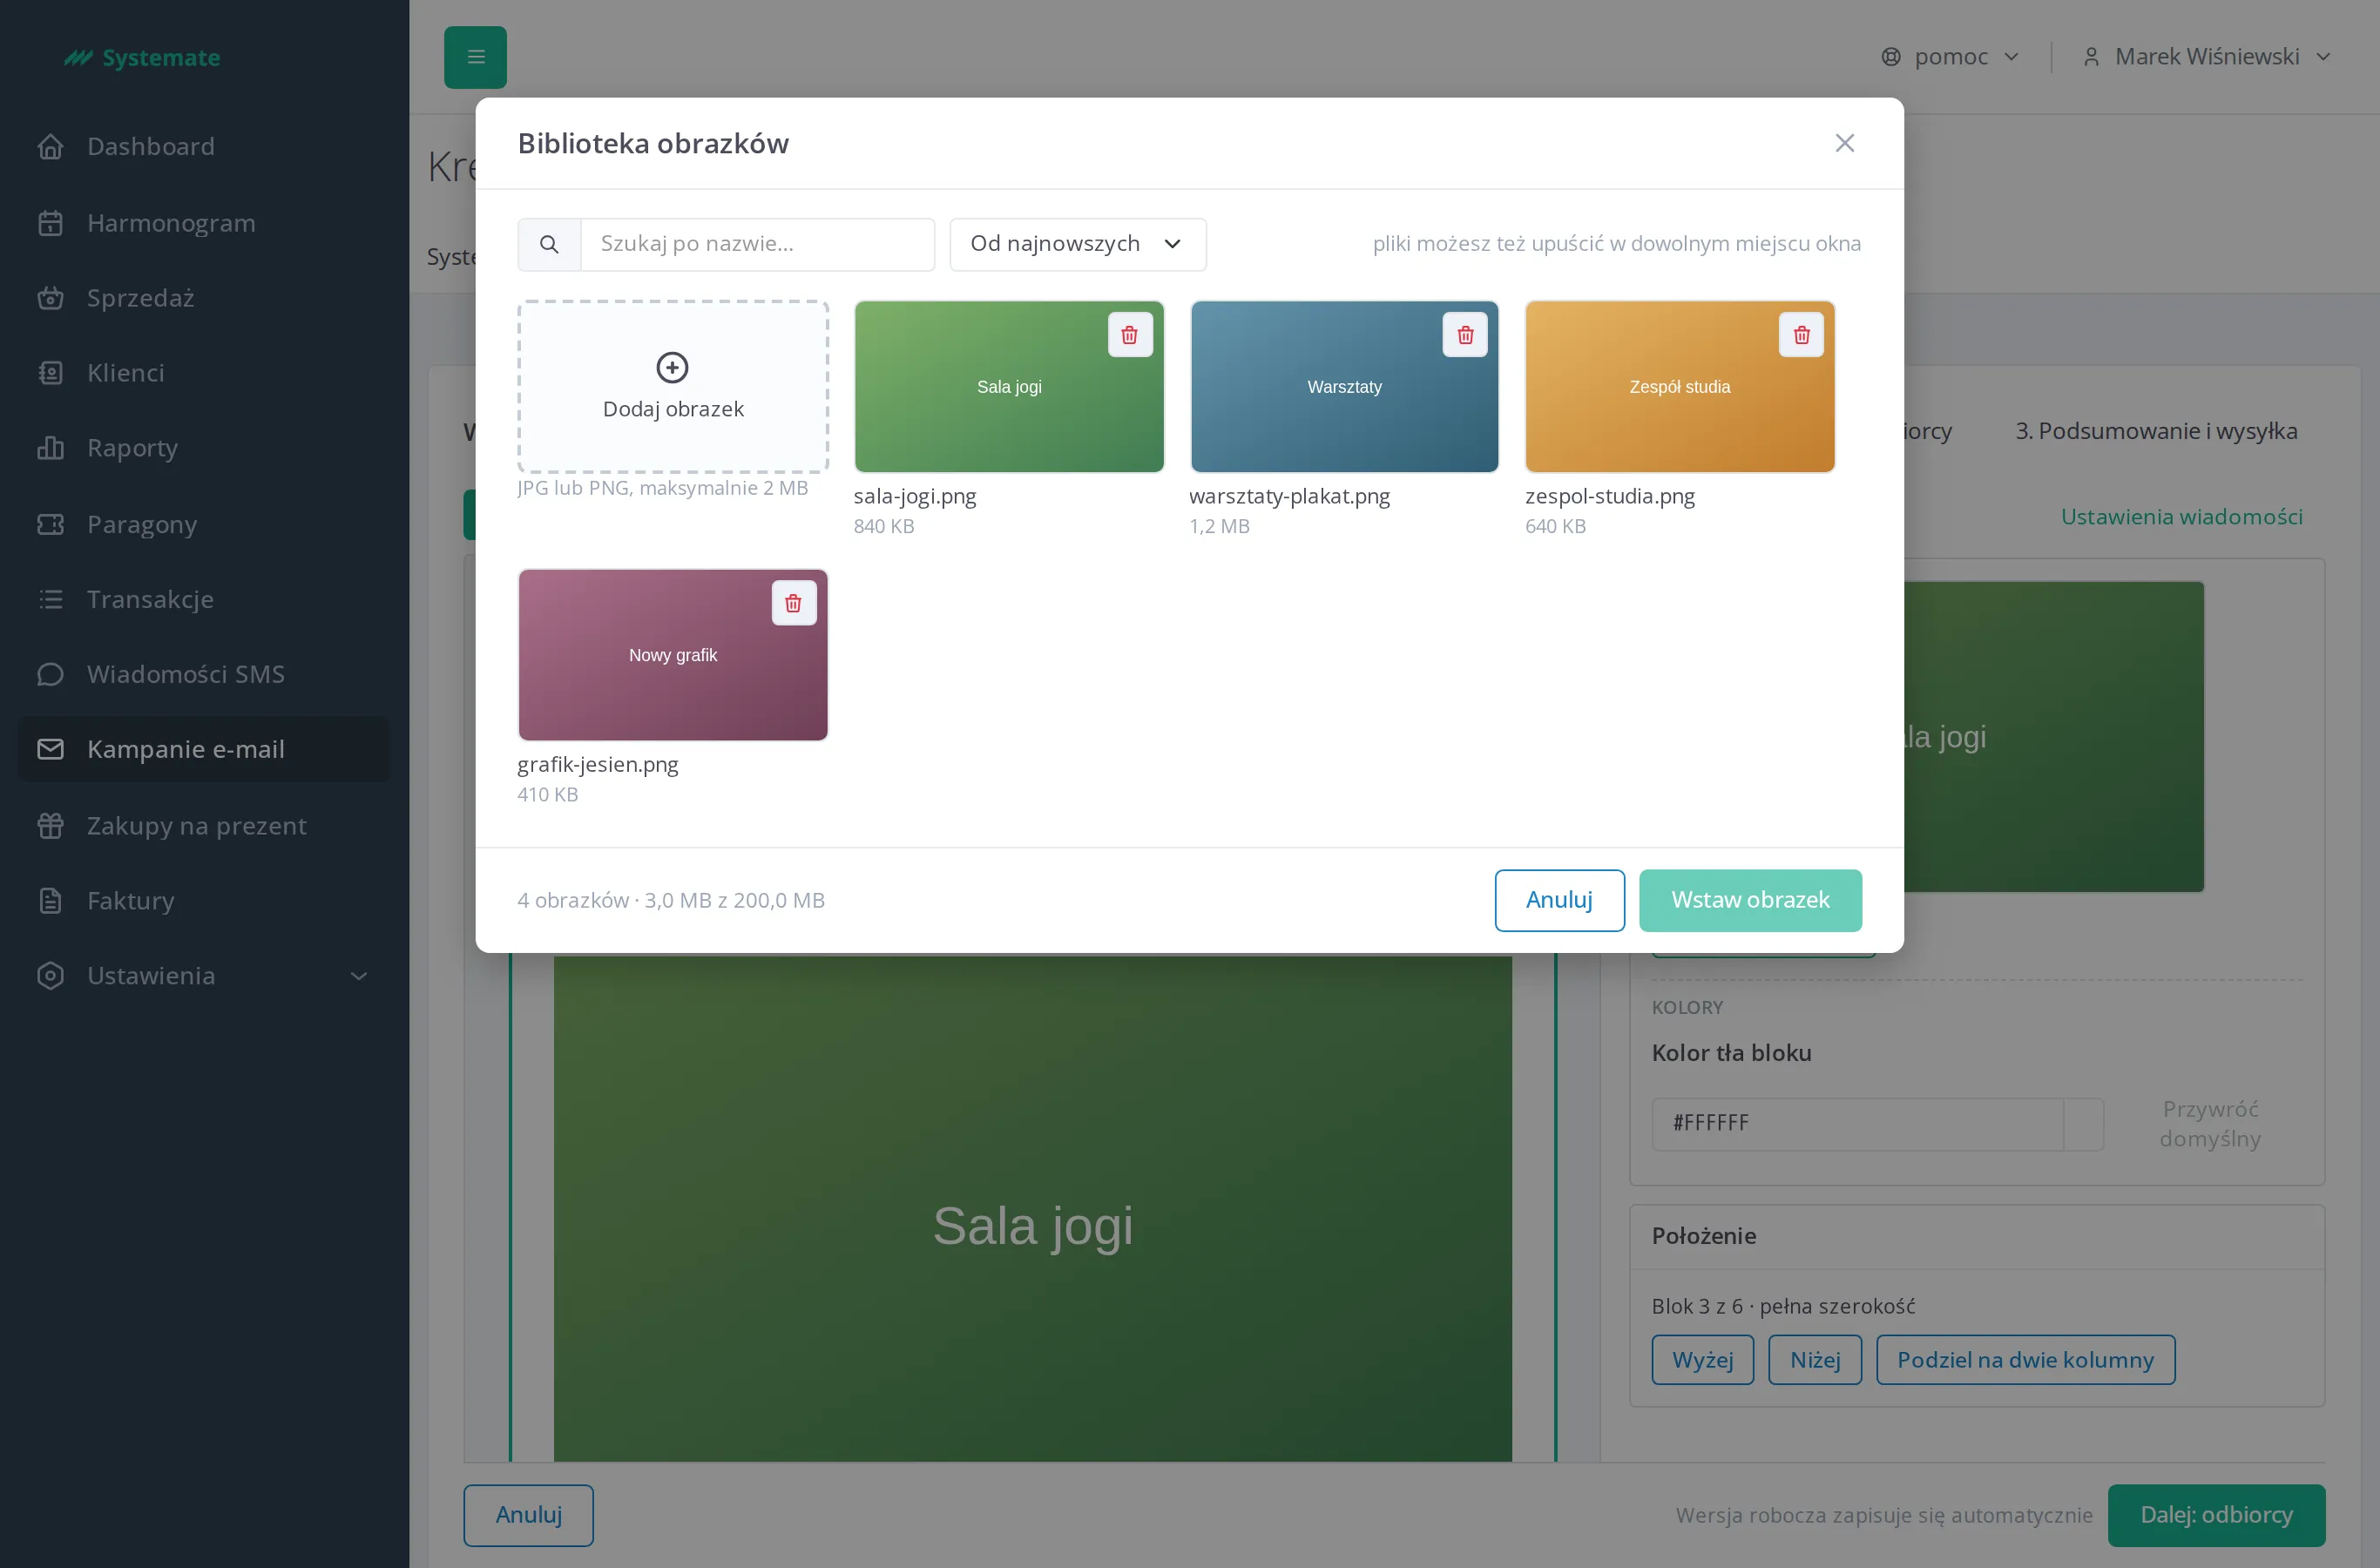
Images used in campaigns come from the image library — a shared collection belonging to your studio. A file you upload once can go into any number of campaigns.
Open the library
Section titled “Open the library”In the campaign creator add an Image block, or click an Image block with no picture — the library opens by itself. If the block already has a picture, select it and click Change image in the drawer.
Add an image
Section titled “Add an image”- Click the Add image tile and pick a file — or simply drop files anywhere in the library window.
- The tile shows the upload progress. Once it finishes, the image is ready to use.
We accept JPG and PNG files only, up to 2 MB. A file that is too large, in an unsupported format, or with image dimensions that are too big ends with an error message on the tile — shrink the file and try again.
Find an image and put it into the campaign
Section titled “Find an image and put it into the campaign”The Search by name… box narrows the list, and the sort dropdown arranges the tiles: Newest first, Oldest first, Name A–Z, or Size.
Click a tile to select it, then click Insert image — the picture goes into the block you are working on. The Cancel button closes the library without a change.
Free up space
Section titled “Free up space”The bar at the bottom of the window shows how many images are in the library and how much of the available limit they take up. Once the limit is used up, uploading another file ends with an error — remove images you no longer need with the bin icon on the tile.
Images in sandbox mode
Section titled “Images in sandbox mode”The library shows the images of the mode the instance is in. Images uploaded in sandbox mode stay in the test environment: they leave the library once you leave sandbox mode and come back if the studio returns to it. Upload the images you need for real sending again after leaving sandbox mode and swap them in your campaigns and templates. See Campaign sending rules.