Configure online payments
Online payments power two customer-facing features: paying for a pass in the customer panel (see Buy a pass online) and recurring subscription charges (see Manage your subscription). Both need a connected Stripe account. Payments go straight to your studio’s Stripe account — Systemate stores no keys.
Connect a Stripe account
Section titled “Connect a Stripe account”-
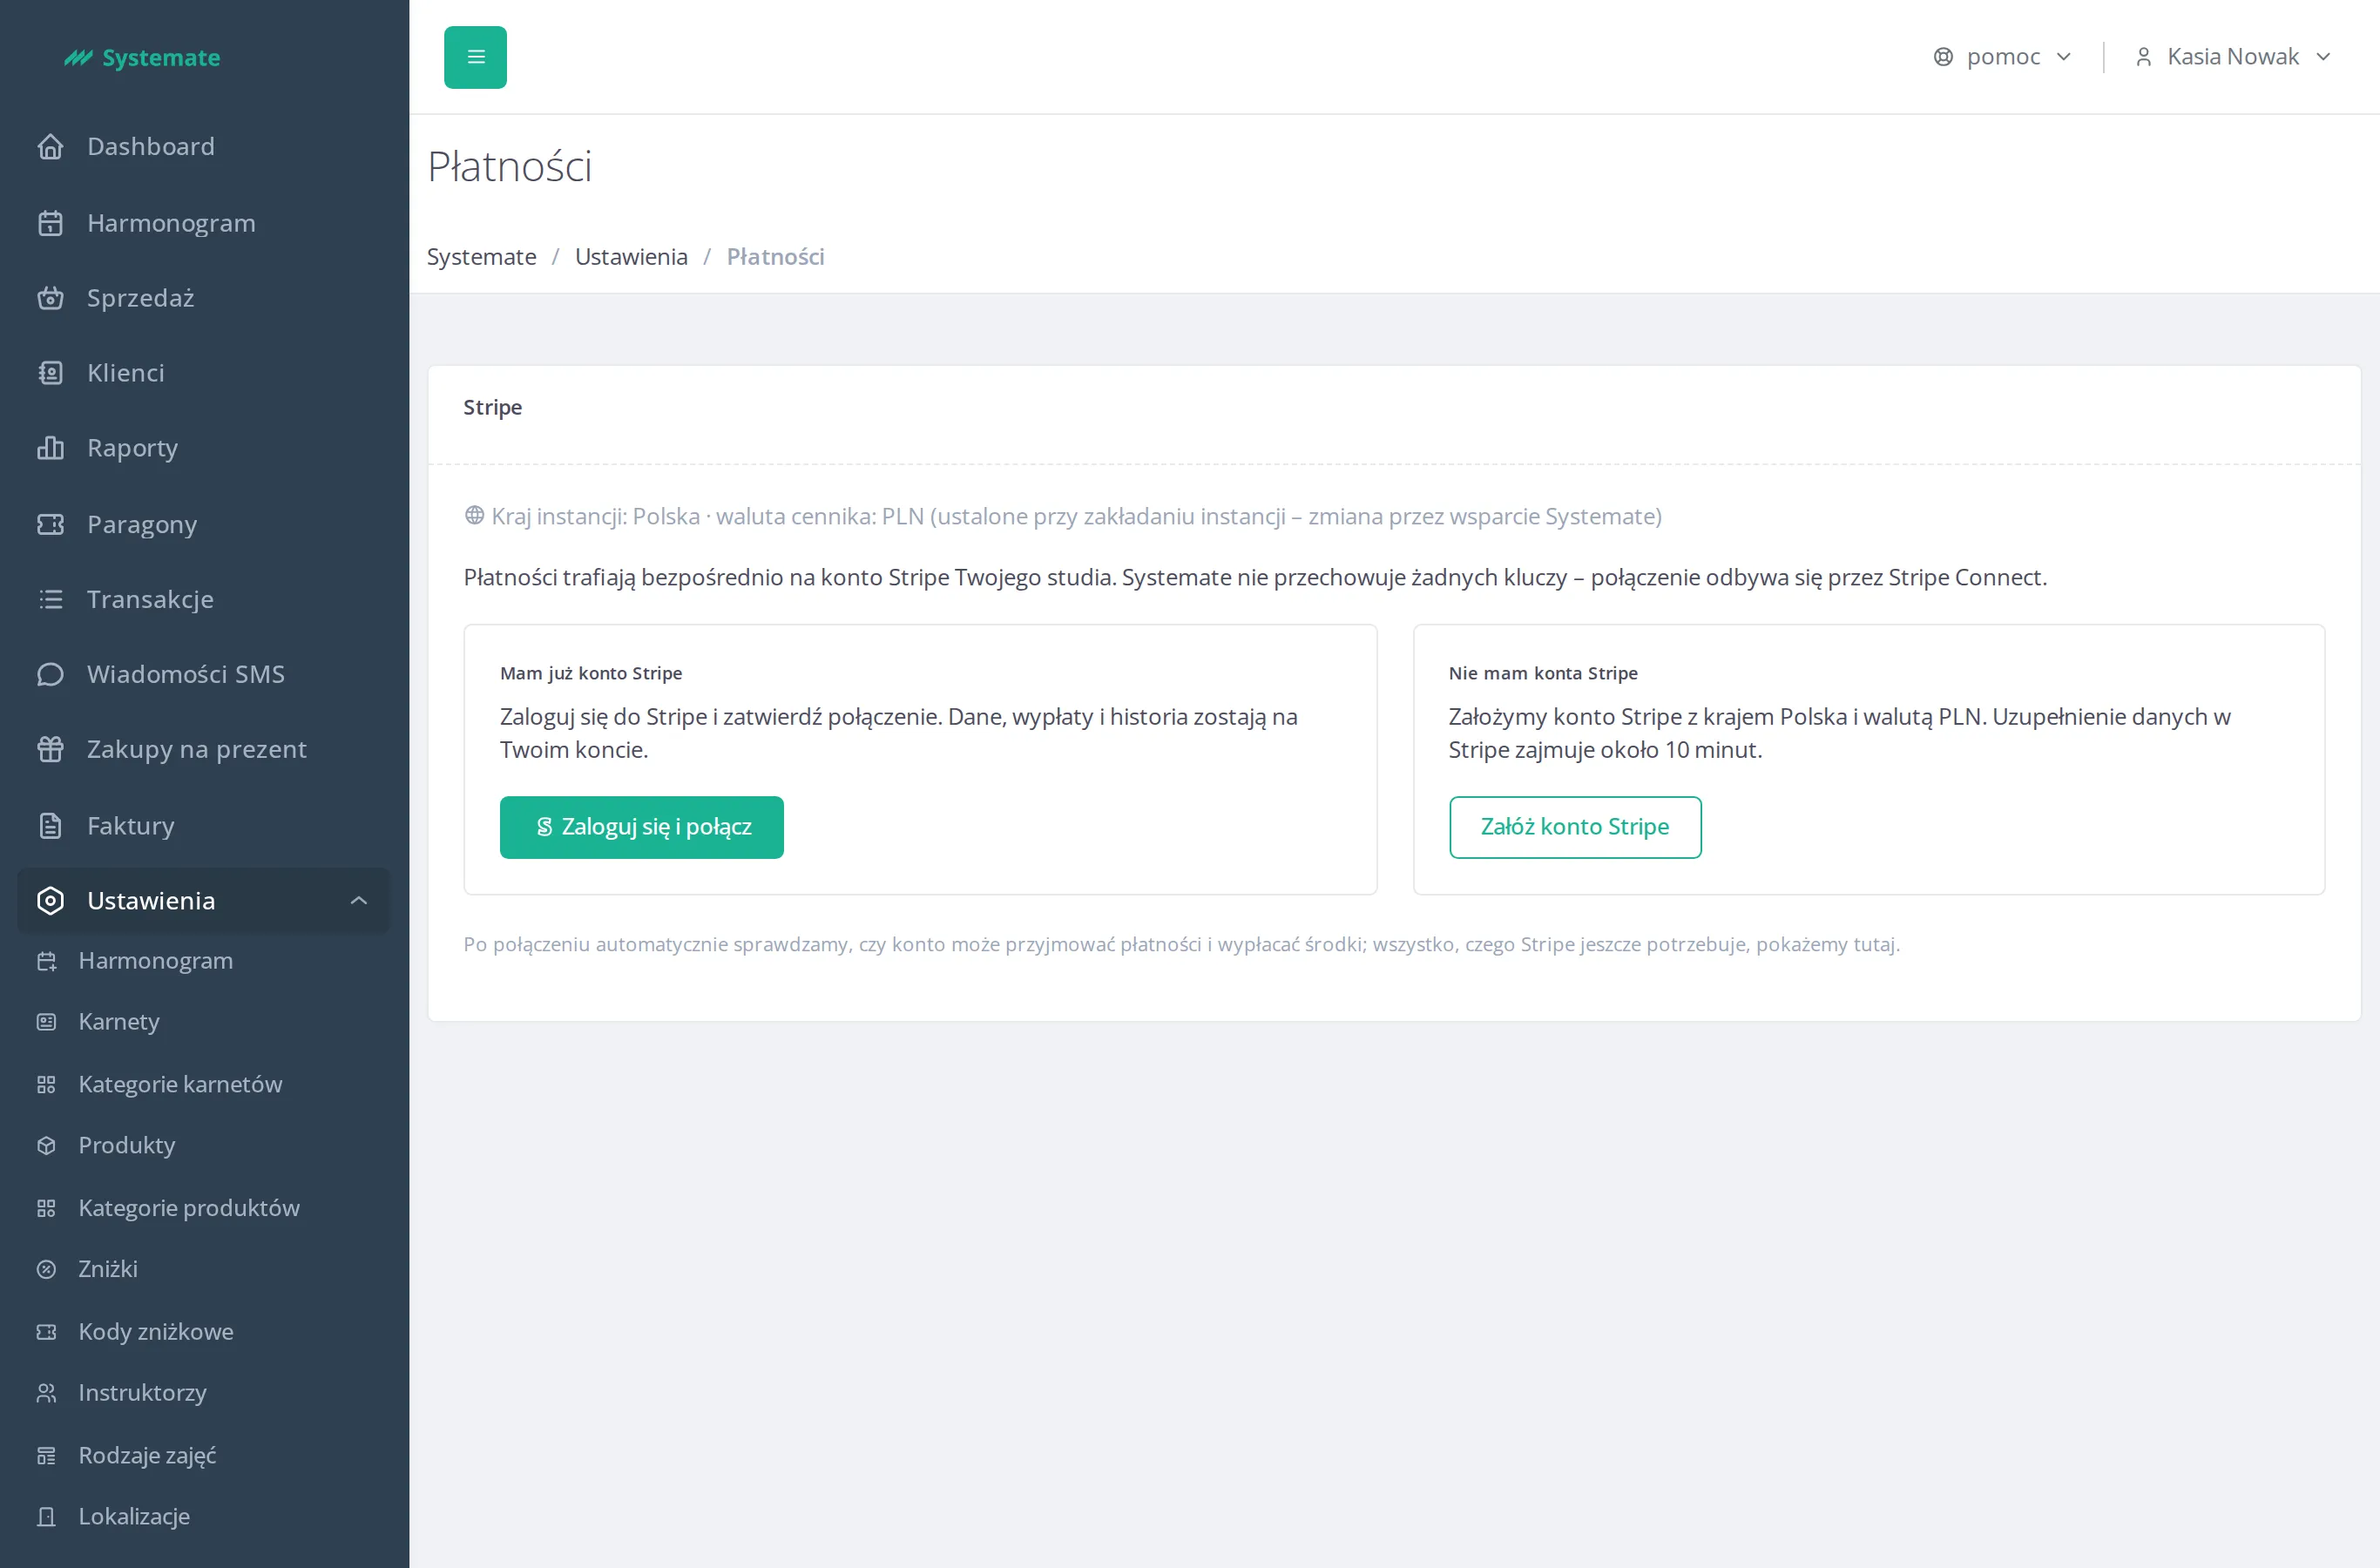
In the office panel go to Settings → Payments. Above the choice you see your instance’s country and price-list currency — set when the instance was created and changed only by Systemate support.
-
Choose one of the two paths:
- I already have a Stripe account — click Log in and connect, log in to Stripe and approve the connection. Your data, payouts and history stay on your account.
- I don’t have a Stripe account — click Create a Stripe account. Systemate creates an account with the instance’s country and currency, and you fill in its details in Stripe (about 10 minutes).
-
When you finish on Stripe’s side you return to Settings → Payments. If Stripe is still confirming the account’s details, the page says so — the account appears once Stripe confirms them. If the connection failed (e.g. it was cancelled in Stripe or the account is already connected to another seller in your studio or to another Systemate instance), the page shows a message with the reason.
Check the account state
Section titled “Check the account state”Once connected, the page shows the account card: the business name and account id, the payout country and currency, whether the account accepts payments and pays out to a bank account (with the masked account number), the payment methods enabled in Stripe, and the connection method — an existing Stripe account or one created by Systemate — with the date and the employee who connected it. Open the Stripe dashboard takes you straight to Stripe.
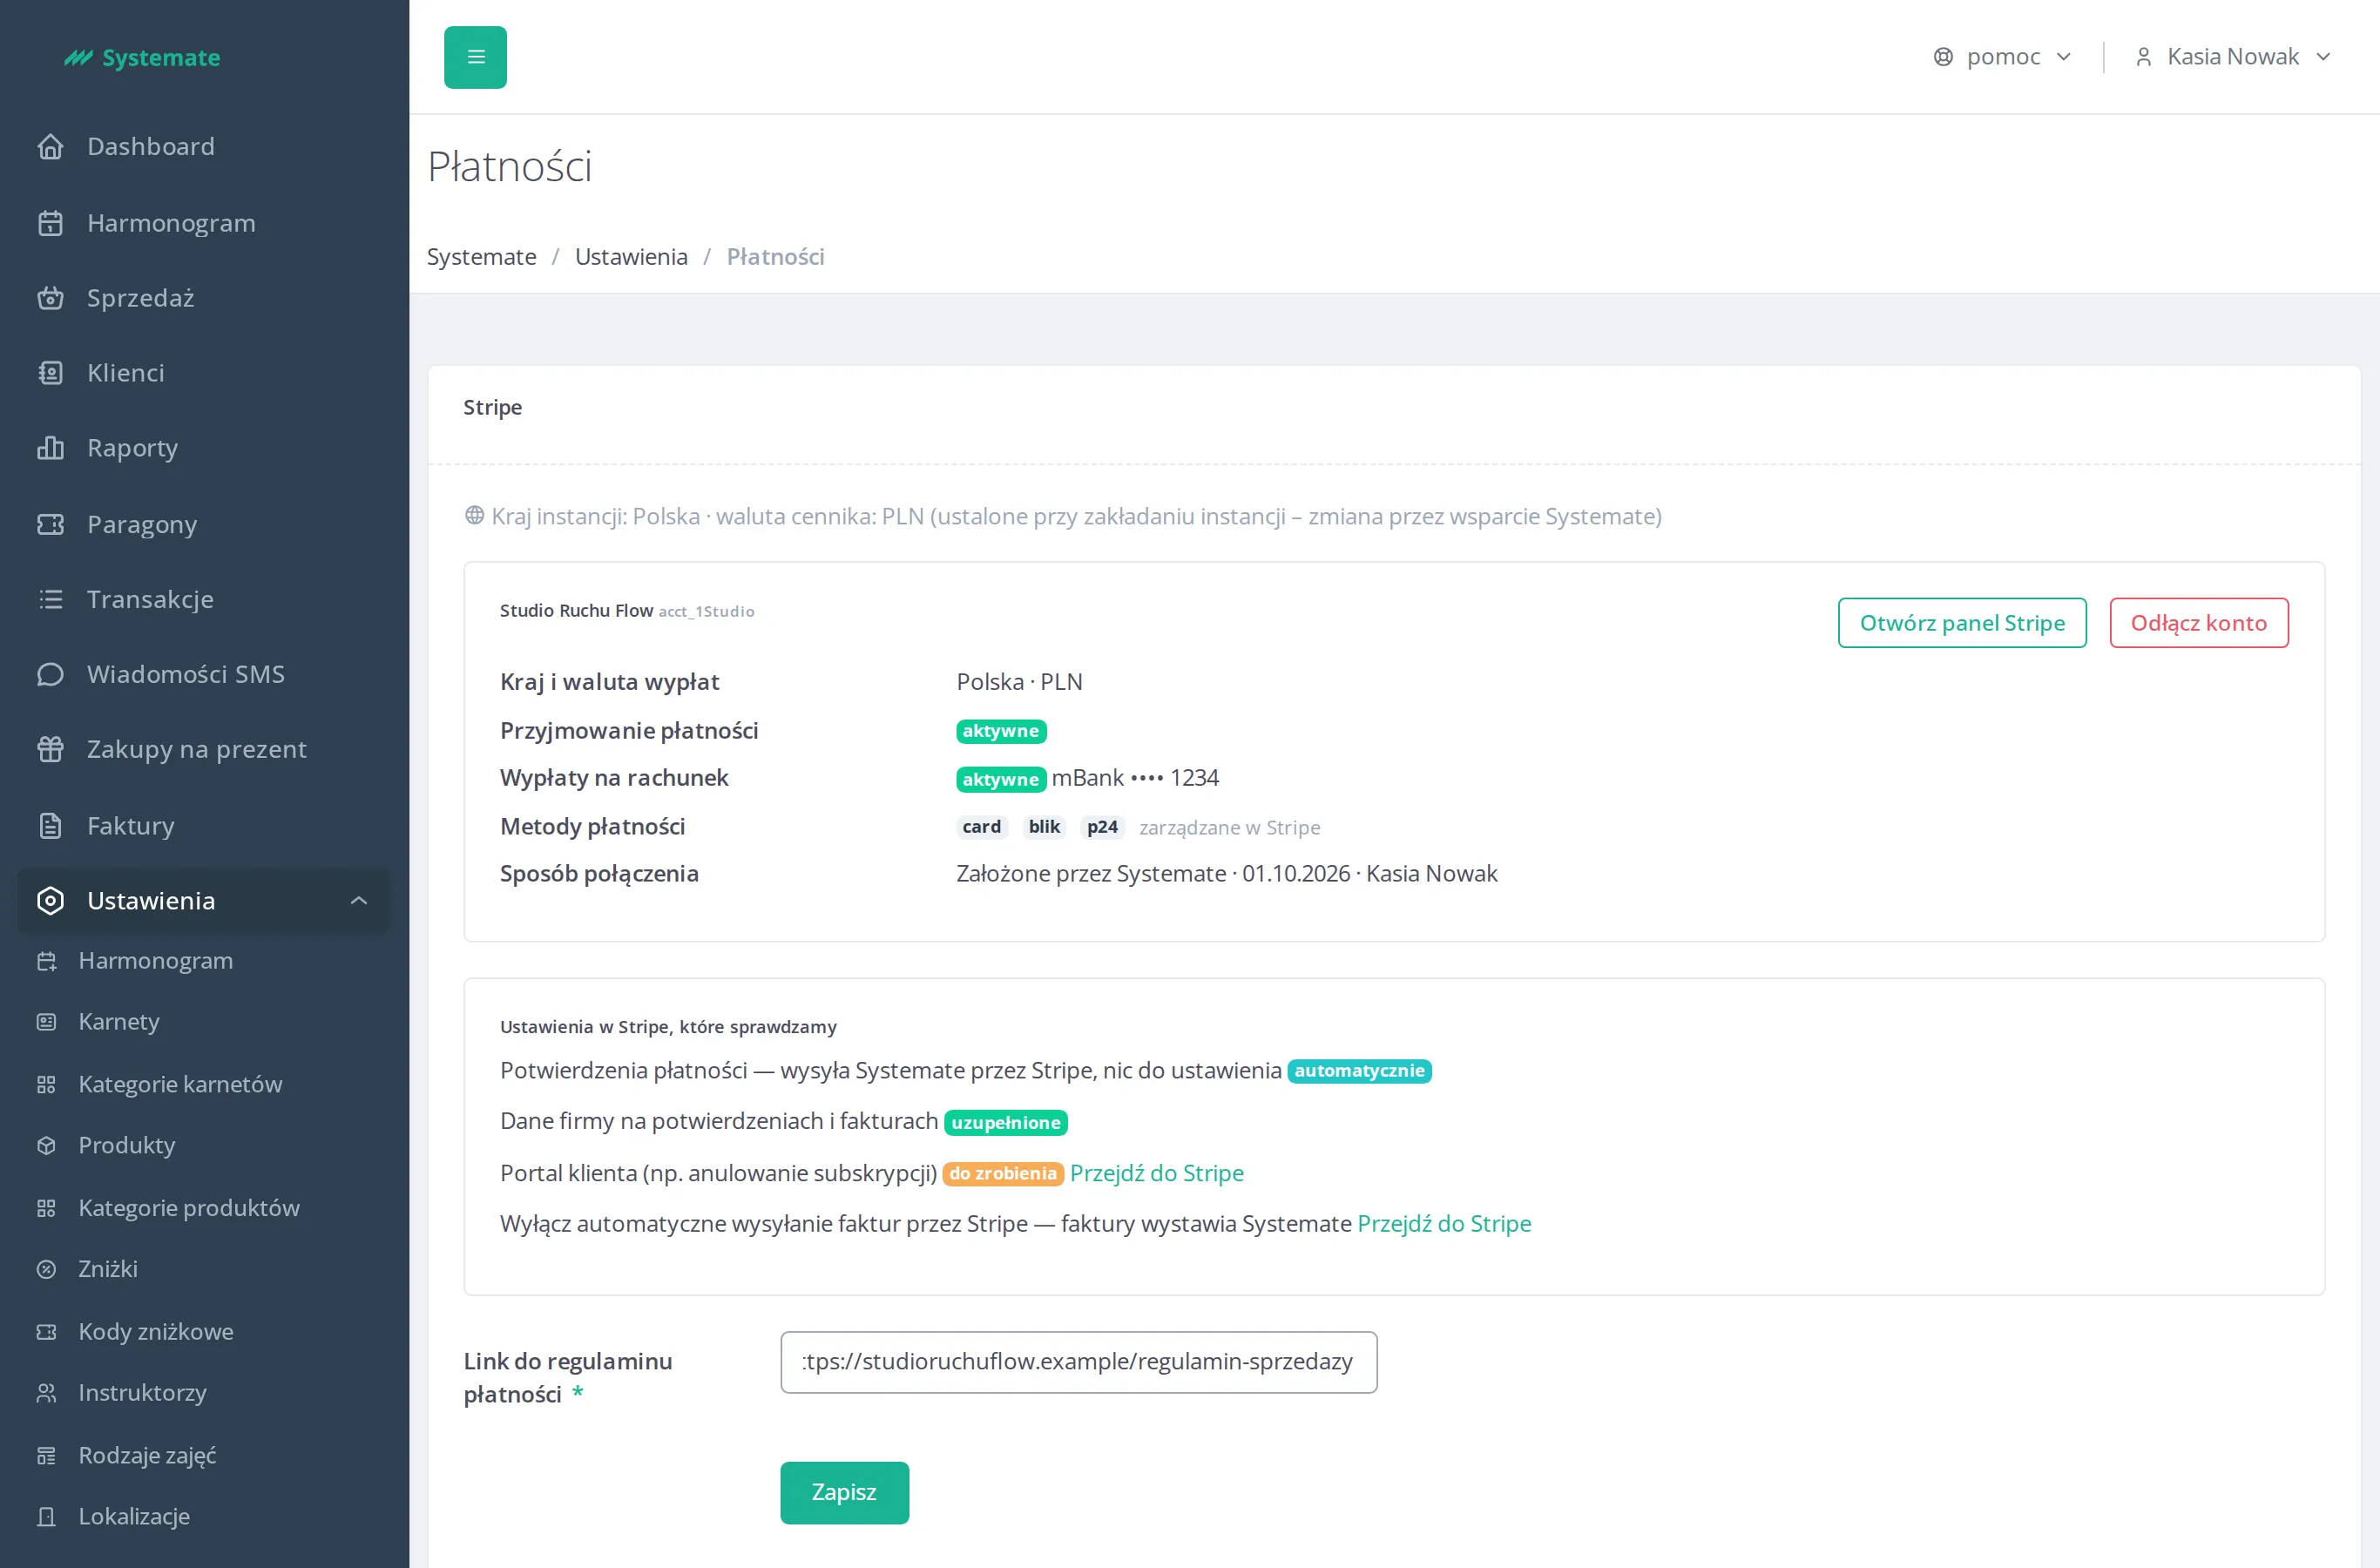
Below the card, the Stripe settings we’re reviewing list shows what is ready and what still needs finishing in Stripe:
- Payment confirmations — Systemate sends them through Stripe, nothing to set up,
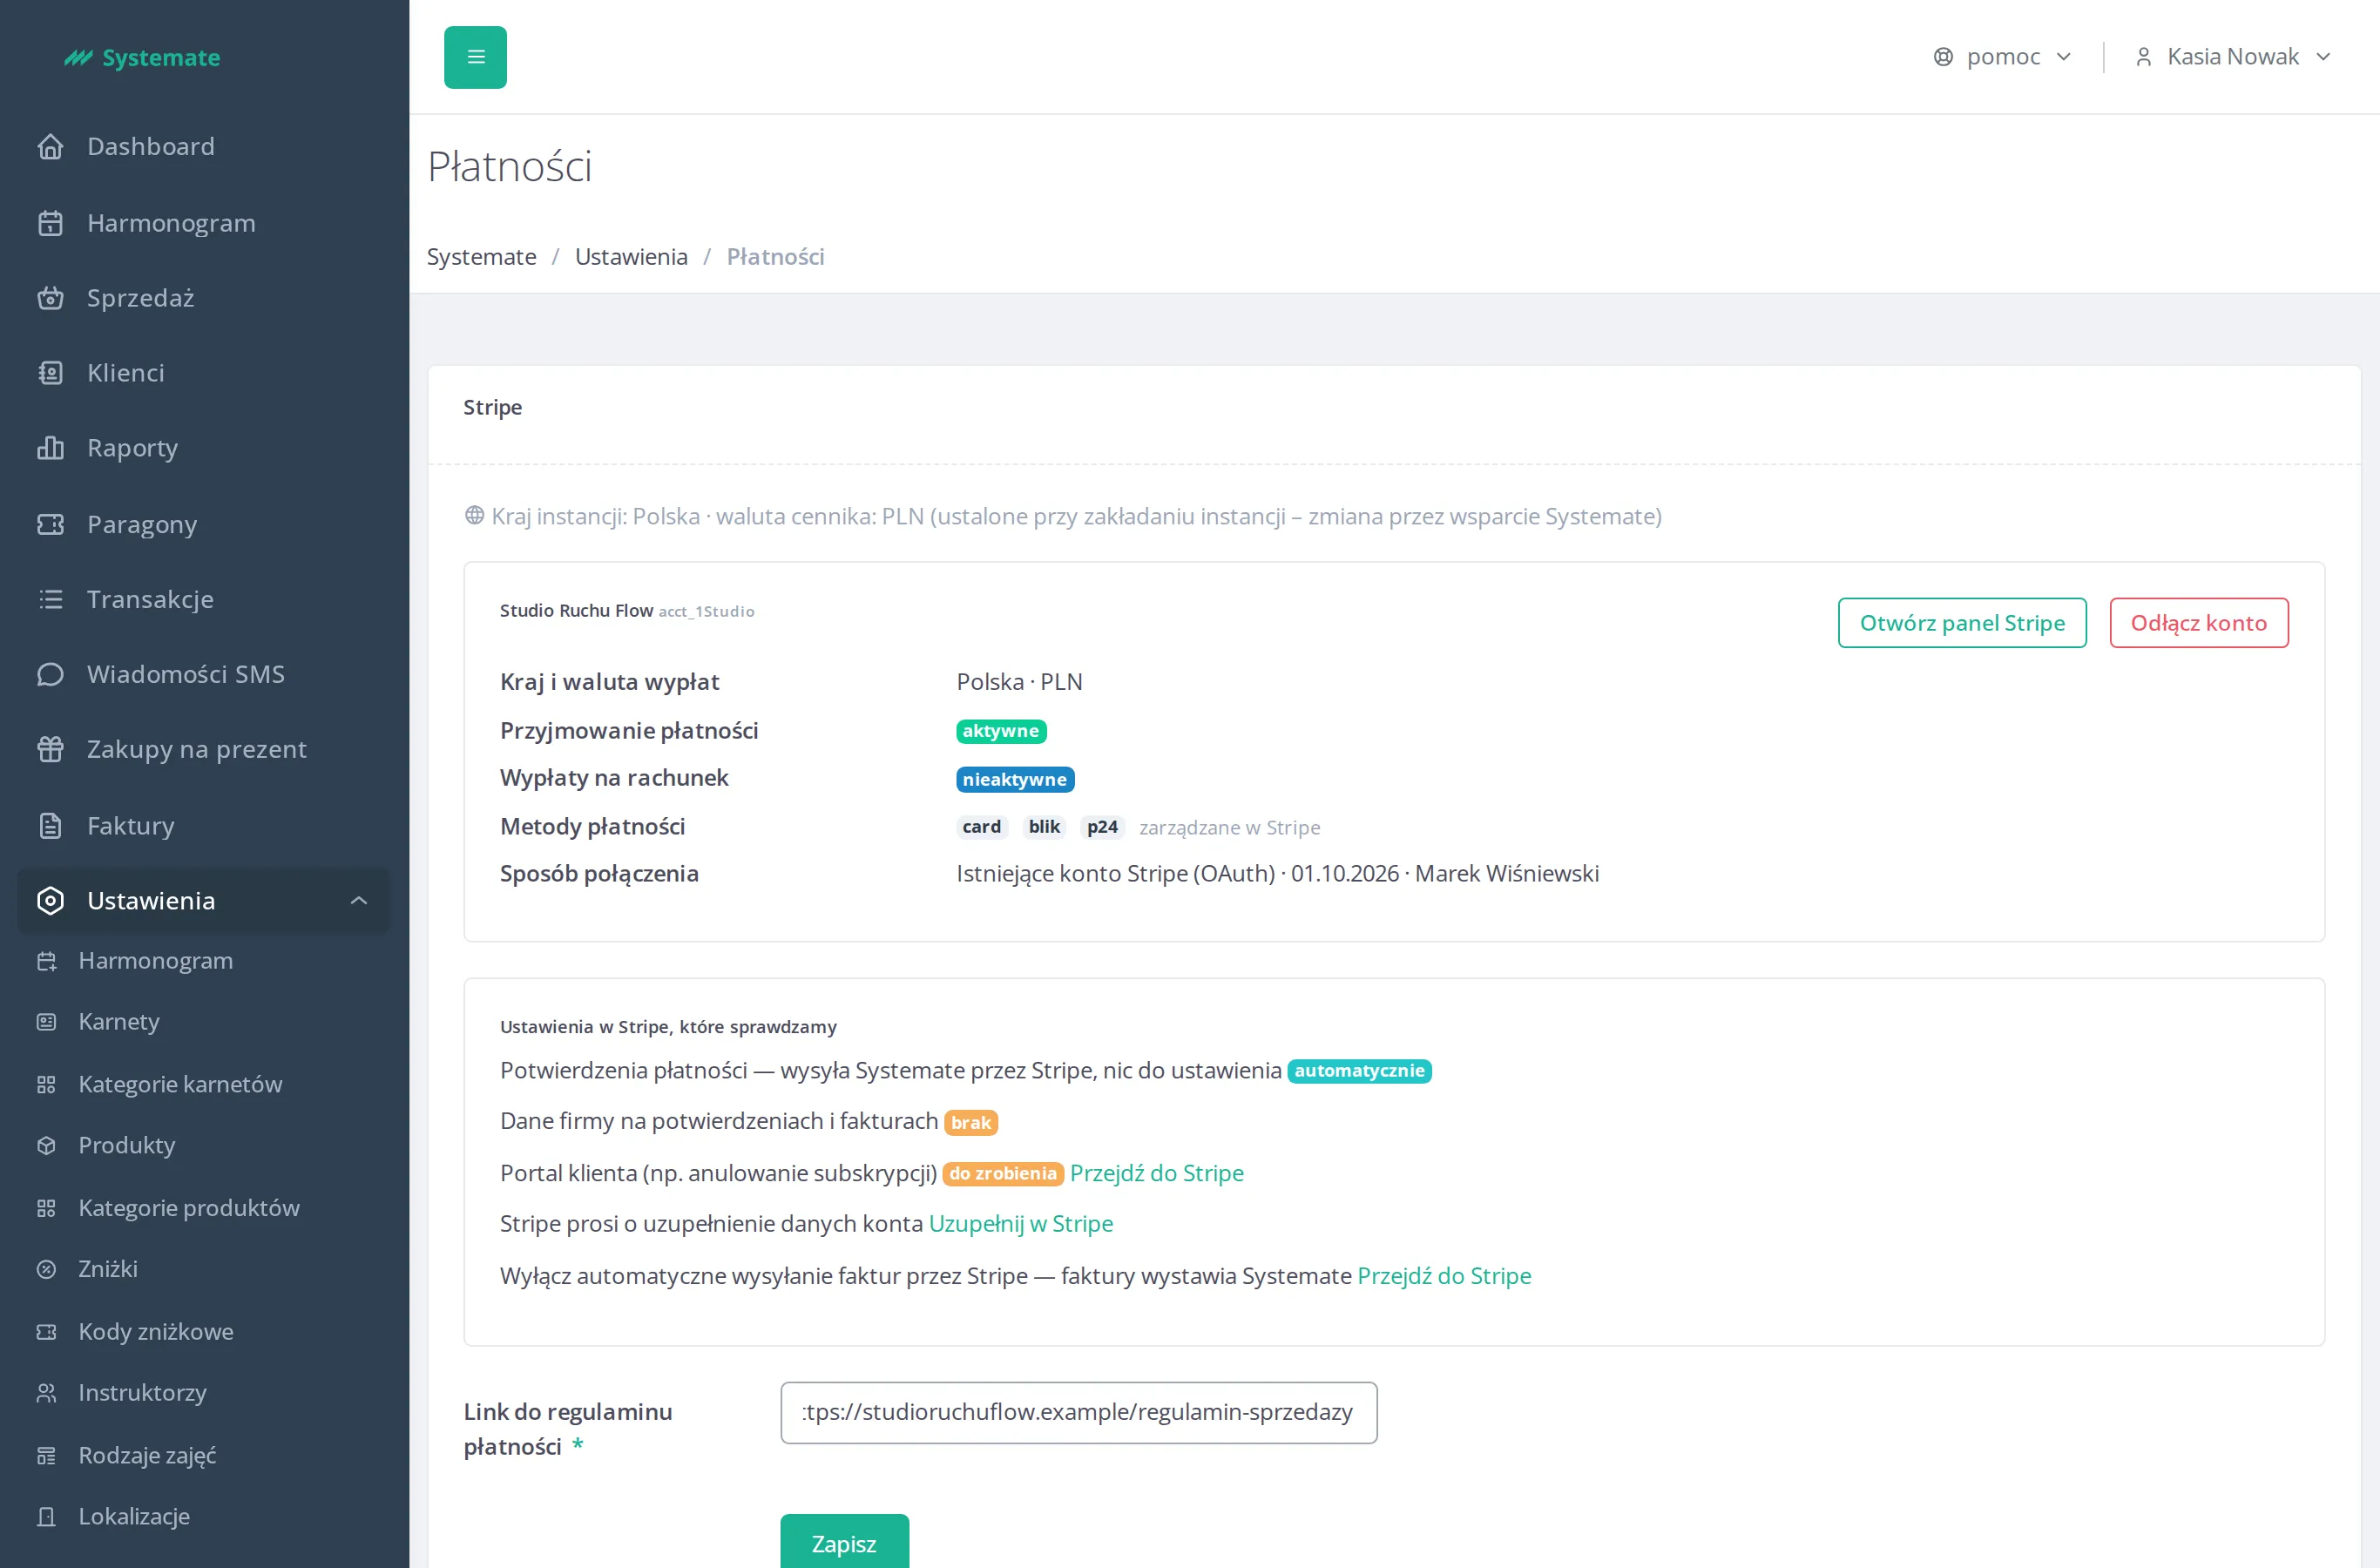
- Business details on confirmations and invoices — marked as filled in or missing,
- Customer portal — where your customers can e.g. cancel a subscription; the link opens its settings in Stripe,
- Stripe asks for account details — shown only when Stripe needs something; the link opens the details form (for an account created by Systemate) or the Stripe dashboard,
- on Polish instances — a reminder to turn off Stripe’s automatic invoice e-mails, because Systemate issues the invoices,
- outside Poland — keep Stripe’s automatic invoices on, because there Stripe issues the subscription invoices (see Invoices and confirmations outside Poland).
Set the payment regulations
Section titled “Set the payment regulations”- Fill in Payments regulations url — a link to your sales/payment terms. Customers accept these terms when buying online.
- Click Save.
Disconnect the account
Section titled “Disconnect the account”Click Disconnect account and confirm. Online payments stop working, and the Stripe account stays yours. The account cannot be disconnected while pass subscriptions are active — the page explains this. After disconnecting, the page goes back to the choice of connection path.
One-off payments through tpay
Section titled “One-off payments through tpay”One-off online payments (passes, outstanding balances) go to your studio’s tpay account. If you see the tpay – płatności jednorazowe card under Settings → Payments, you connect the account yourself — by creating a new tpay account or entering the details of an existing one. The whole process, including the steps in the tpay Merchant Panel, is described in Marek connects tpay. If the card is not there, write to us — we will connect the tpay account for you.
tpay is available only to studios operating in Poland. Outside Poland there is no tpay card, and under the instance country you see a note that all customer online payments — one-off and subscriptions — are settled through Stripe.
The card headers show what each connected account is used for:
- on the Stripe card: subscriptions, one-time payments and subscriptions (when Stripe also handles one-off payments) or one-time payments (API key) (when one-off payments go through Stripe connected with an API key);
- on the tpay card, once the account is connected: one-time payments if one-off payments go through it, or unused if another account handles one-off payments.
Several sellers
Section titled “Several sellers”If your studio has more than one seller, each of them connects its own Stripe and tpay accounts and has its own choice of account for one-off payments. At the top of Settings → Payments the Seller: switcher picks which seller you are configuring — all the steps above apply to the selected seller. Payments for a pass go to the accounts of the seller assigned to that pass, and you can turn on a subscription for a pass only when its seller has a connected Stripe account.
One Stripe account can be connected to only one seller. If you try to connect an account another seller already holds, the connection is refused with a message — connect a different account, or first disconnect that account from the other seller.