Create a class type
-
In the office panel go to Settings → Course types.
-
Click Add.
-
Fill in the form:
- Name (required) — must be unique,
- Short name — when provided, it is used on the schedule tiles in the weekly views instead of the full name,
- Color — click the swatch to choose; classes of this type appear in this color on the schedule,
- Description (optional).
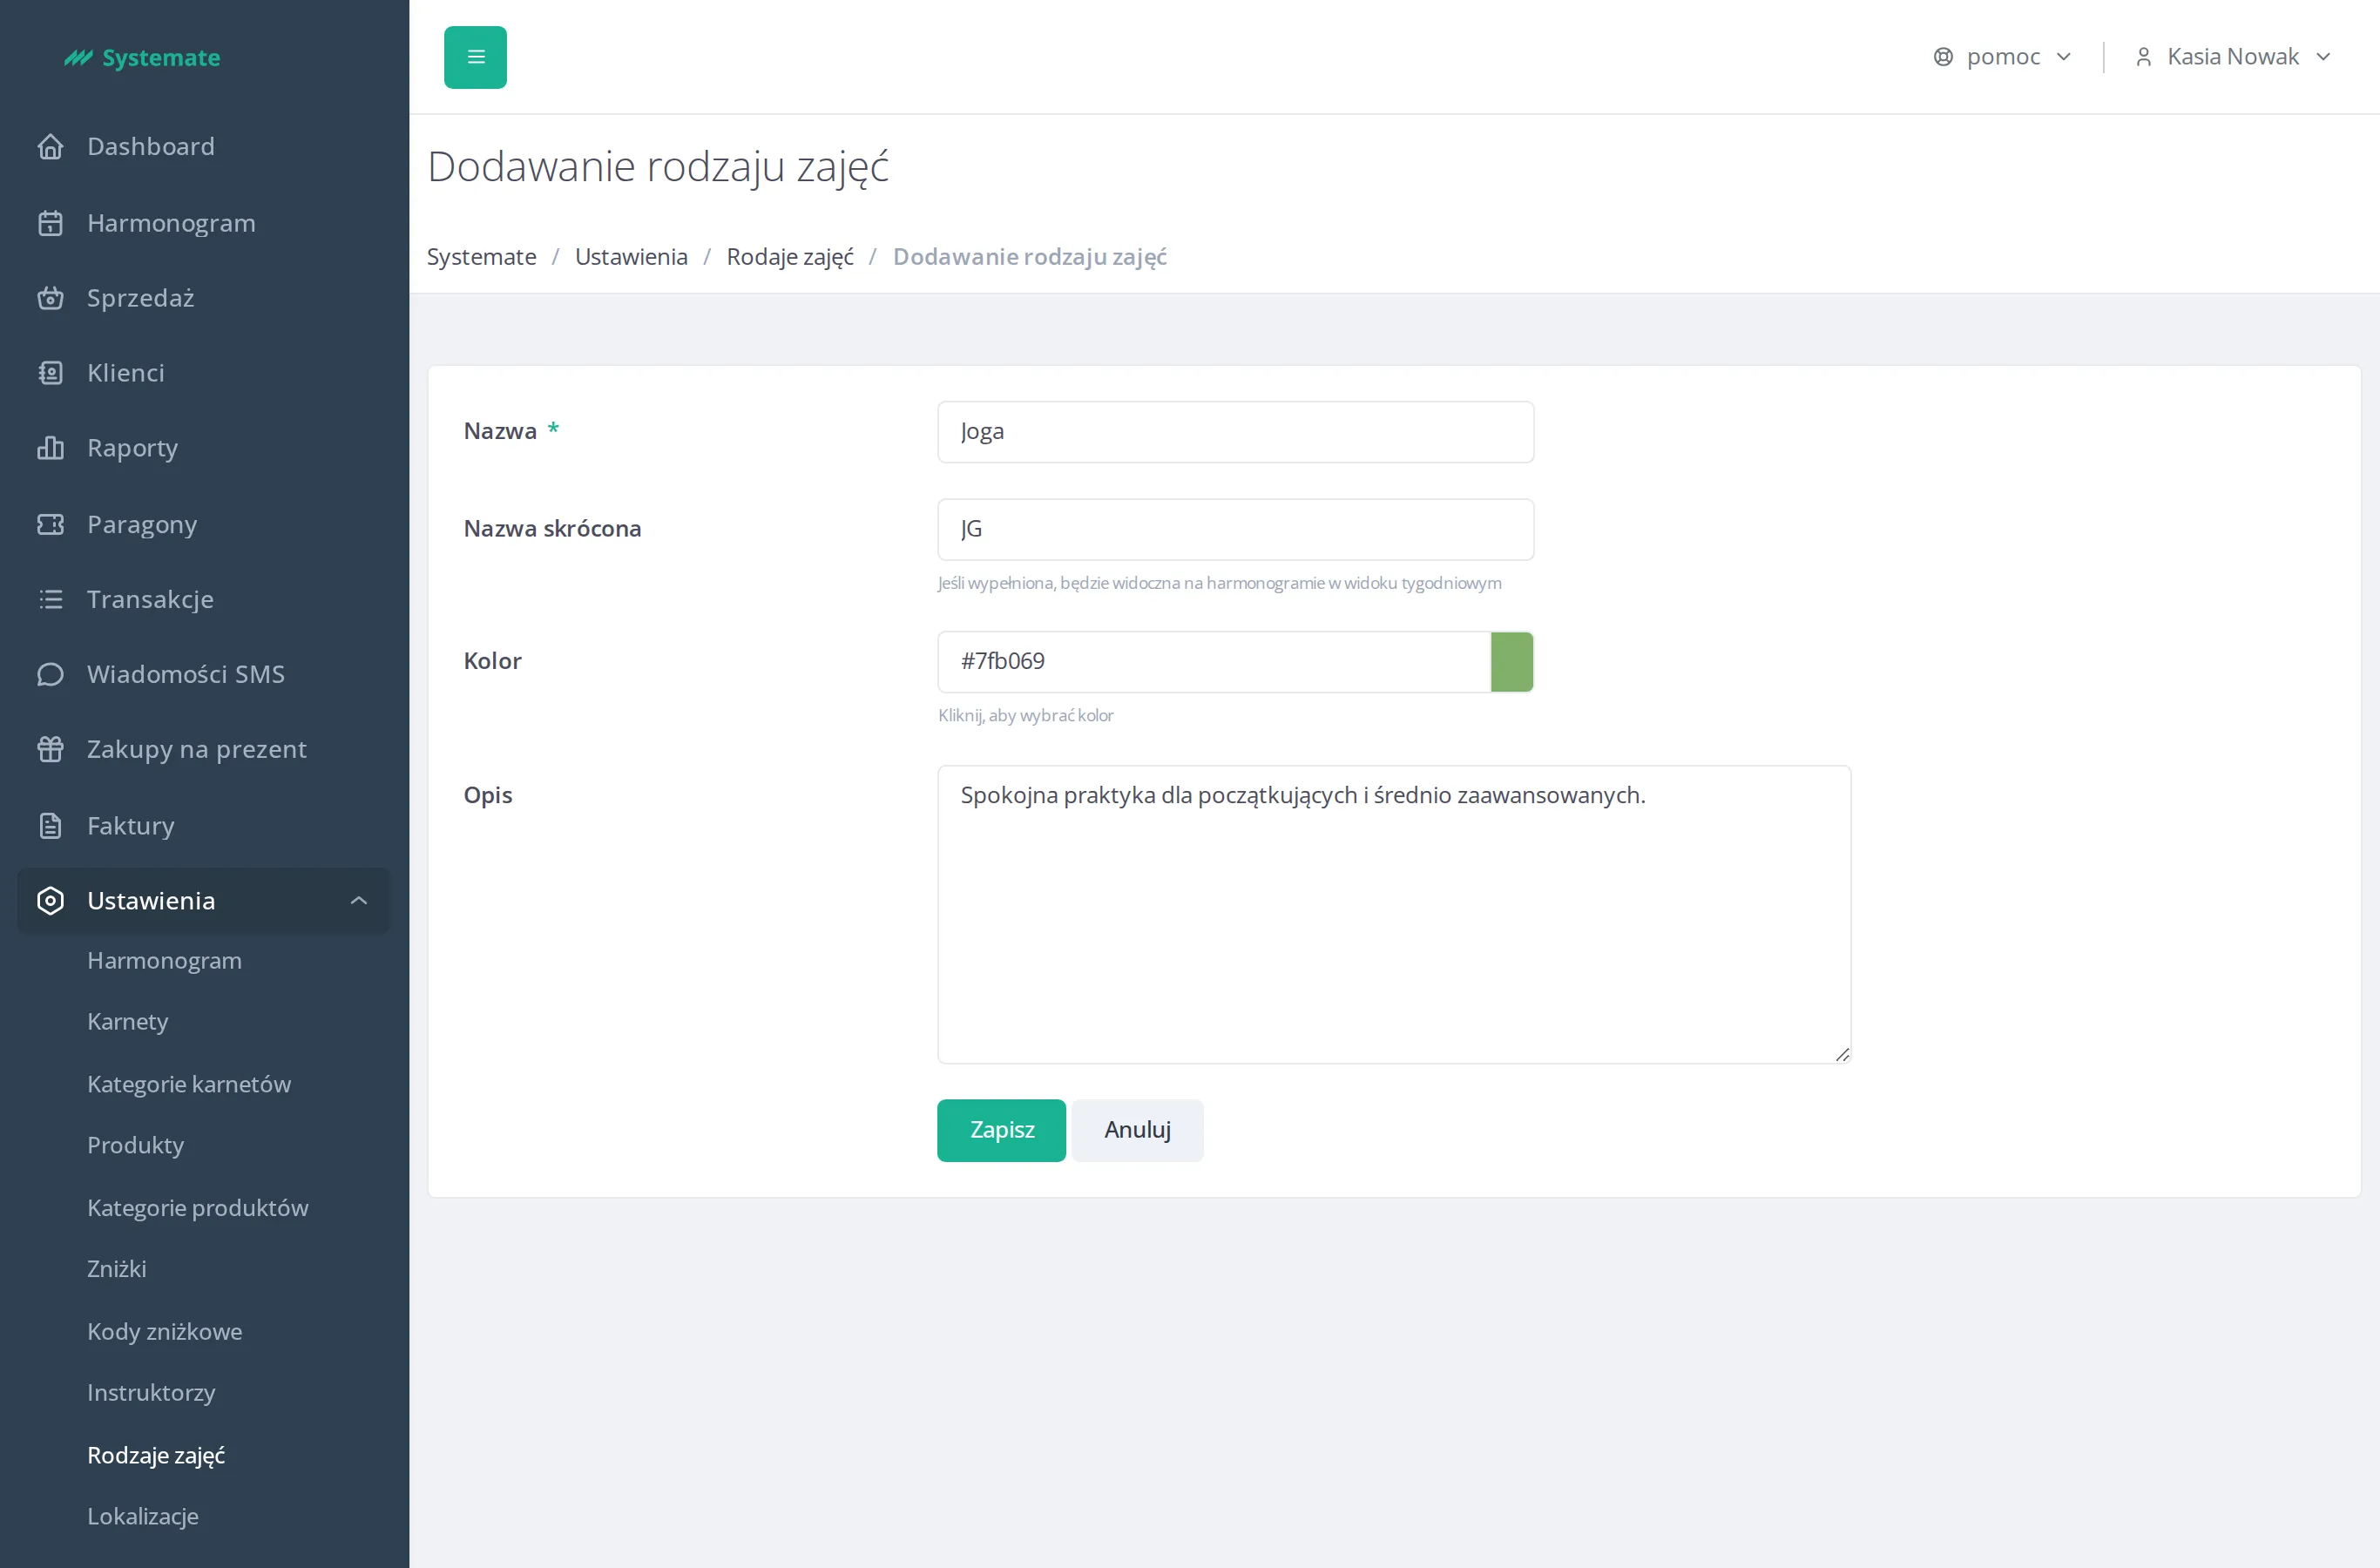
-
Click Save.
The class type is now available as Course type when you add a class to the schedule — see Add a class to the schedule.