Connect your own sender domain
Settings → Email sending shows the address your studio’s email campaigns go out from, and lets you swap it for an address in your own domain.
Check who sends the campaigns today
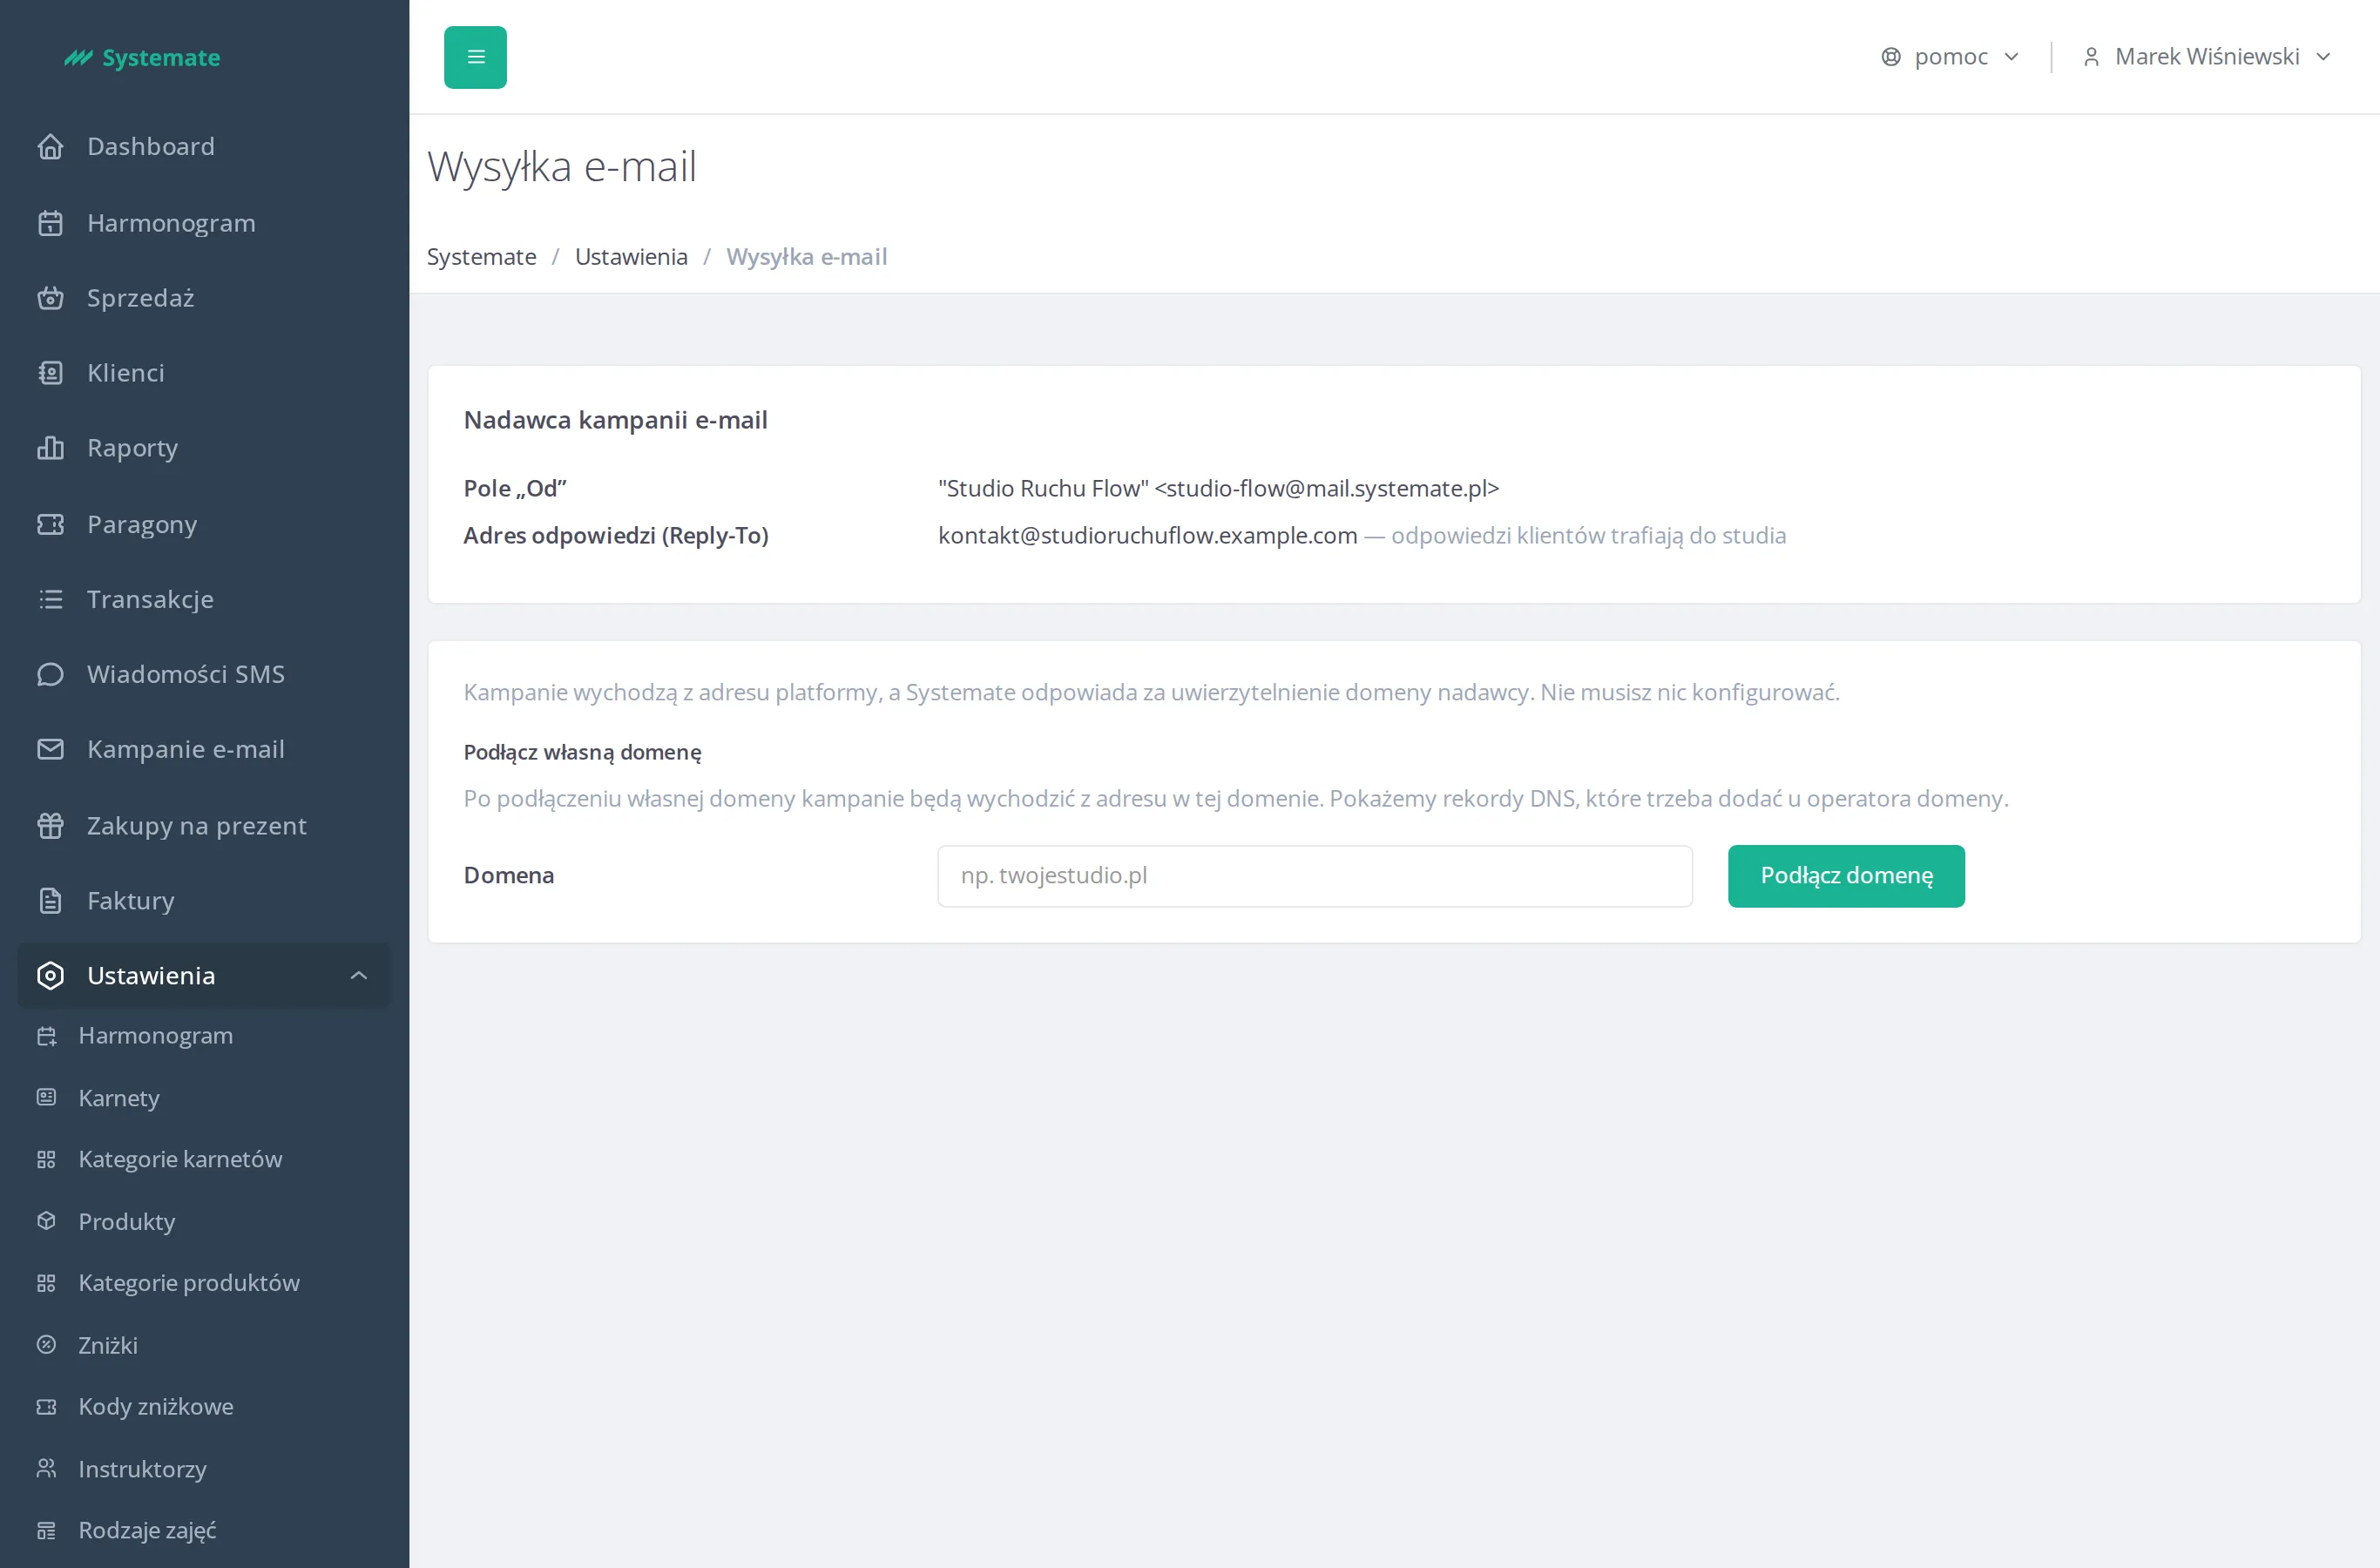
Section titled “Check who sends the campaigns today”The Email campaign sender section gives two values:
- The “From” field — the name and address the customer sees in their inbox,
- Reply-To address — customer replies go to the studio.
Until you connect your own domain, campaigns go out from the platform’s address
(…@mailing.systemate.pl), and Systemate takes care of authenticating the sender domain.
There is nothing to configure — the messages reach inboxes just the same.
Connect the studio’s domain
Section titled “Connect the studio’s domain”- In the Connect your own domain section, enter the studio’s main domain — for example
studioruchuflow.pl. - Click Connect a domain.
One domain can be connected to the studio. Disconnect the current one before you connect another.
If the domain is not accepted, the message below the form says why, and the domain you entered stays in the field:
- a free email domain (gmail.com, wp.pl and the like) — DMARC prevents sending from these addresses with any provider. Enter the studio’s own domain.
- a subdomain (for example
www.studioruchuflow.pl) — enter the studio’s main domain. - an invalid name or an unknown extension — check the spelling.
- a domain connected to another studio — one domain belongs to one studio.
- no connection to the sending service — try again in a moment.
Add the DNS records
Section titled “Add the DNS records”Once the domain is accepted, the screen shows the DNS records to add table: the type, name, value and status of every record. Three records are required (the DKIM signature and the bounce address — MX and SPF); the fourth one, DMARC, is marked Recommended and carries no status.
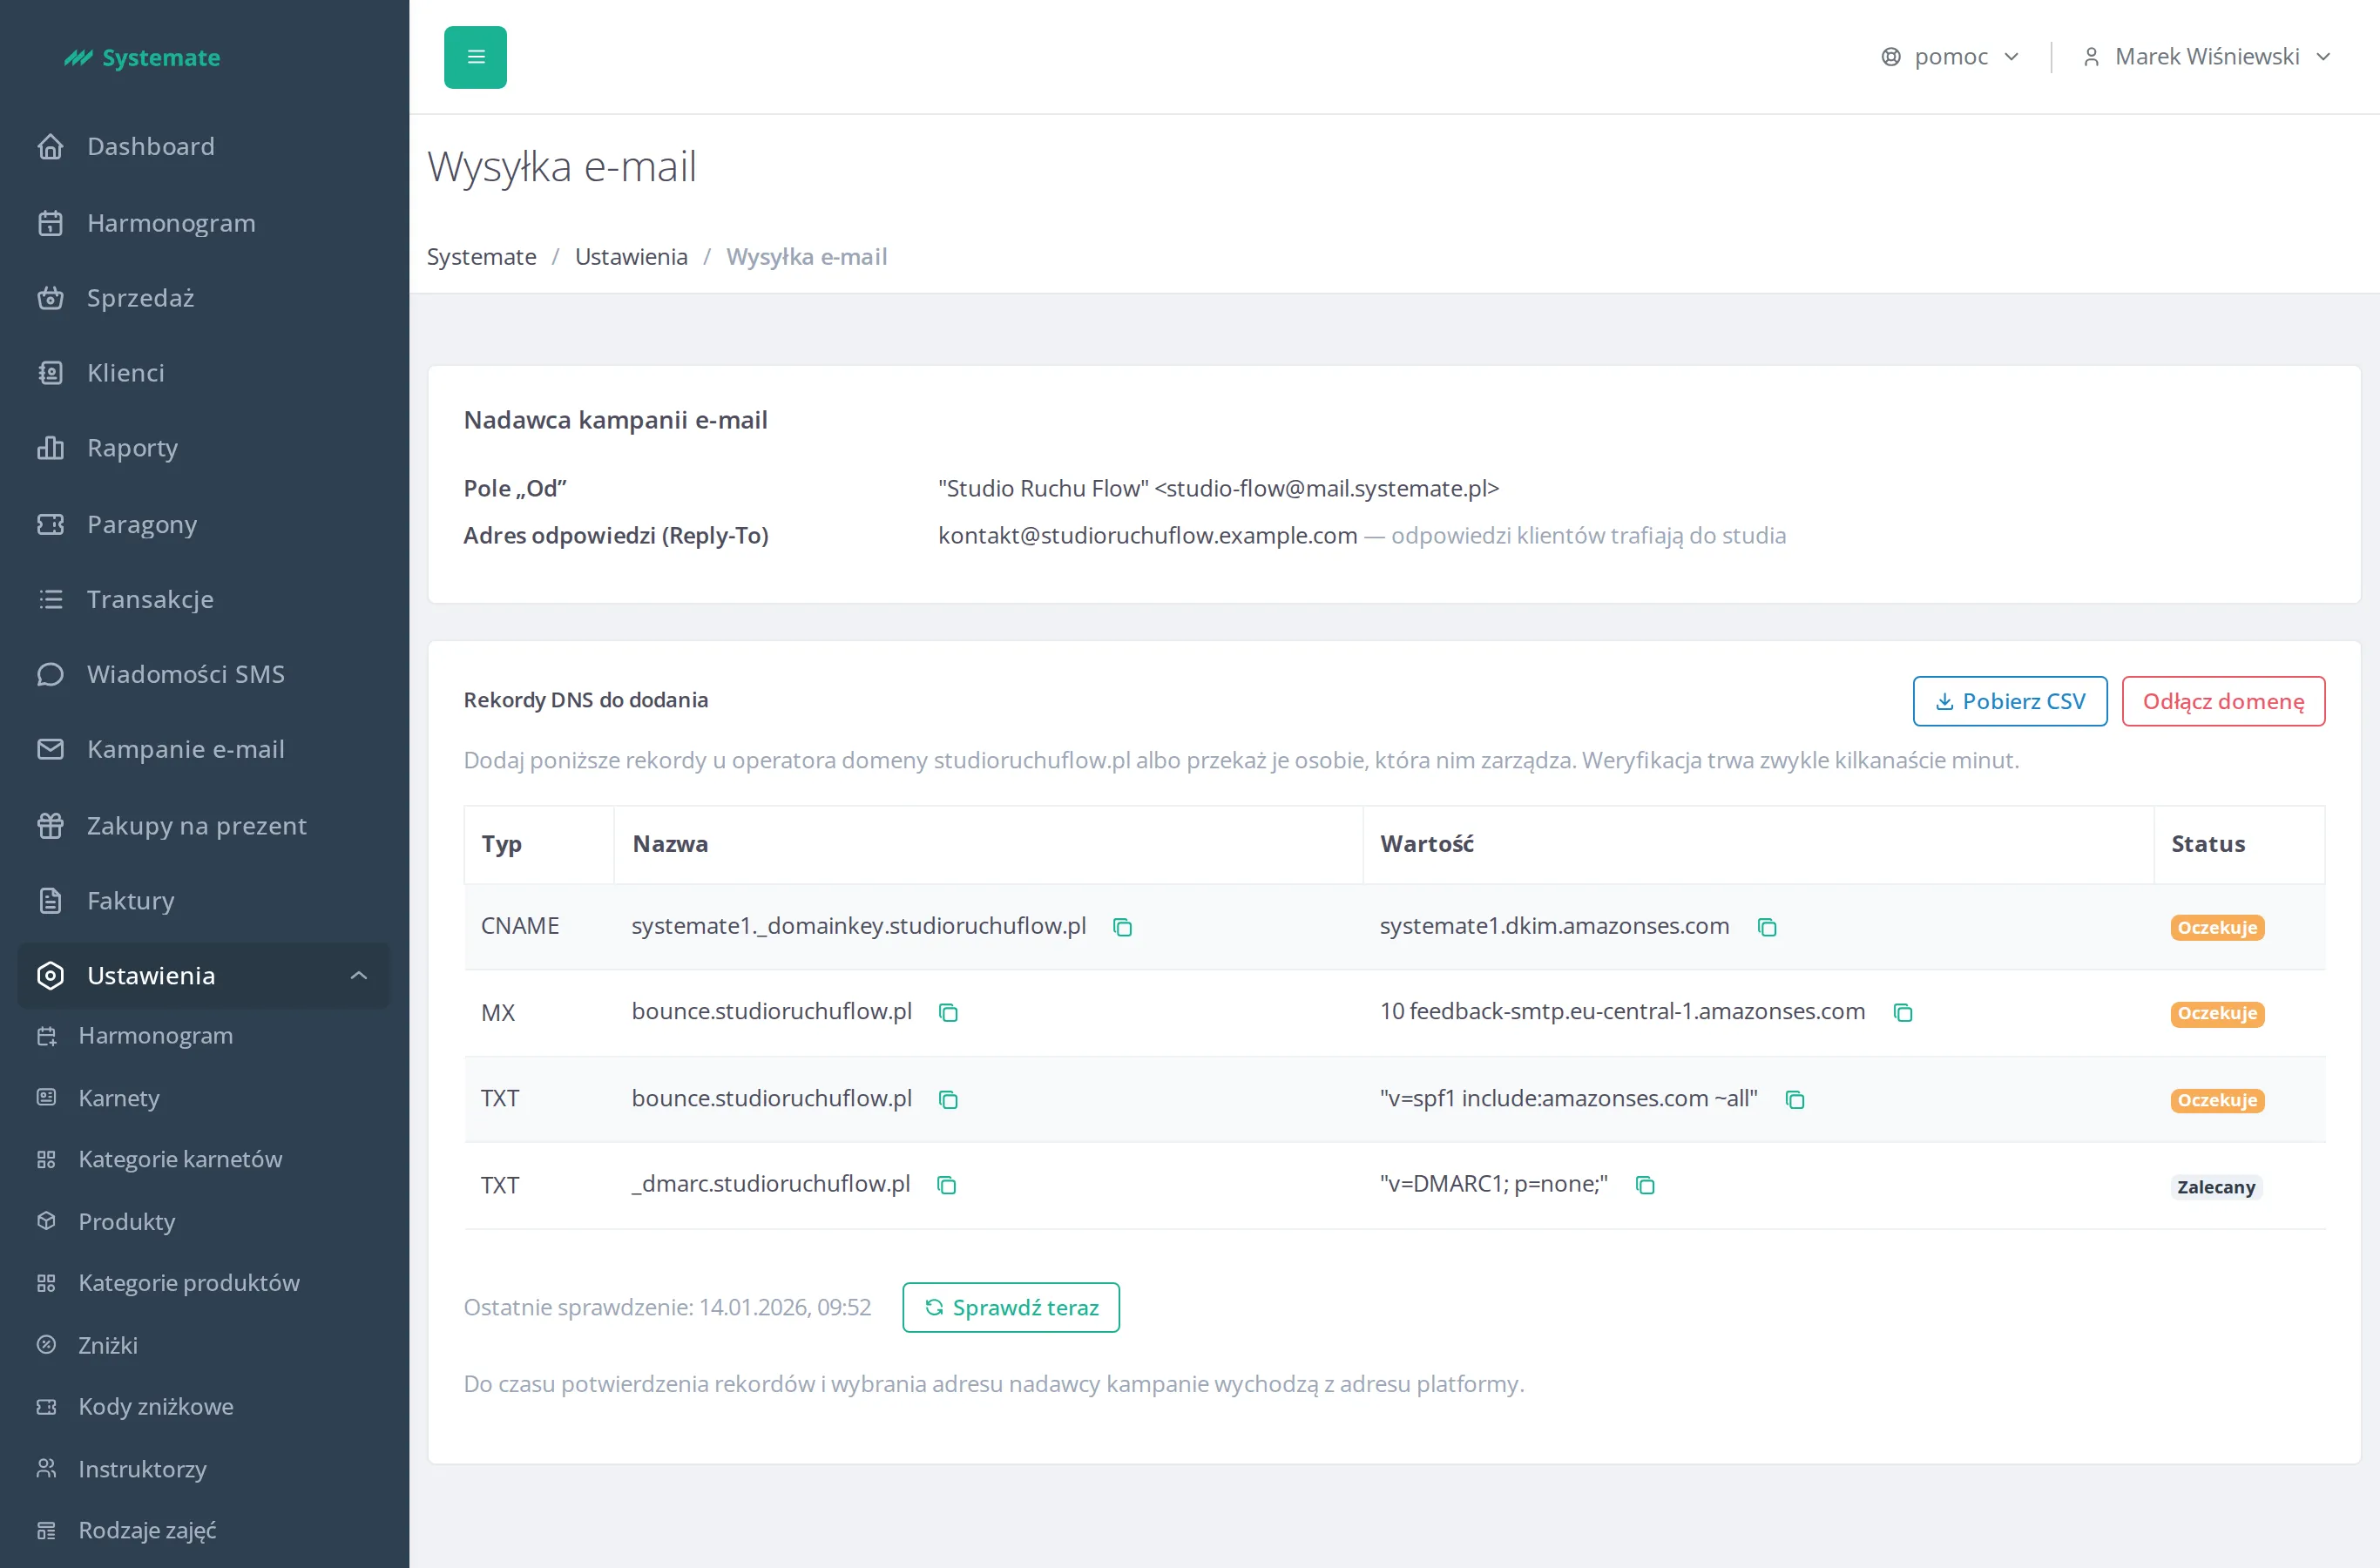
The records are added at the registrar you bought the domain from (or in the panel of the company that runs your website). You have two ways to go:
- add them yourself — the icon next to the name and the value copies the text to the clipboard, so you can paste it without a typo;
- hand them to whoever manages the domain — the Download CSV button saves the file
rekordy-dns-{domain}.csvwith the type, name, value and whether the record is required. If you do not know who manages your domain, send that file to platform support — we will help you work out the rest.
Wait for the verification
Section titled “Wait for the verification”Systemate checks the records in the background every half a minute and refreshes the statuses on its own — there is no need to reload the page. A record moves from Pending to Verified once the change reaches the DNS servers; that usually takes a dozen or so minutes, but a registrar is free to spread the change over several hours.
The time of the last check sits below the table, and the Check now button asks straight away. When a check fails, the message Unable to check the domain status appears — the table keeps the last known statuses and the next attempt goes out automatically.
Until the records are verified and a sender address is chosen, campaigns go out from the platform’s address. Nothing breaks along the way.
Choose the sender address
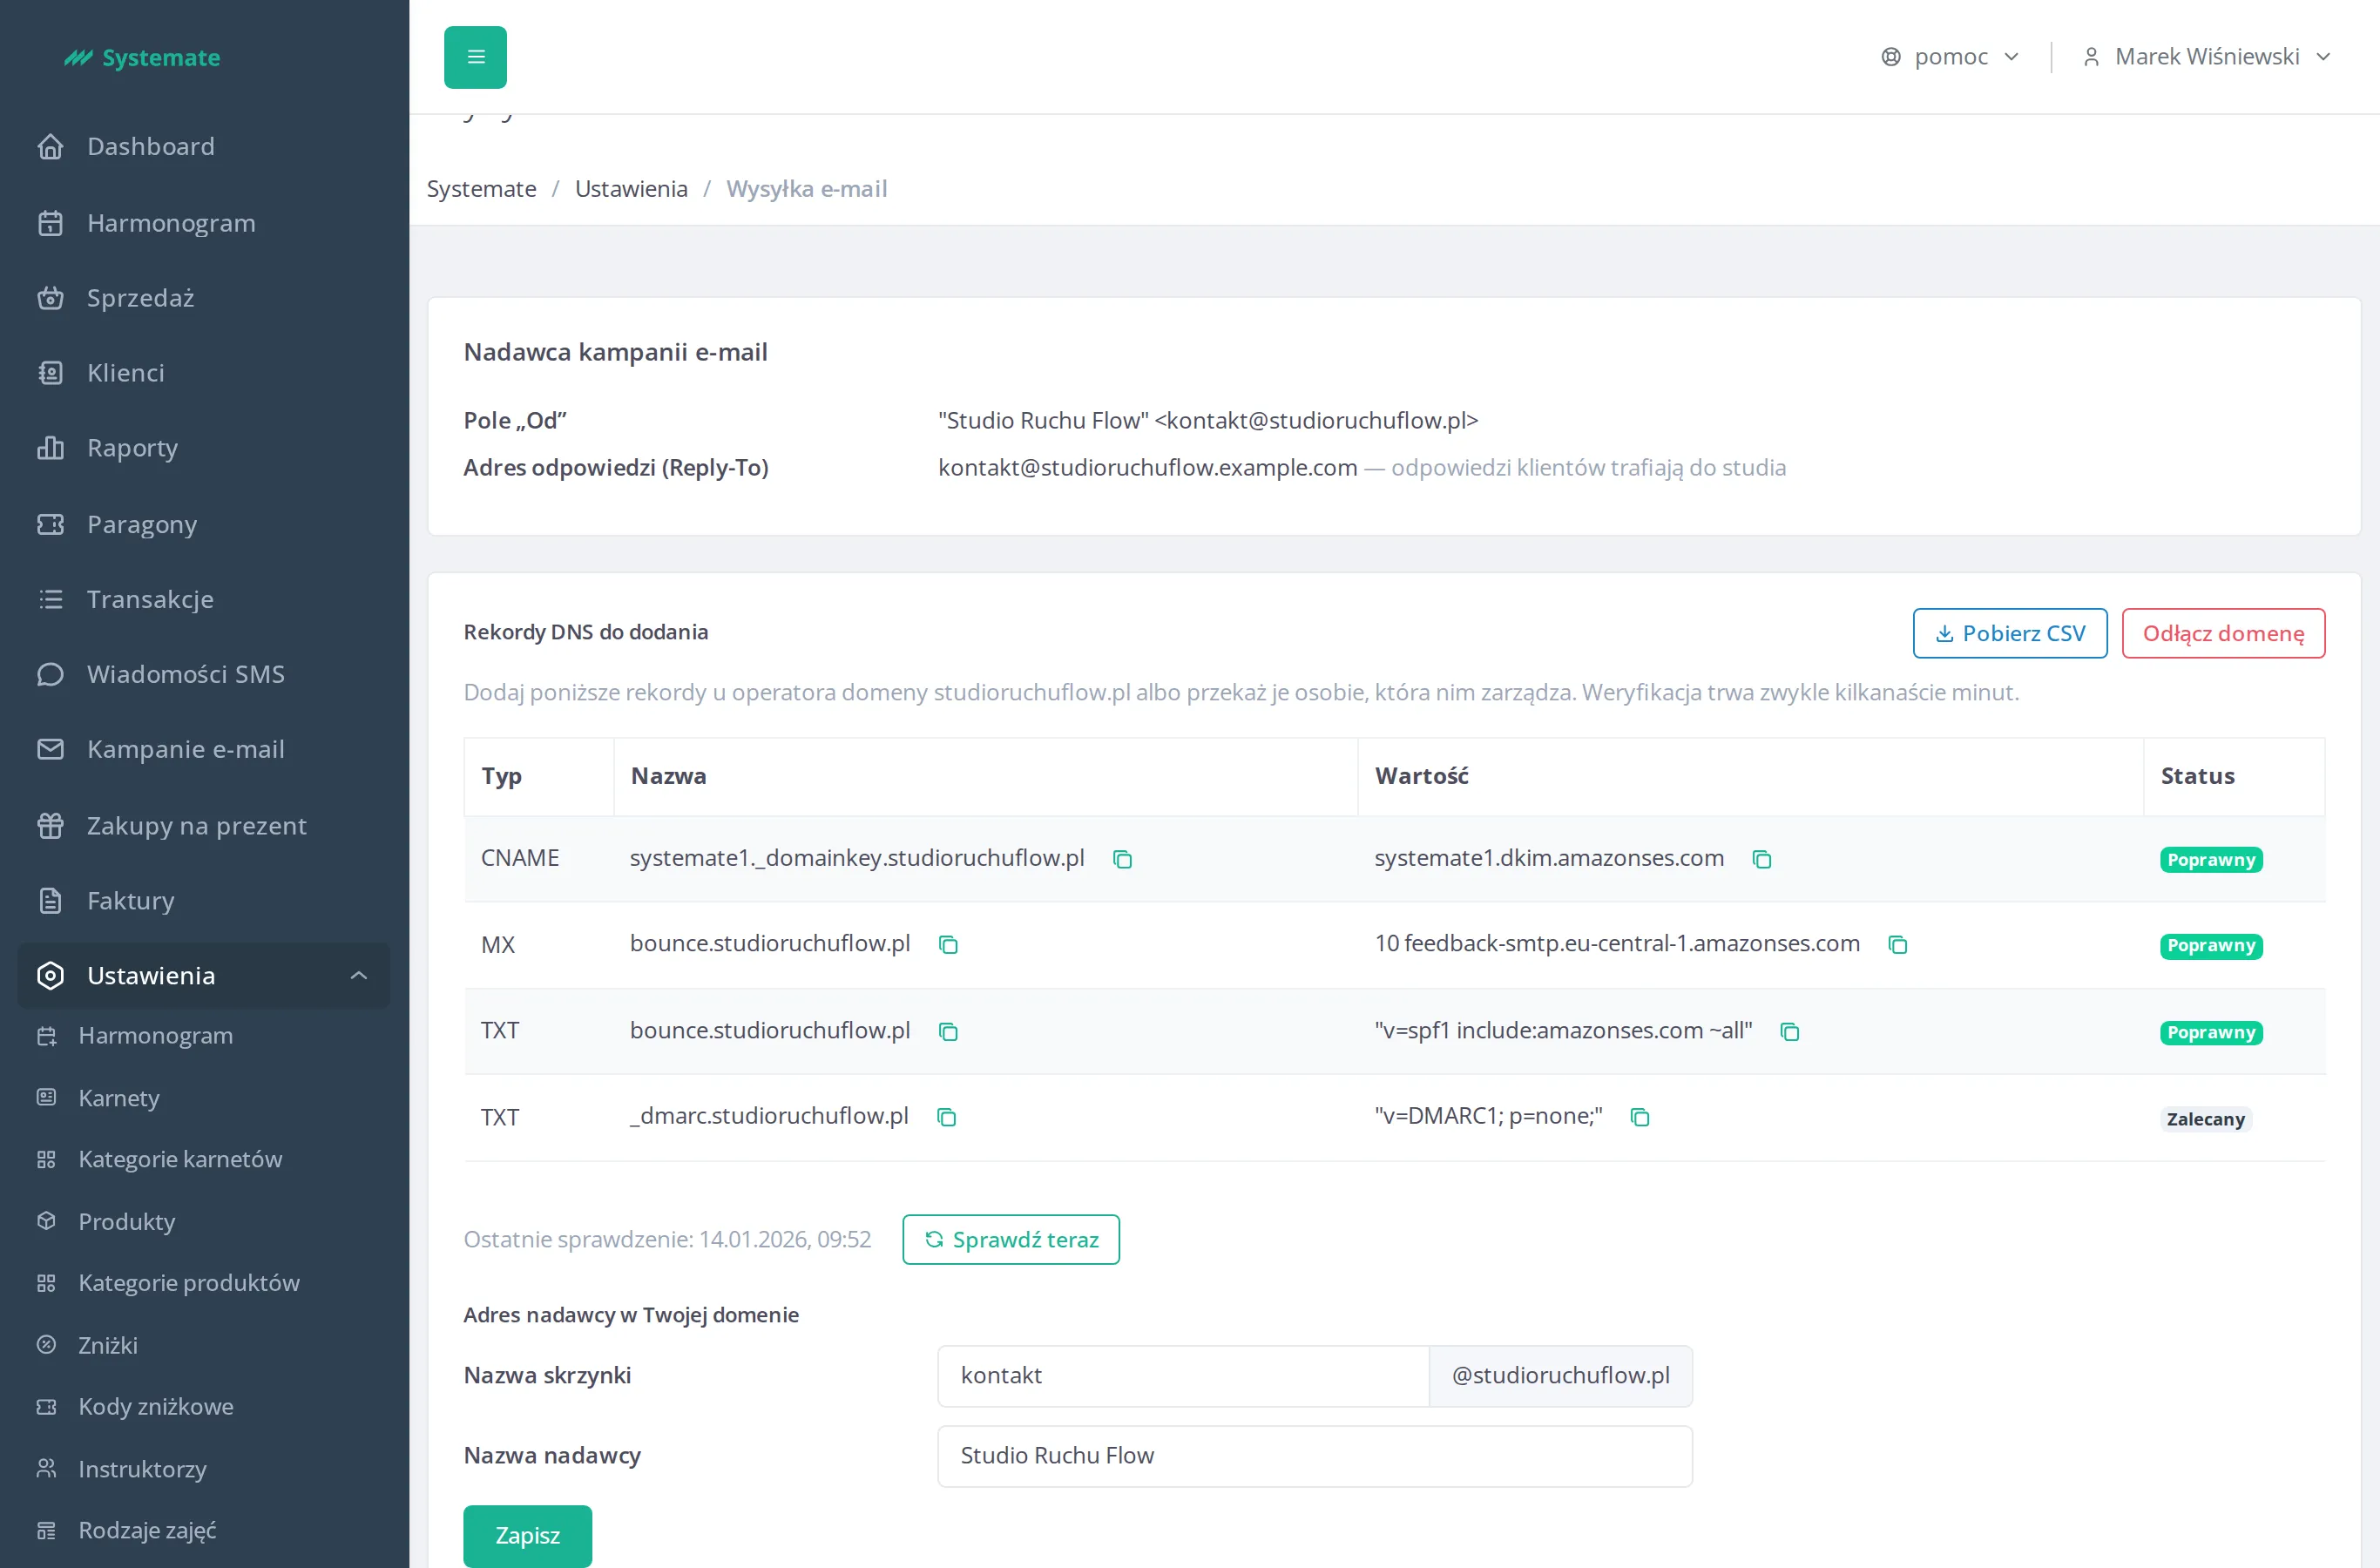
Section titled “Choose the sender address”Once the domain is verified, the Sender address on your domain section appears:
- In the Mailbox name field, enter the part before the at sign —
kontaktornewsletter, for instance. The@yourdomain.plsuffix is fixed. Letters, digits and the characters._+-are allowed; the name may not begin or end with a dot. - In the Sender Name field, enter the name the customer sees instead of the address — usually the studio’s name. Up to 100 characters.
- Click Save.
The Email campaign sender section shows the new “From” field right away. The reply-to address stays as it was — customer replies still go to the studio’s contact address.
The sender address applies to campaigns sent after you save it. A campaign whose send has already started keeps the sender it had at the start — see Schedule and send a campaign.
Disconnect the domain
Section titled “Disconnect the domain”The Disconnect the domain button above the record table ends the studio’s use of that domain. After you confirm, the screen returns to its starting state and campaigns go out from the platform’s address again. You can then delete the DNS records at the registrar.
When the option is unavailable
Section titled “When the option is unavailable”On instances where campaigns go out through the studio’s own mail server, connecting your own sender domain is unavailable — the screen then shows just the sender and an explanation, with no form and no record table.
In sandbox mode
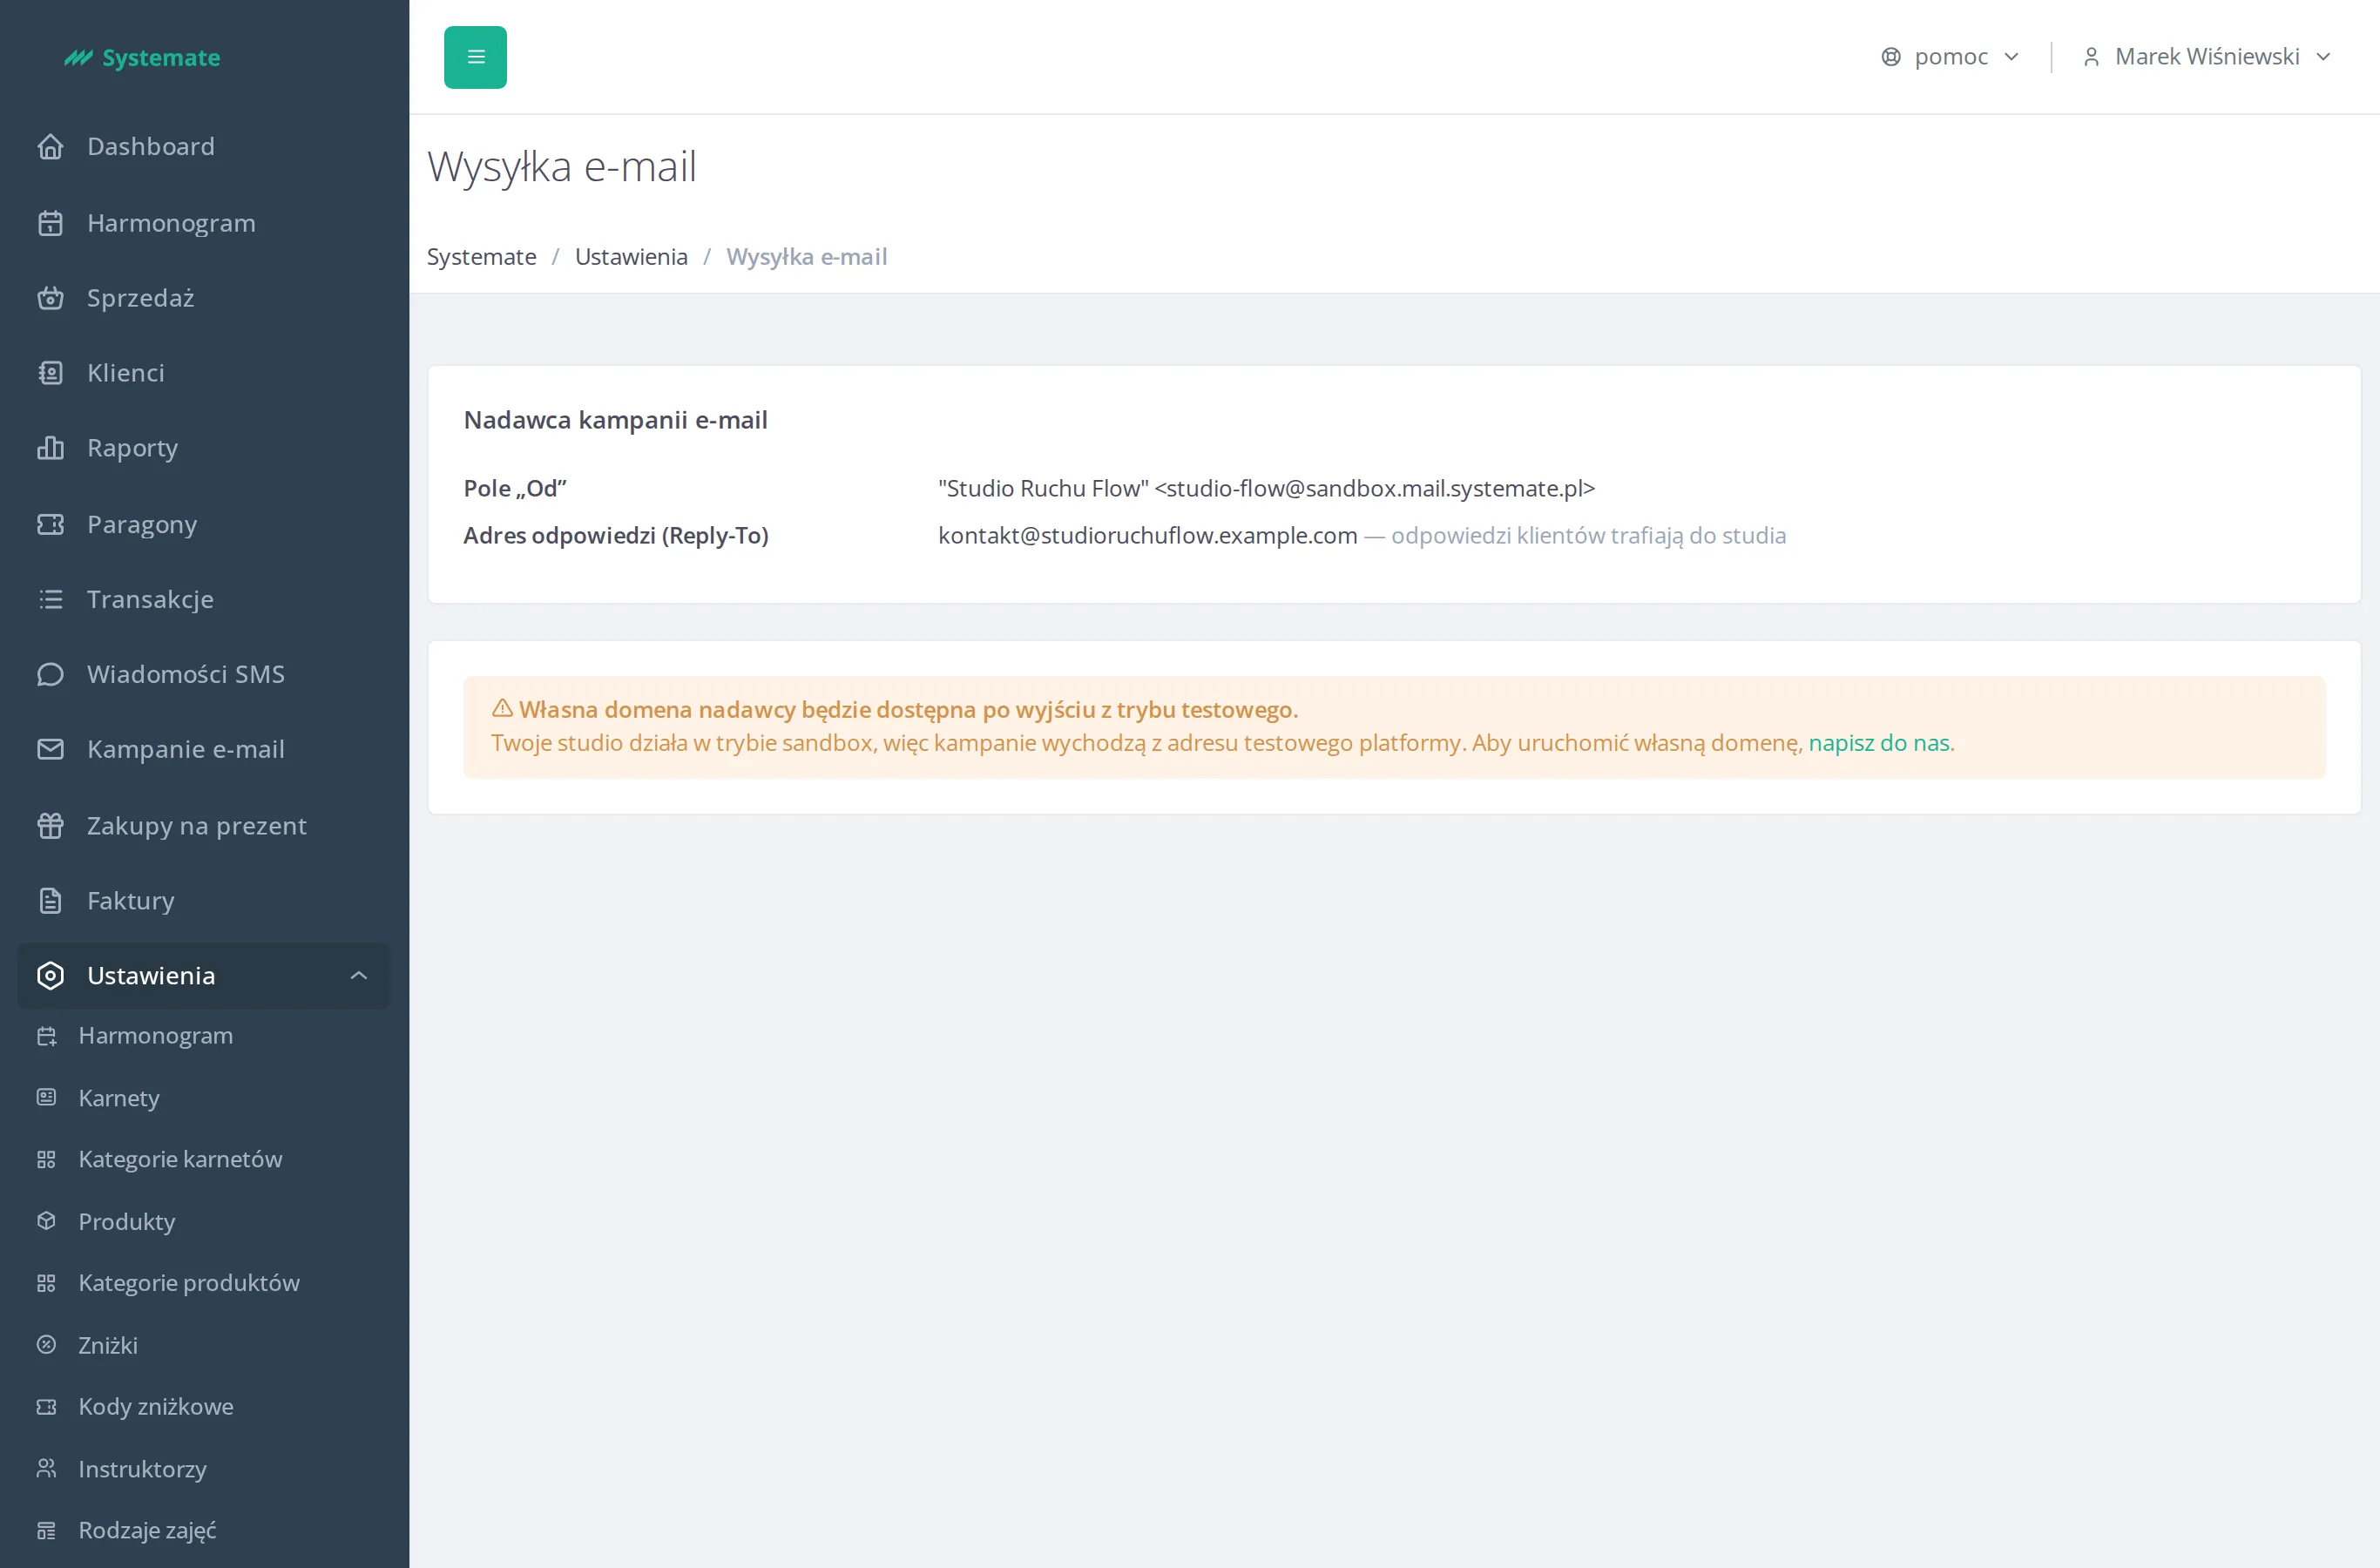
Section titled “In sandbox mode”A studio running in sandbox mode cannot connect its own sender domain. Instead of the form and the record table, the screen says that your own domain becomes available after leaving the test mode, together with a contact us link. Campaigns then go out from the platform’s test address — the Email campaign sender section shows that address in the “From” field.
A domain connected earlier does not disappear. Once the studio leaves sandbox mode, it comes back with the chosen sender address and name — no need to add the DNS records again.