Manage customer tags
Tags let you mark customers (e.g. VIP or New customer) and filter the customer list by them. A tag can be assigned manually or automatically — based on a rule.
-
In the office panel go to Settings → Tags.
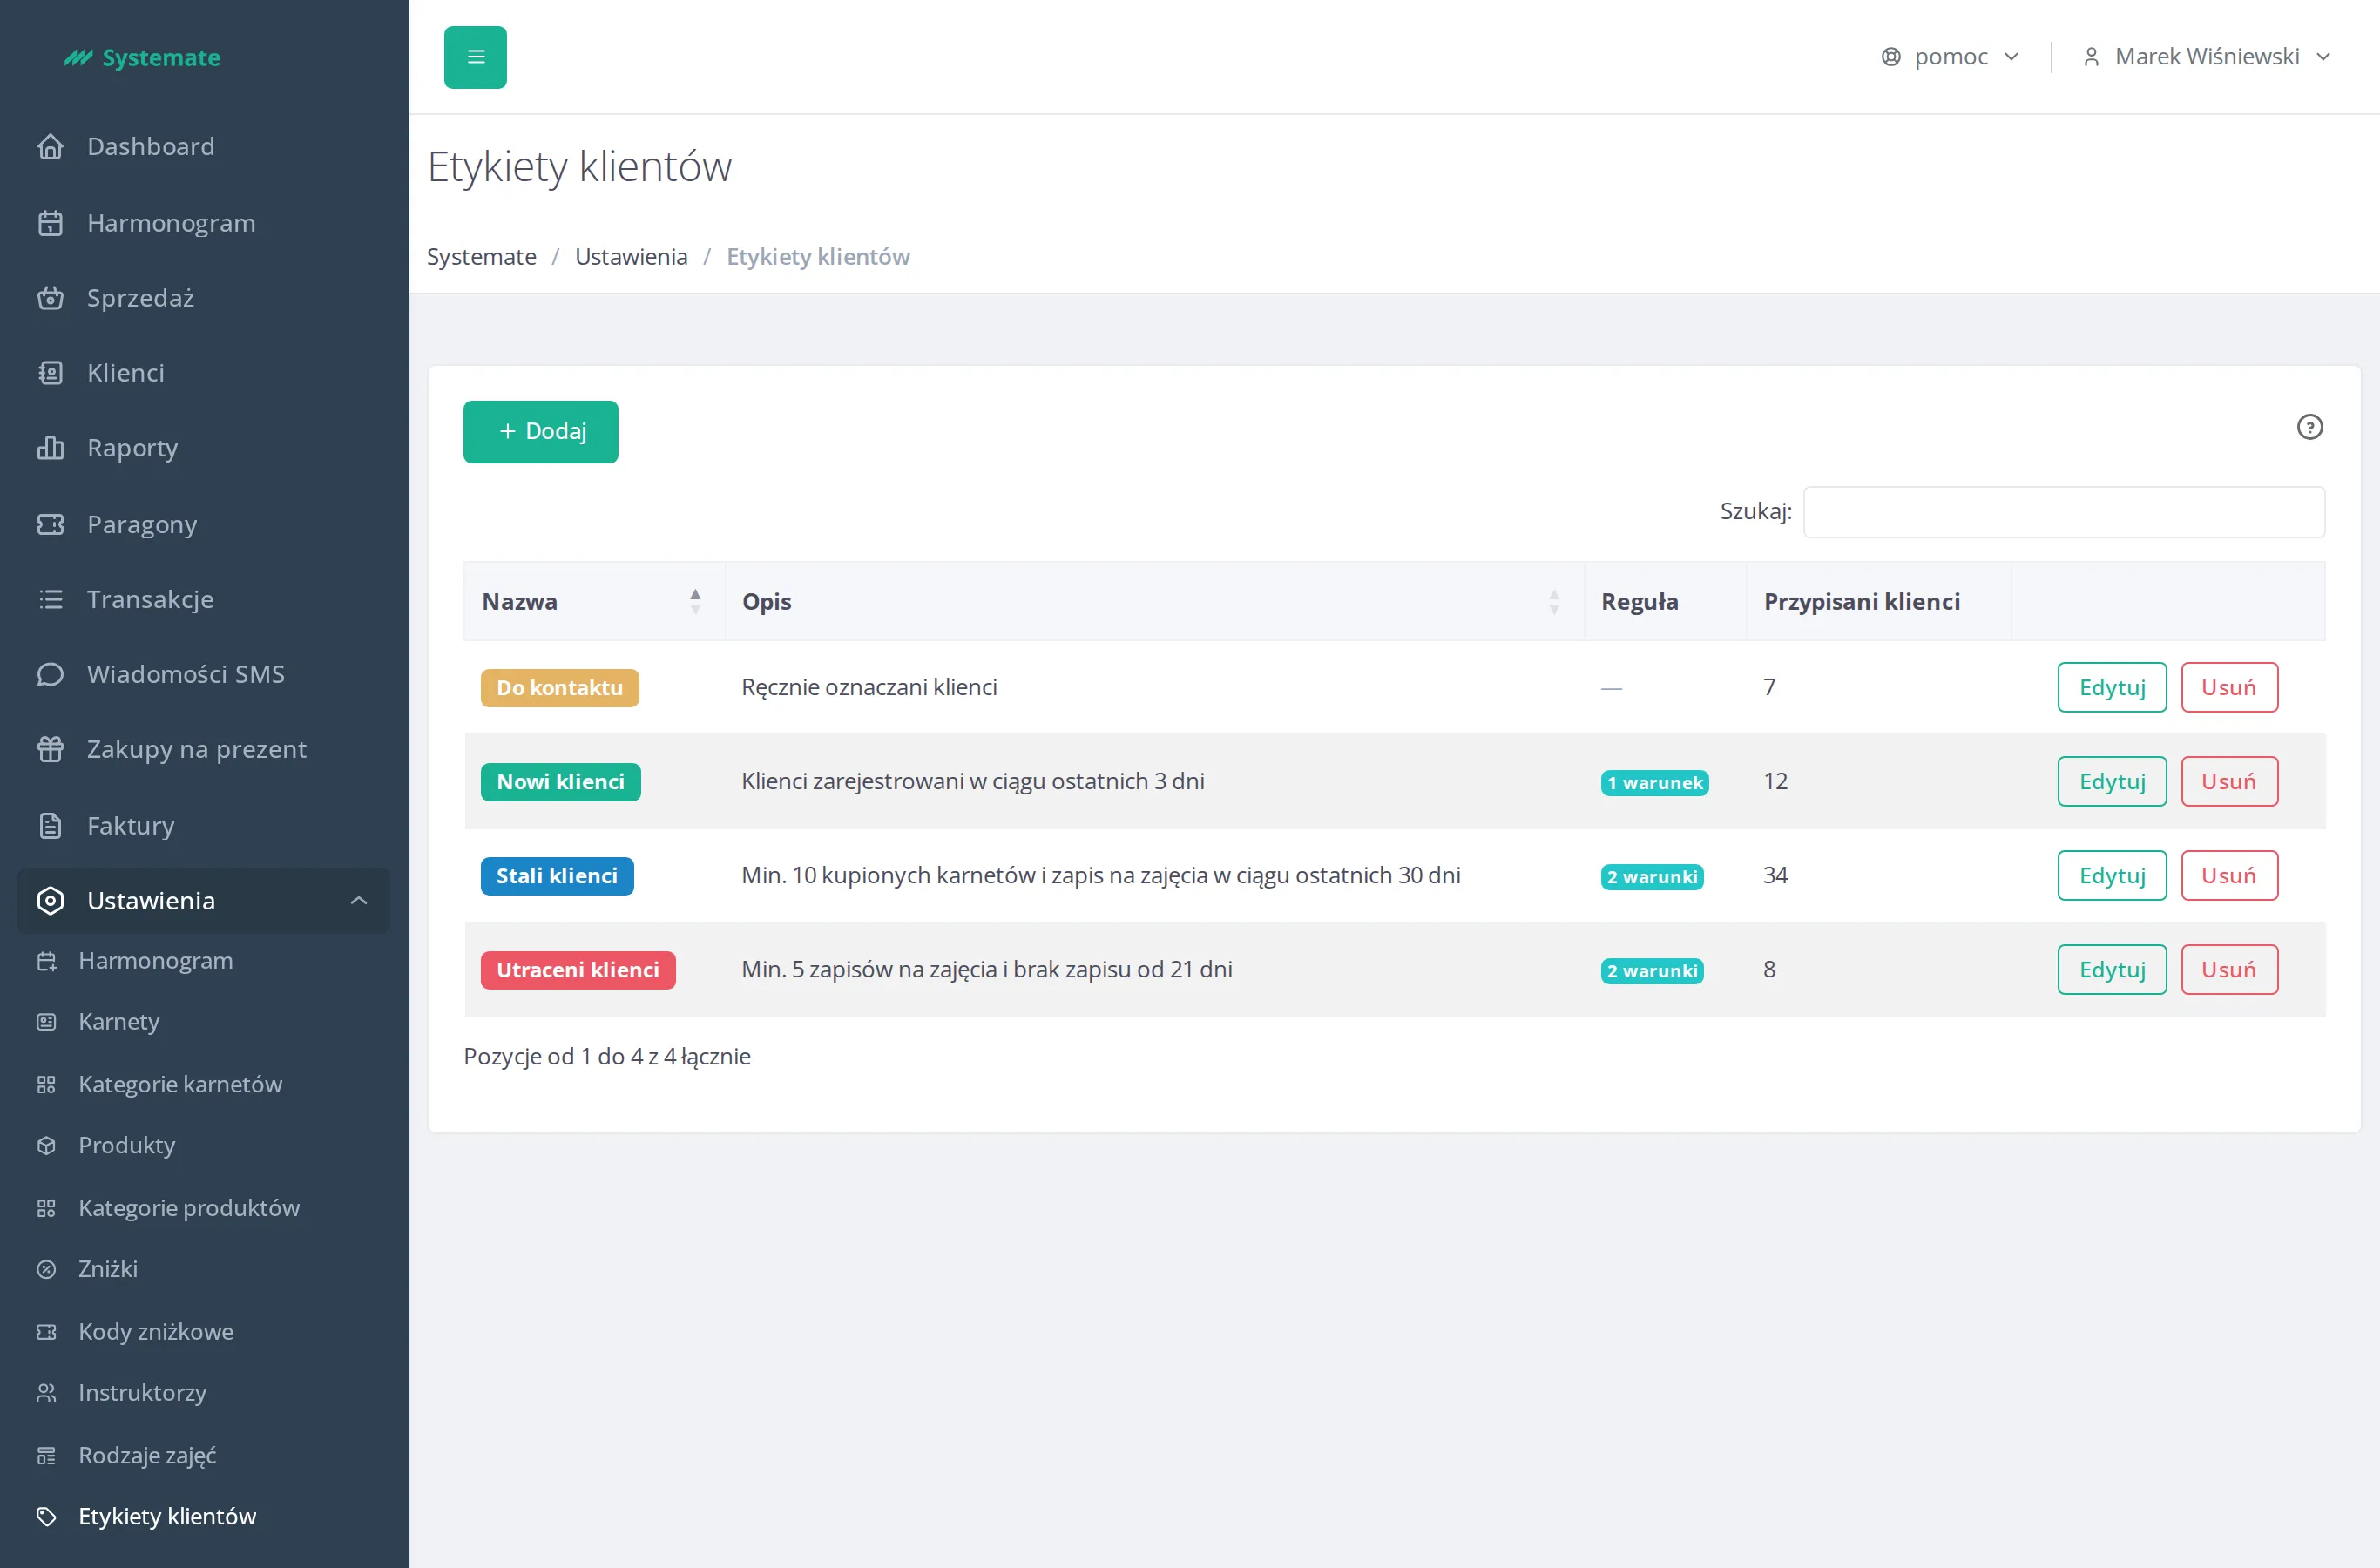
Add a tag
Section titled “Add a tag”-
Click + Add tag.
-
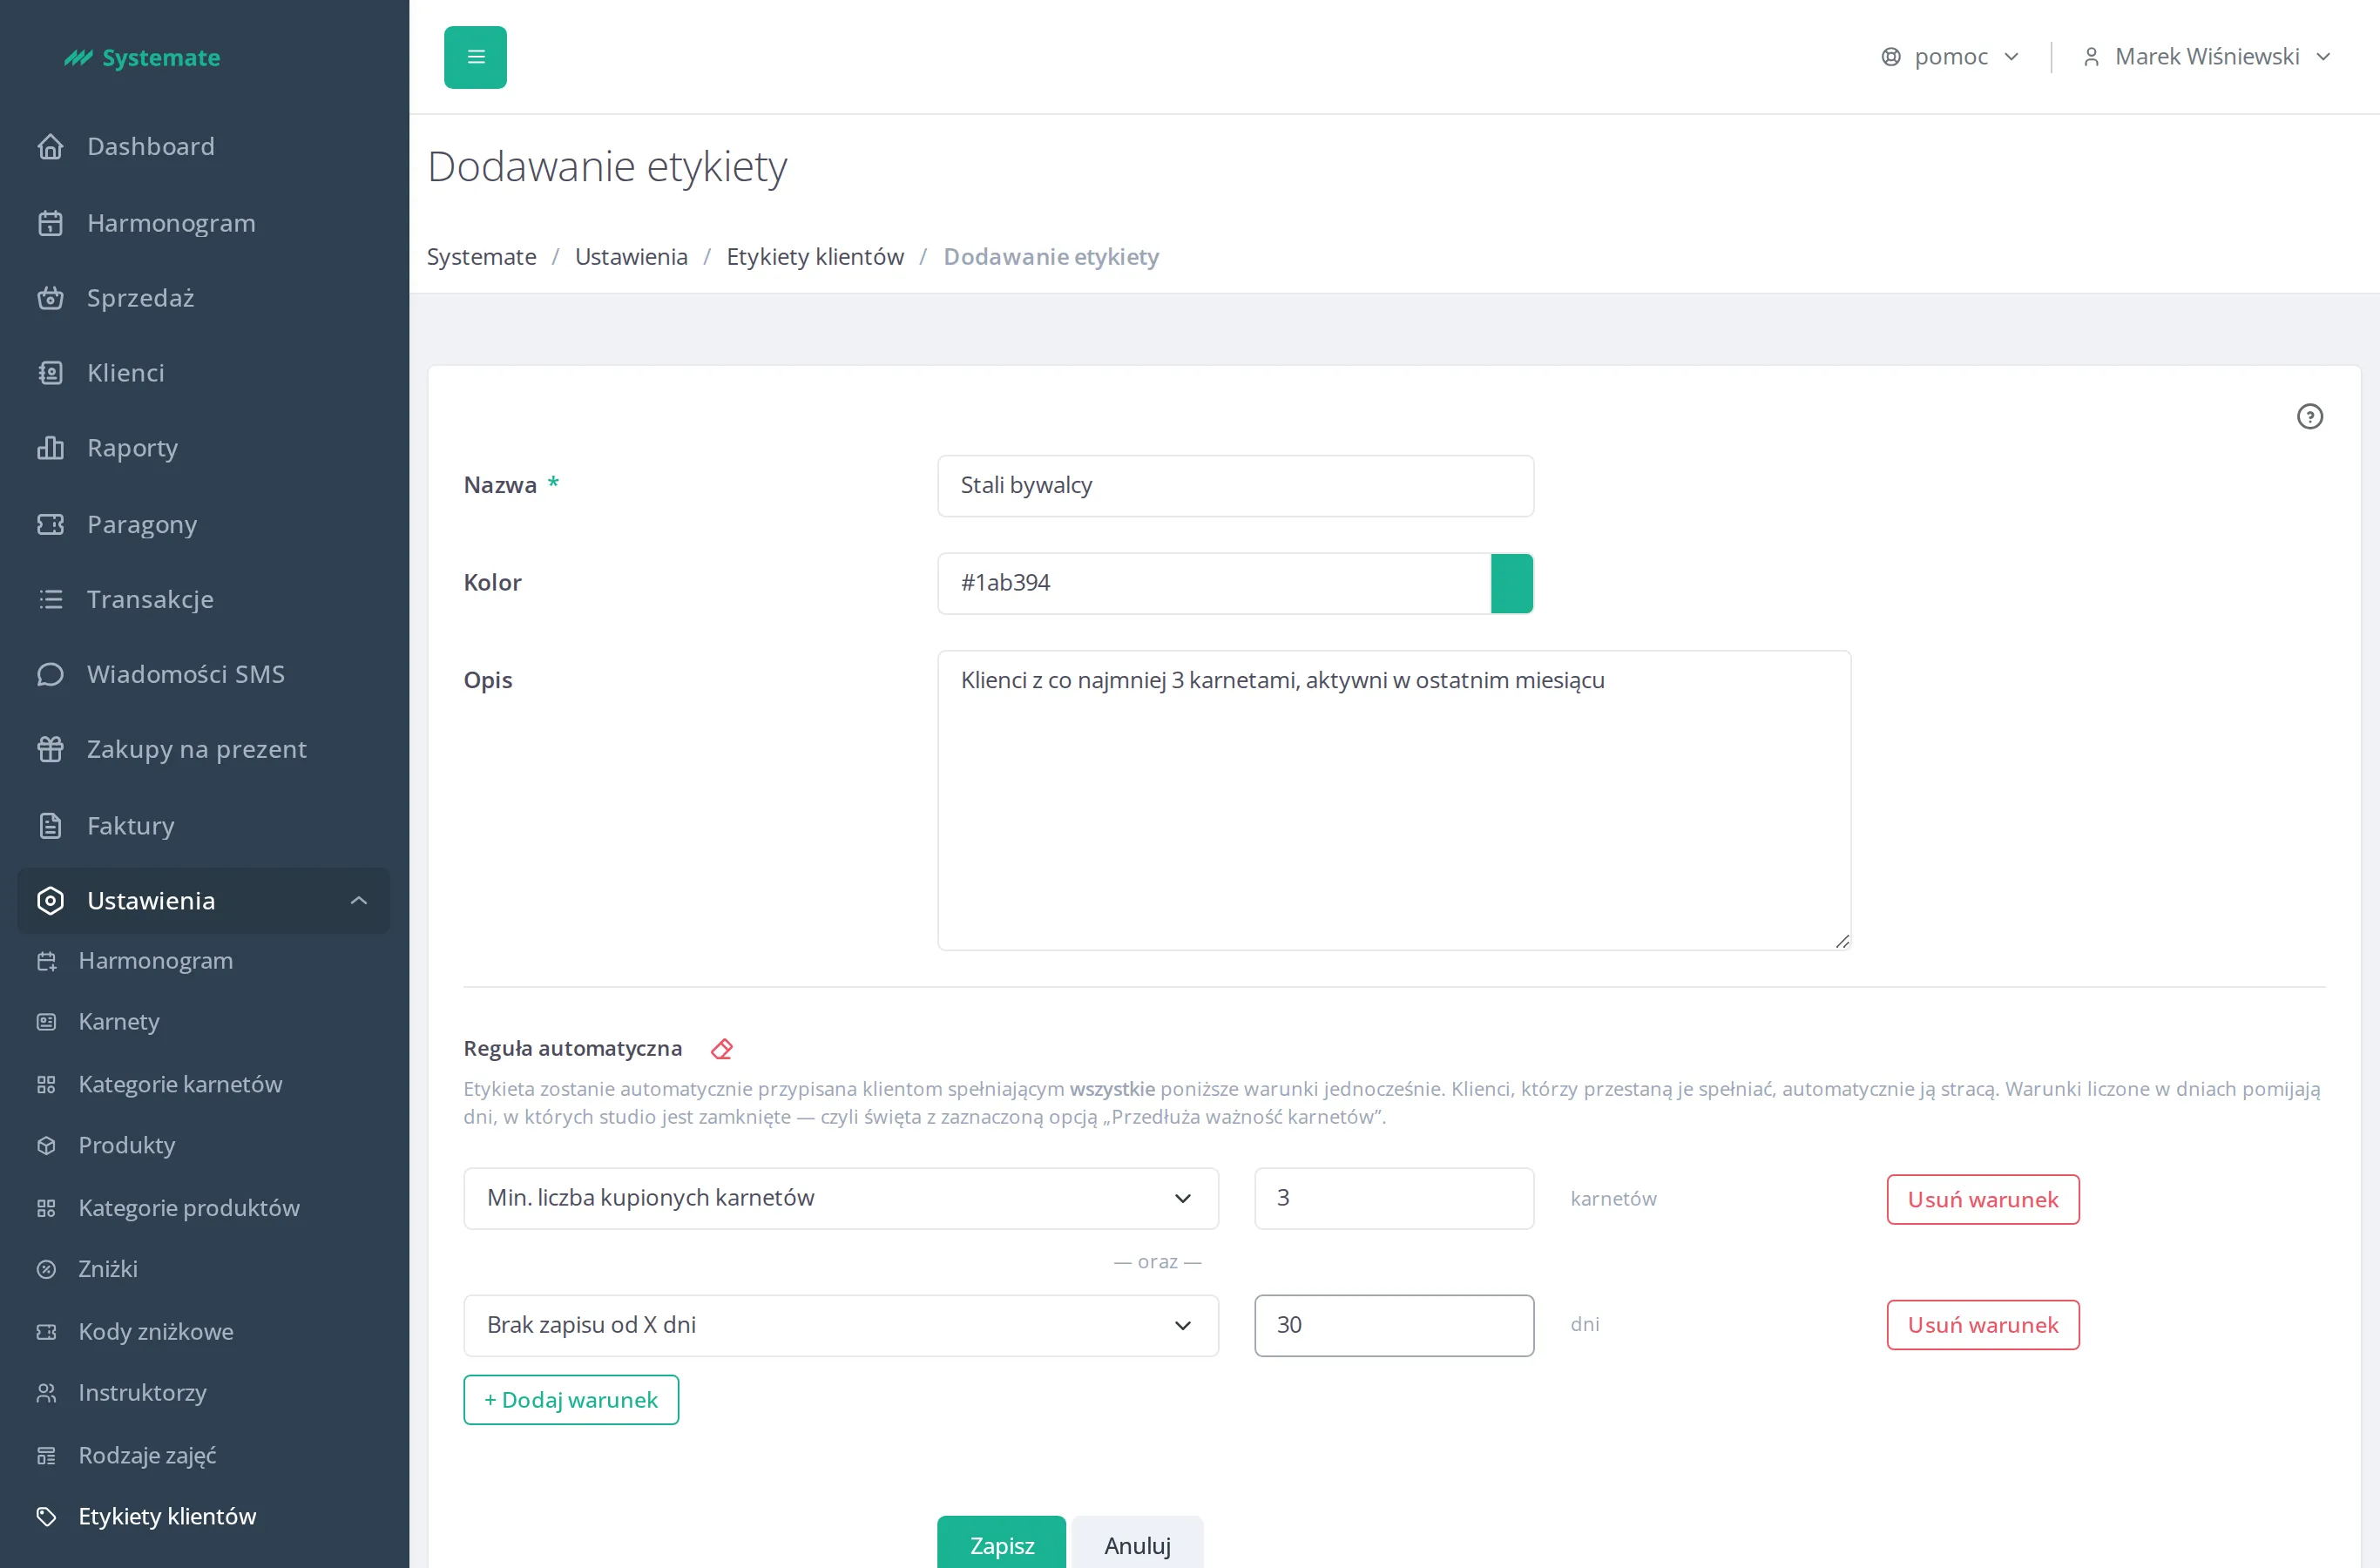
Fill in the Name (required), pick a Color, and optionally add a Description.
-
If the tag should be assigned automatically, build its rule right away — see Build an automatic rule below.
-
Click Save — the tag appears in the list.
Build an automatic rule
Section titled “Build an automatic rule”A rule is a set of conditions joined with and — only a customer who meets all of them at once gets the tag. When they stop meeting them, they automatically lose it.
- In the tag form click + Add condition.
- Pick a condition type and enter its numeric value. Available types:
- Min./max. number of purchased passes,
- Min./max. number of active class sign-ups,
- No sign-up for X days,
- Registered within the last X days,
- Class sign-up within the last X days,
- Participation in the instructor’s classes over the last X days — pick the instructor, the minimum number of classes and the number of days,
- Purchase of a pass from a category within the last X days — pick the pass category and the number of days.
- Add more conditions if you need them — each new one is joined with the previous ones using and.
- Click Save — the rule is saved together with the rest of the form, both when adding and when editing a tag.
Edit a tag
Section titled “Edit a tag”-
In the tag list click the edit icon next to the tag.
-
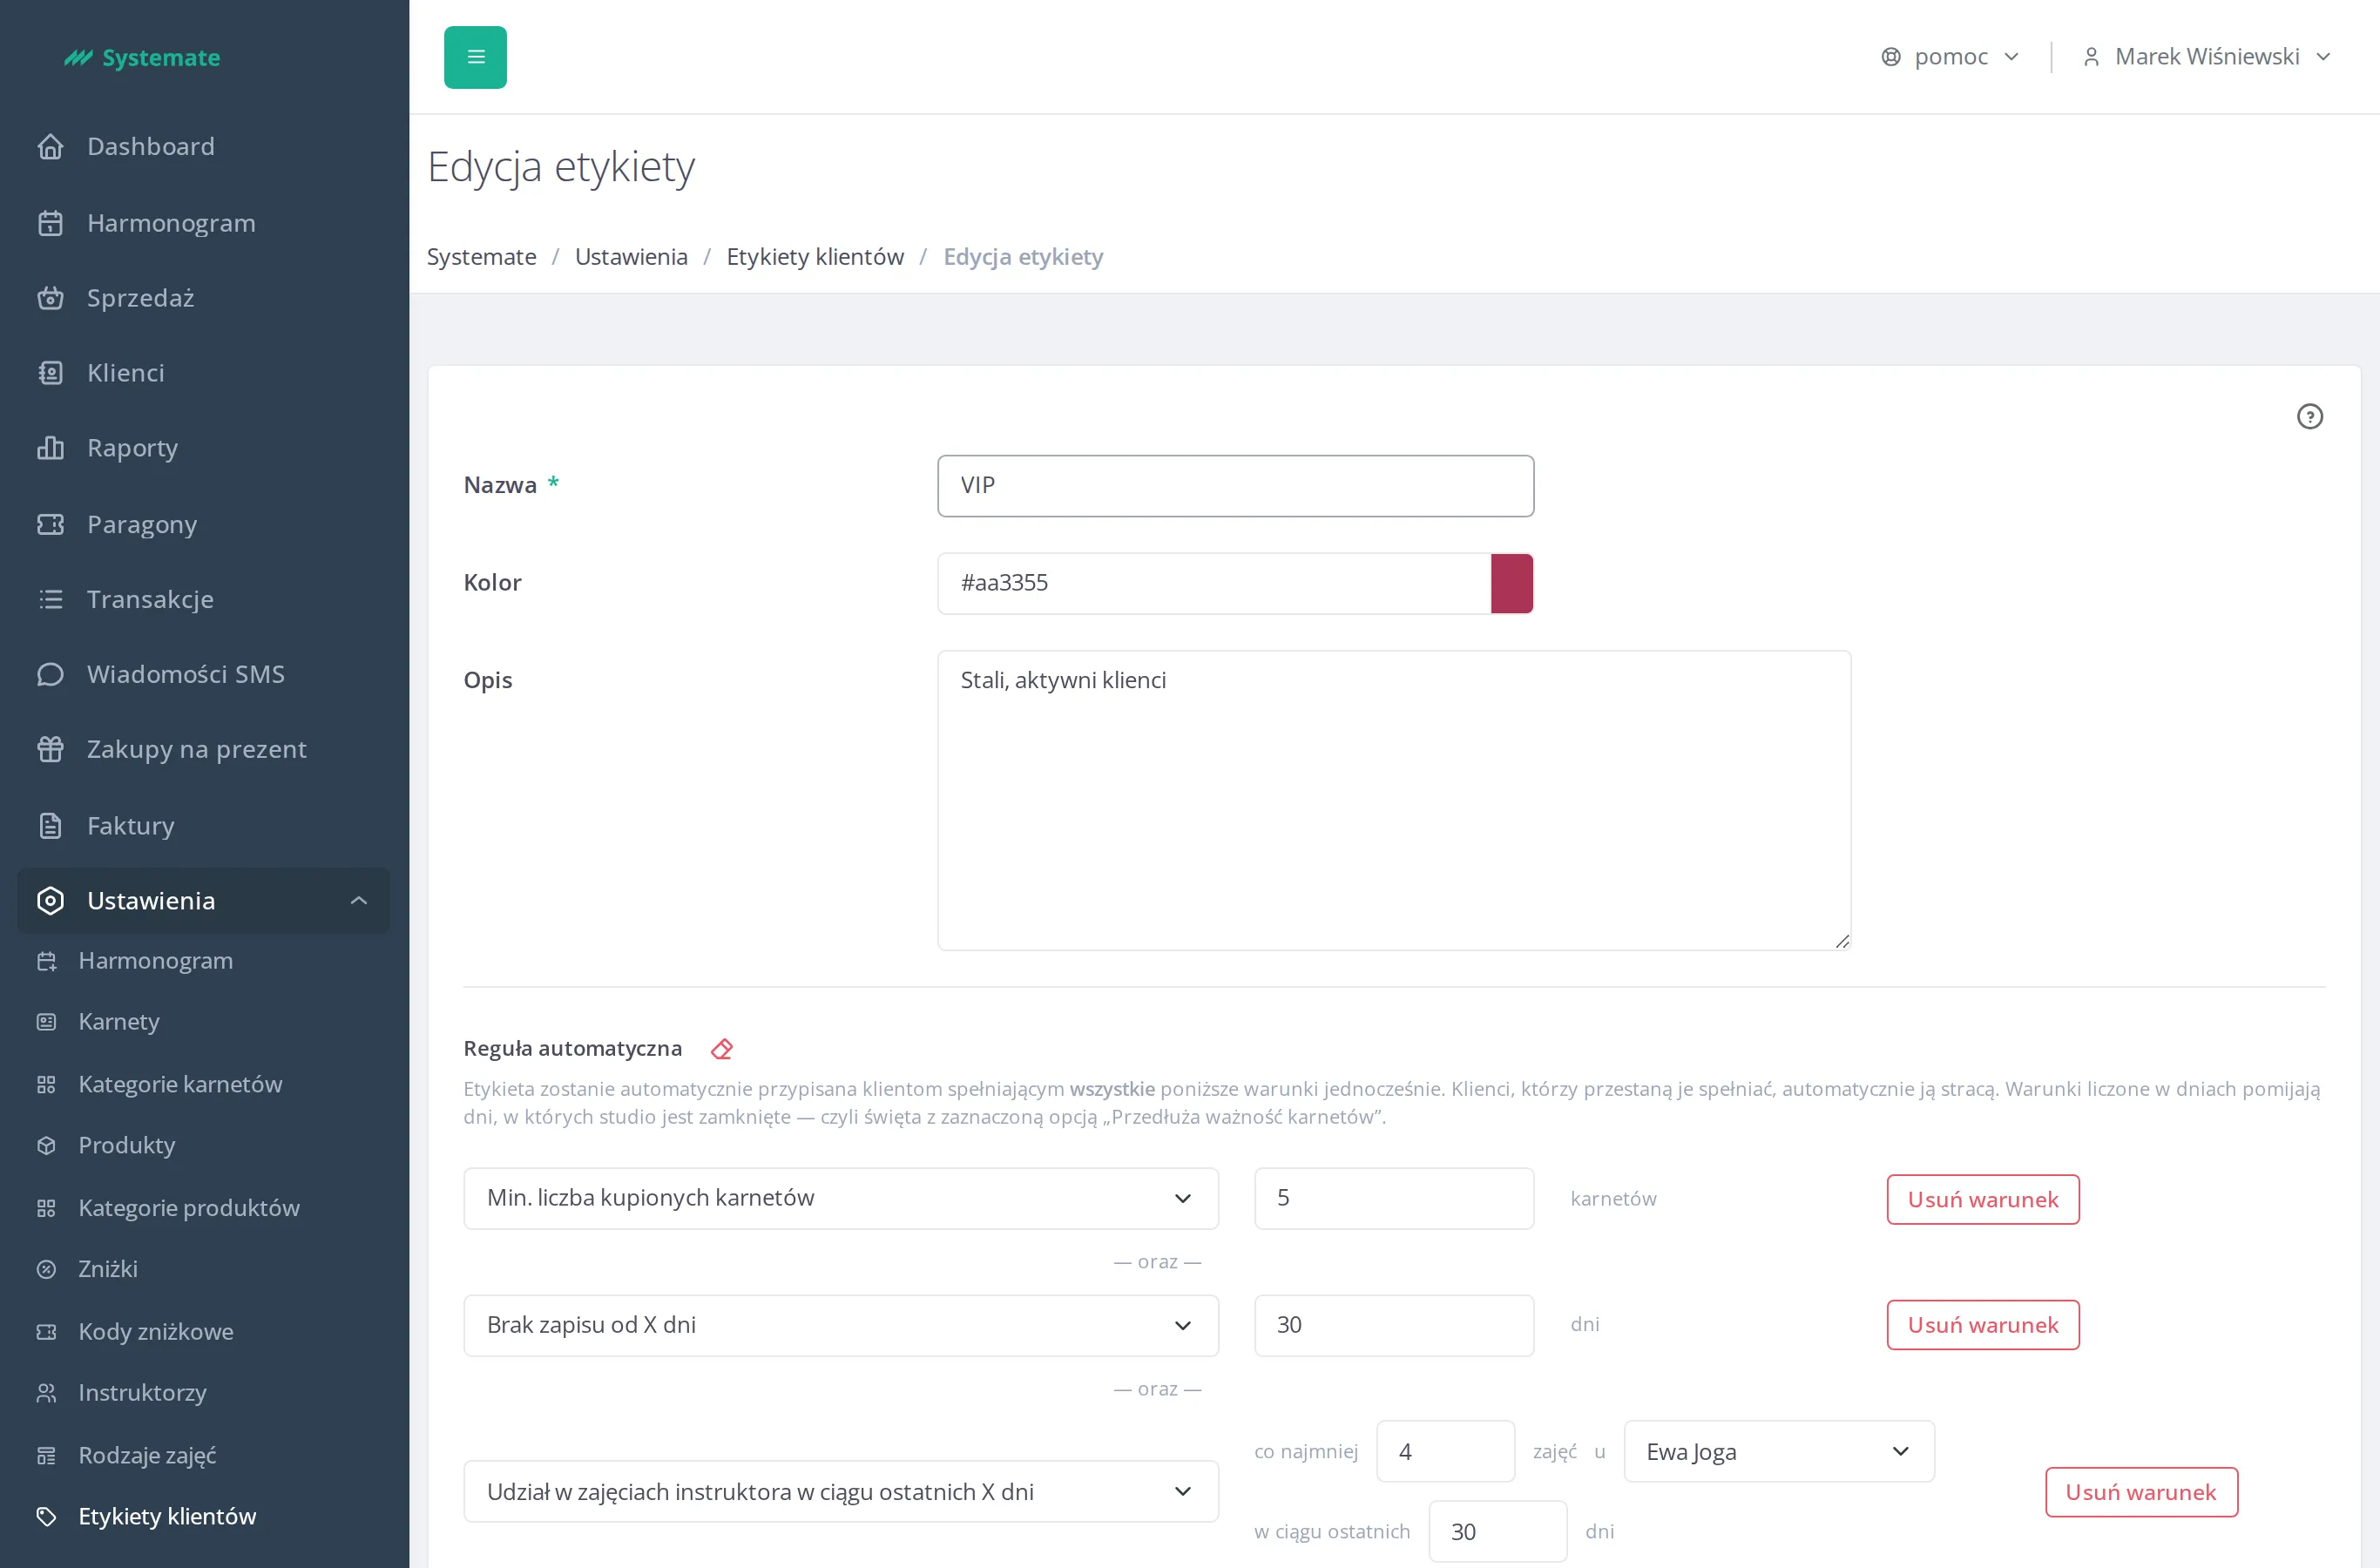
Change the name, color, description, or rule conditions, and save.
-
After you save a changed rule, the assignments recalculate automatically in the background — there is nothing extra to trigger.
Delete a tag
Section titled “Delete a tag”-
In the tag list click the delete icon next to the tag.
-
If the tag isn’t assigned to any customer, it’s deleted right away.
-
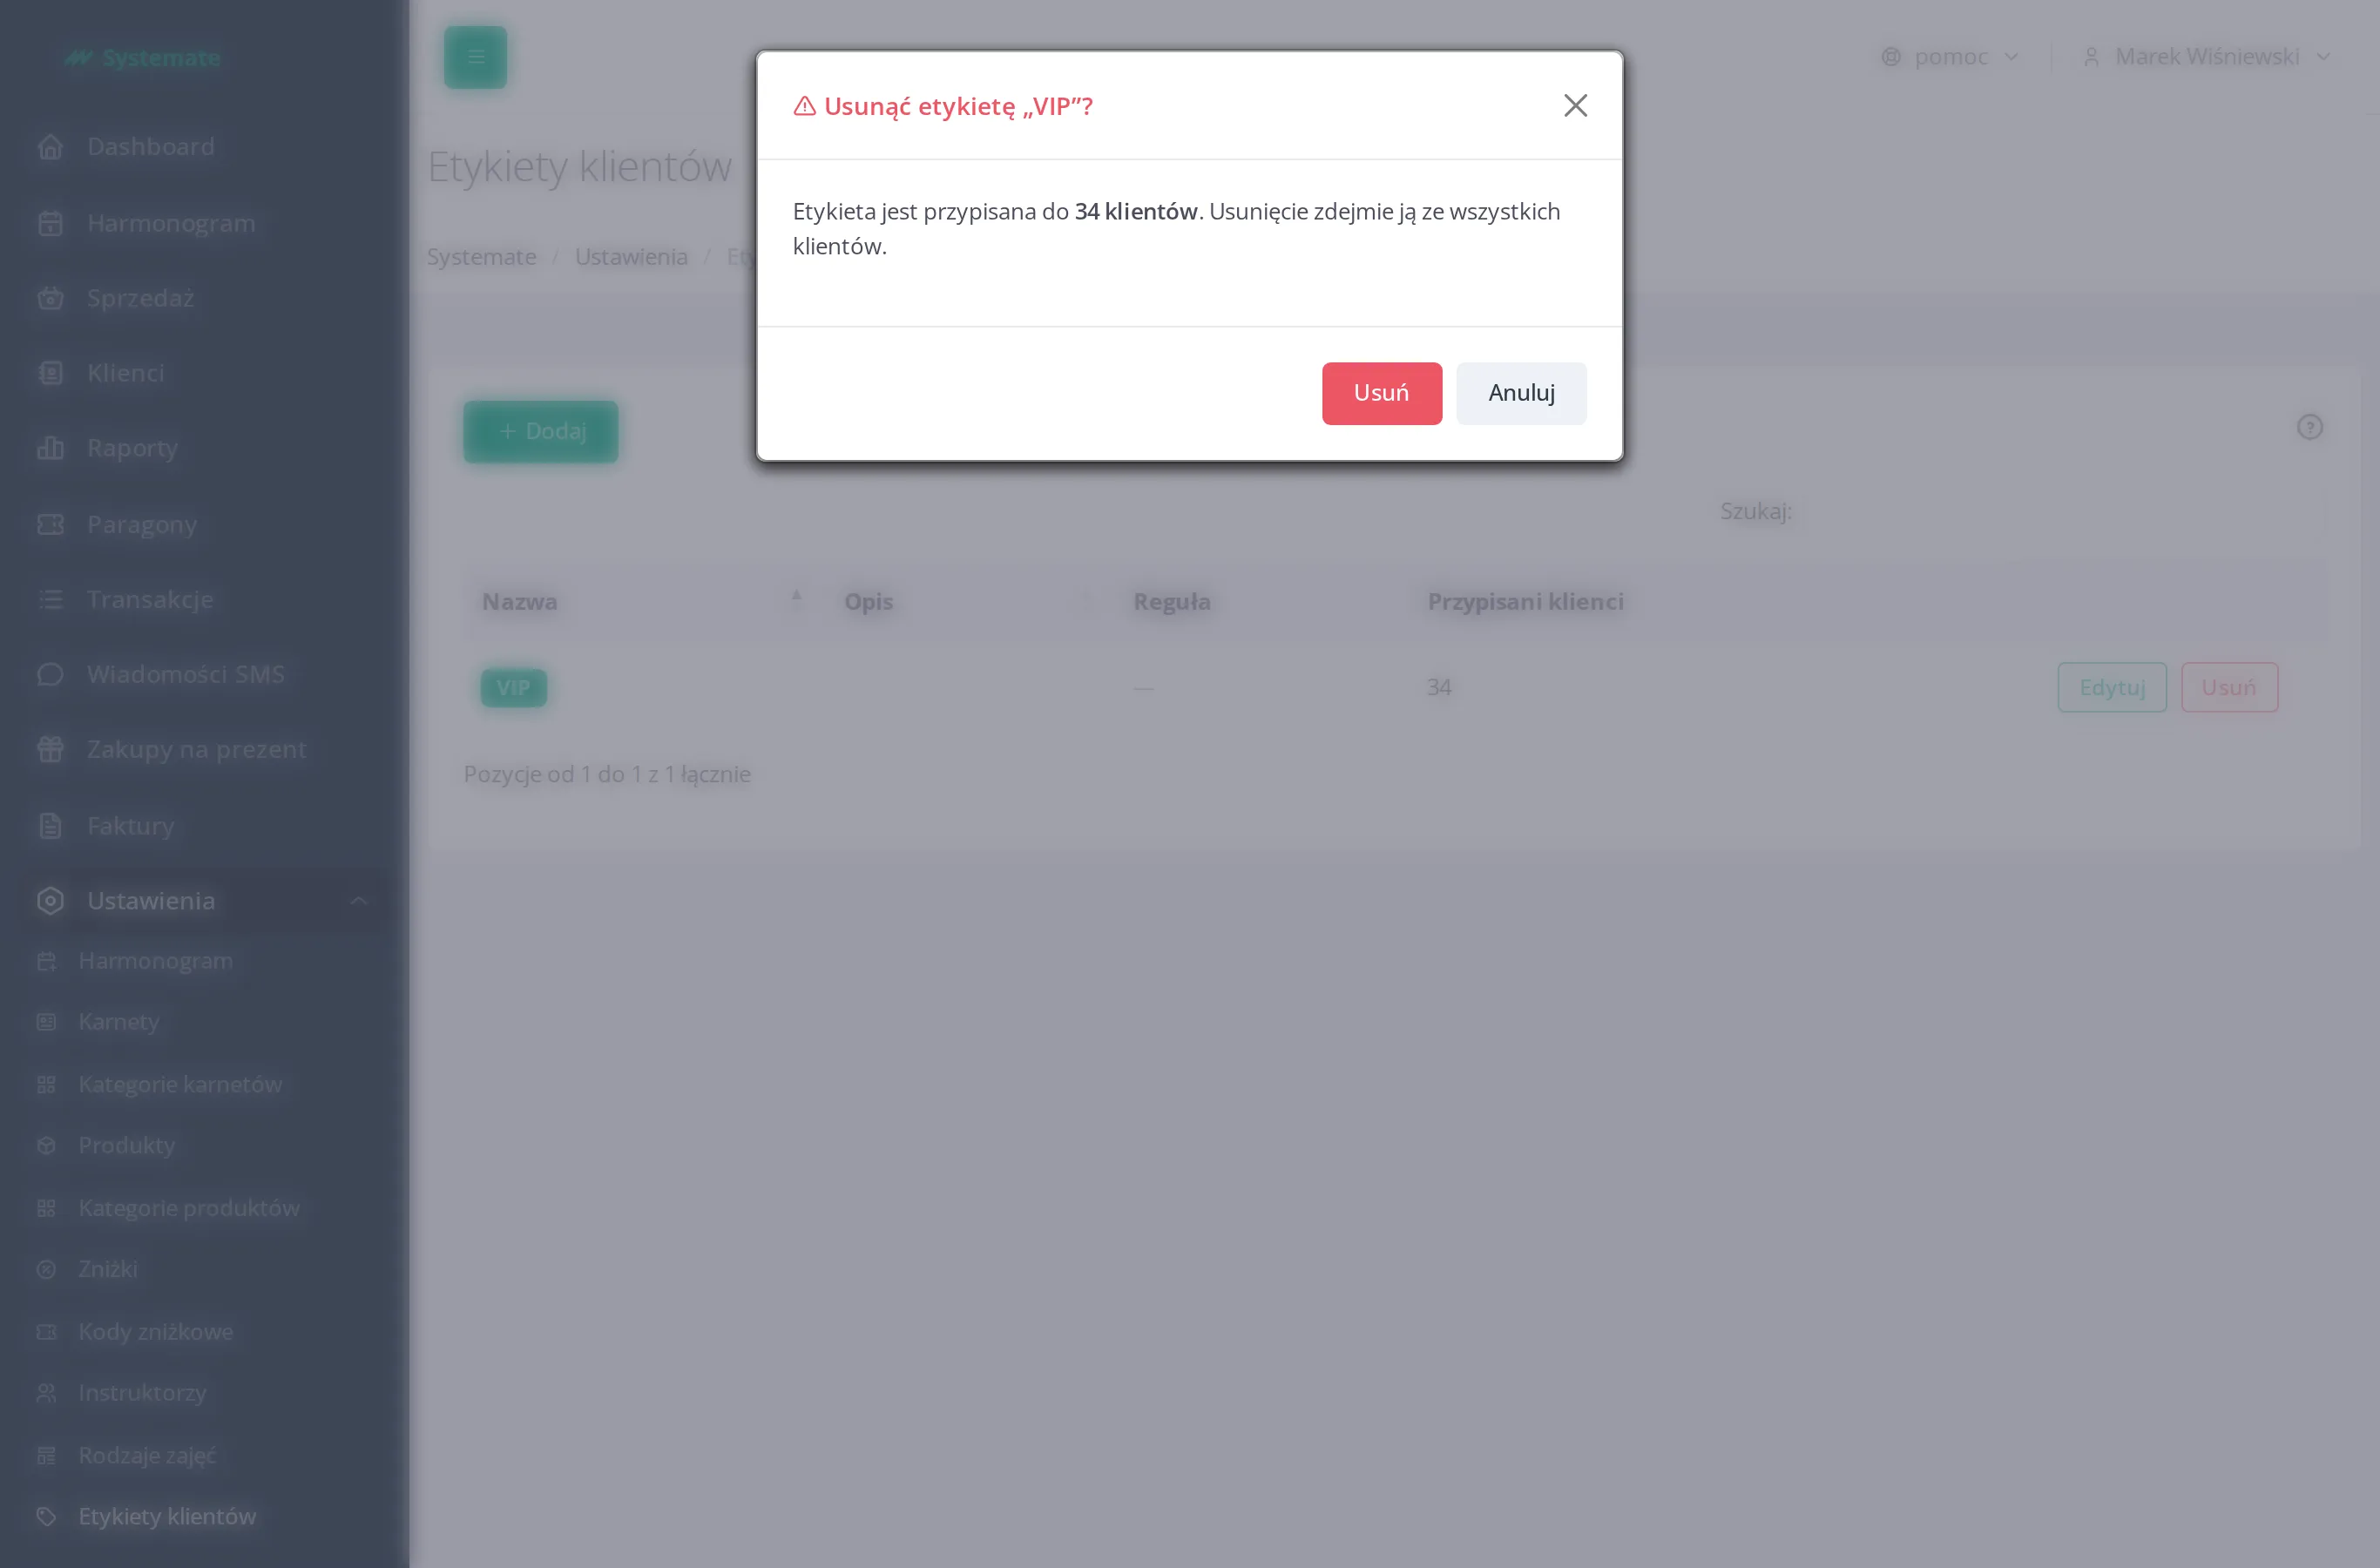
If it is assigned, you’ll see a confirmation with the number of customers who will lose it once it’s deleted.
-
Confirm to delete the tag and remove it from all customers.