Marek sends an email campaign
Marek Wiśniewski is running a weekend yoga workshop at Studio Ruchu Flow. There are few places, so instead of writing to the whole customer base he wants to invite the people who already come to yoga — in one message, rather than dozens of text messages from the front desk.
1. Marek starts a campaign and picks a template
Section titled “1. Marek starts a campaign and picks a template”He opens Email campaigns and clicks New campaign. In the picker he sees the Empty campaign tile and the templates the studio saved earlier — he chooses the Workshop invitation template so he does not have to build the message from scratch. A draft is created with the layout already in place.
Step by step: Create an email campaign.
2. He writes the content and personalises the greeting
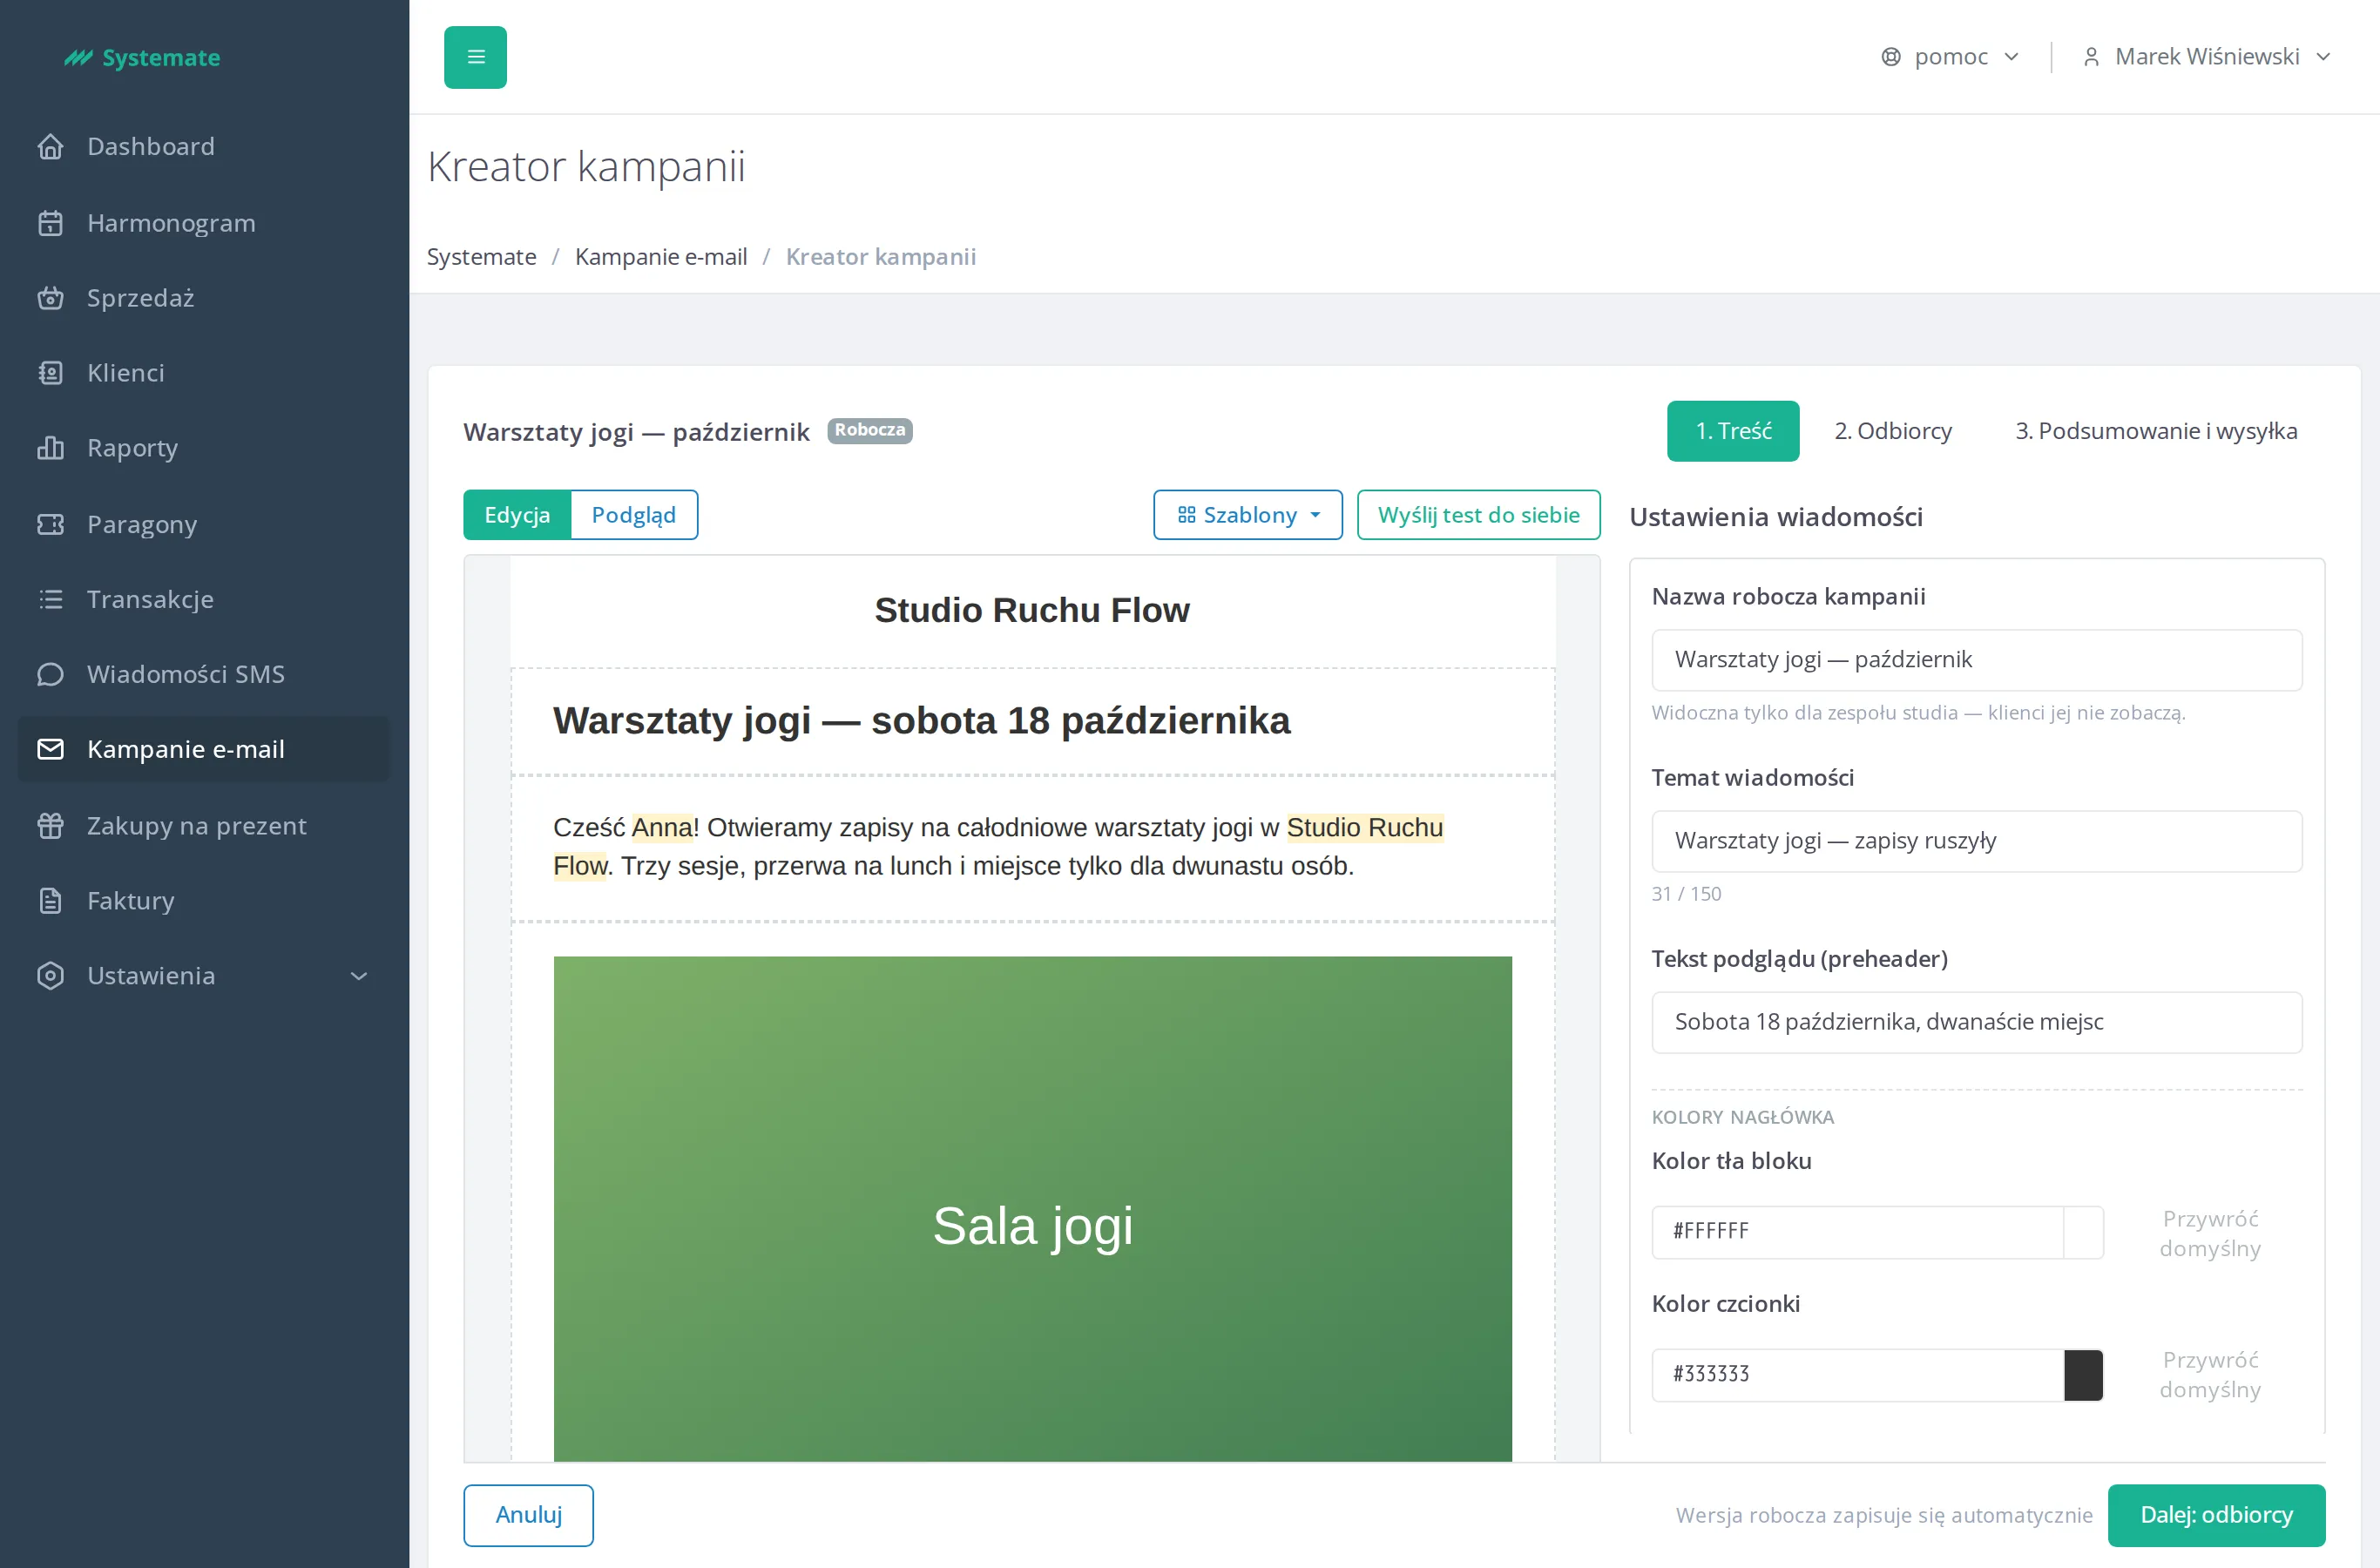
Section titled “2. He writes the content and personalises the greeting”In step 1. Content he enters the Campaign working name (“Yoga workshop — October”), the Message subject, and a short Preview text (preheader).
In the Paragraph block he puts the cursor at the start of the sentence and clicks
the ((firstName)) button — every customer will get a message that opens with her own
name. Below it he adds an Image block with a photo of the studio room, picked from
the studio library, and a Link button block pointing at the sign-up page.
The right-hand column shows the Live preview, and Marek also clicks Send a test to yourself to check the message in his own inbox.
Step by step: Manage the image library.
3. He narrows the audience to one tag
Section titled “3. He narrows the audience to one tag”In step 2. Recipients he selects Customers with a tag and picks the Yoga tag. The Will receive the message tile shows the number of customers, and the Skipped list explains the difference: some people have no marketing consent, some gave no email address. Marek knows there is no way around it — marketing messages go only to people who consented.
Step by step: Choose the campaign recipients.
4. He schedules the send for Tuesday morning
Section titled “4. He schedules the send for Tuesday morning”In step 3. Summary and sending he chooses Schedule sending and sets Tuesday, 9:00 studio time. He reviews the How the message will introduce itself section — the sender and the reply address — and the What will be sent preview. He ticks I confirm that I am responsible for the content of this message and clicks Schedule sending.
The campaign gets the Scheduled status. Marek knows he can still cancel it until Tuesday, and that customers tagged in the meantime will get the invitation too — the recipient list is only fixed when sending starts.
Below the Who to section Marek sees the month’s use of the sending limit — how much of the studio’s monthly allowance has gone out and how much is left. The invitations for one tag fit with room to spare; had the campaign not fitted in what is left, the approval button would be disabled and the message below it would give the numbers and point him at platform support, who raise a studio’s limit.
If the approval button were disabled with a paused-sending banner above the creator, it would mean Systemate had stopped the studio’s sending over bounces or spam complaints — Marek would then write to platform support and schedule the campaign once it is lifted. See Campaign sending rules.
Step by step: Schedule and send a campaign.
5. He checks how the send went
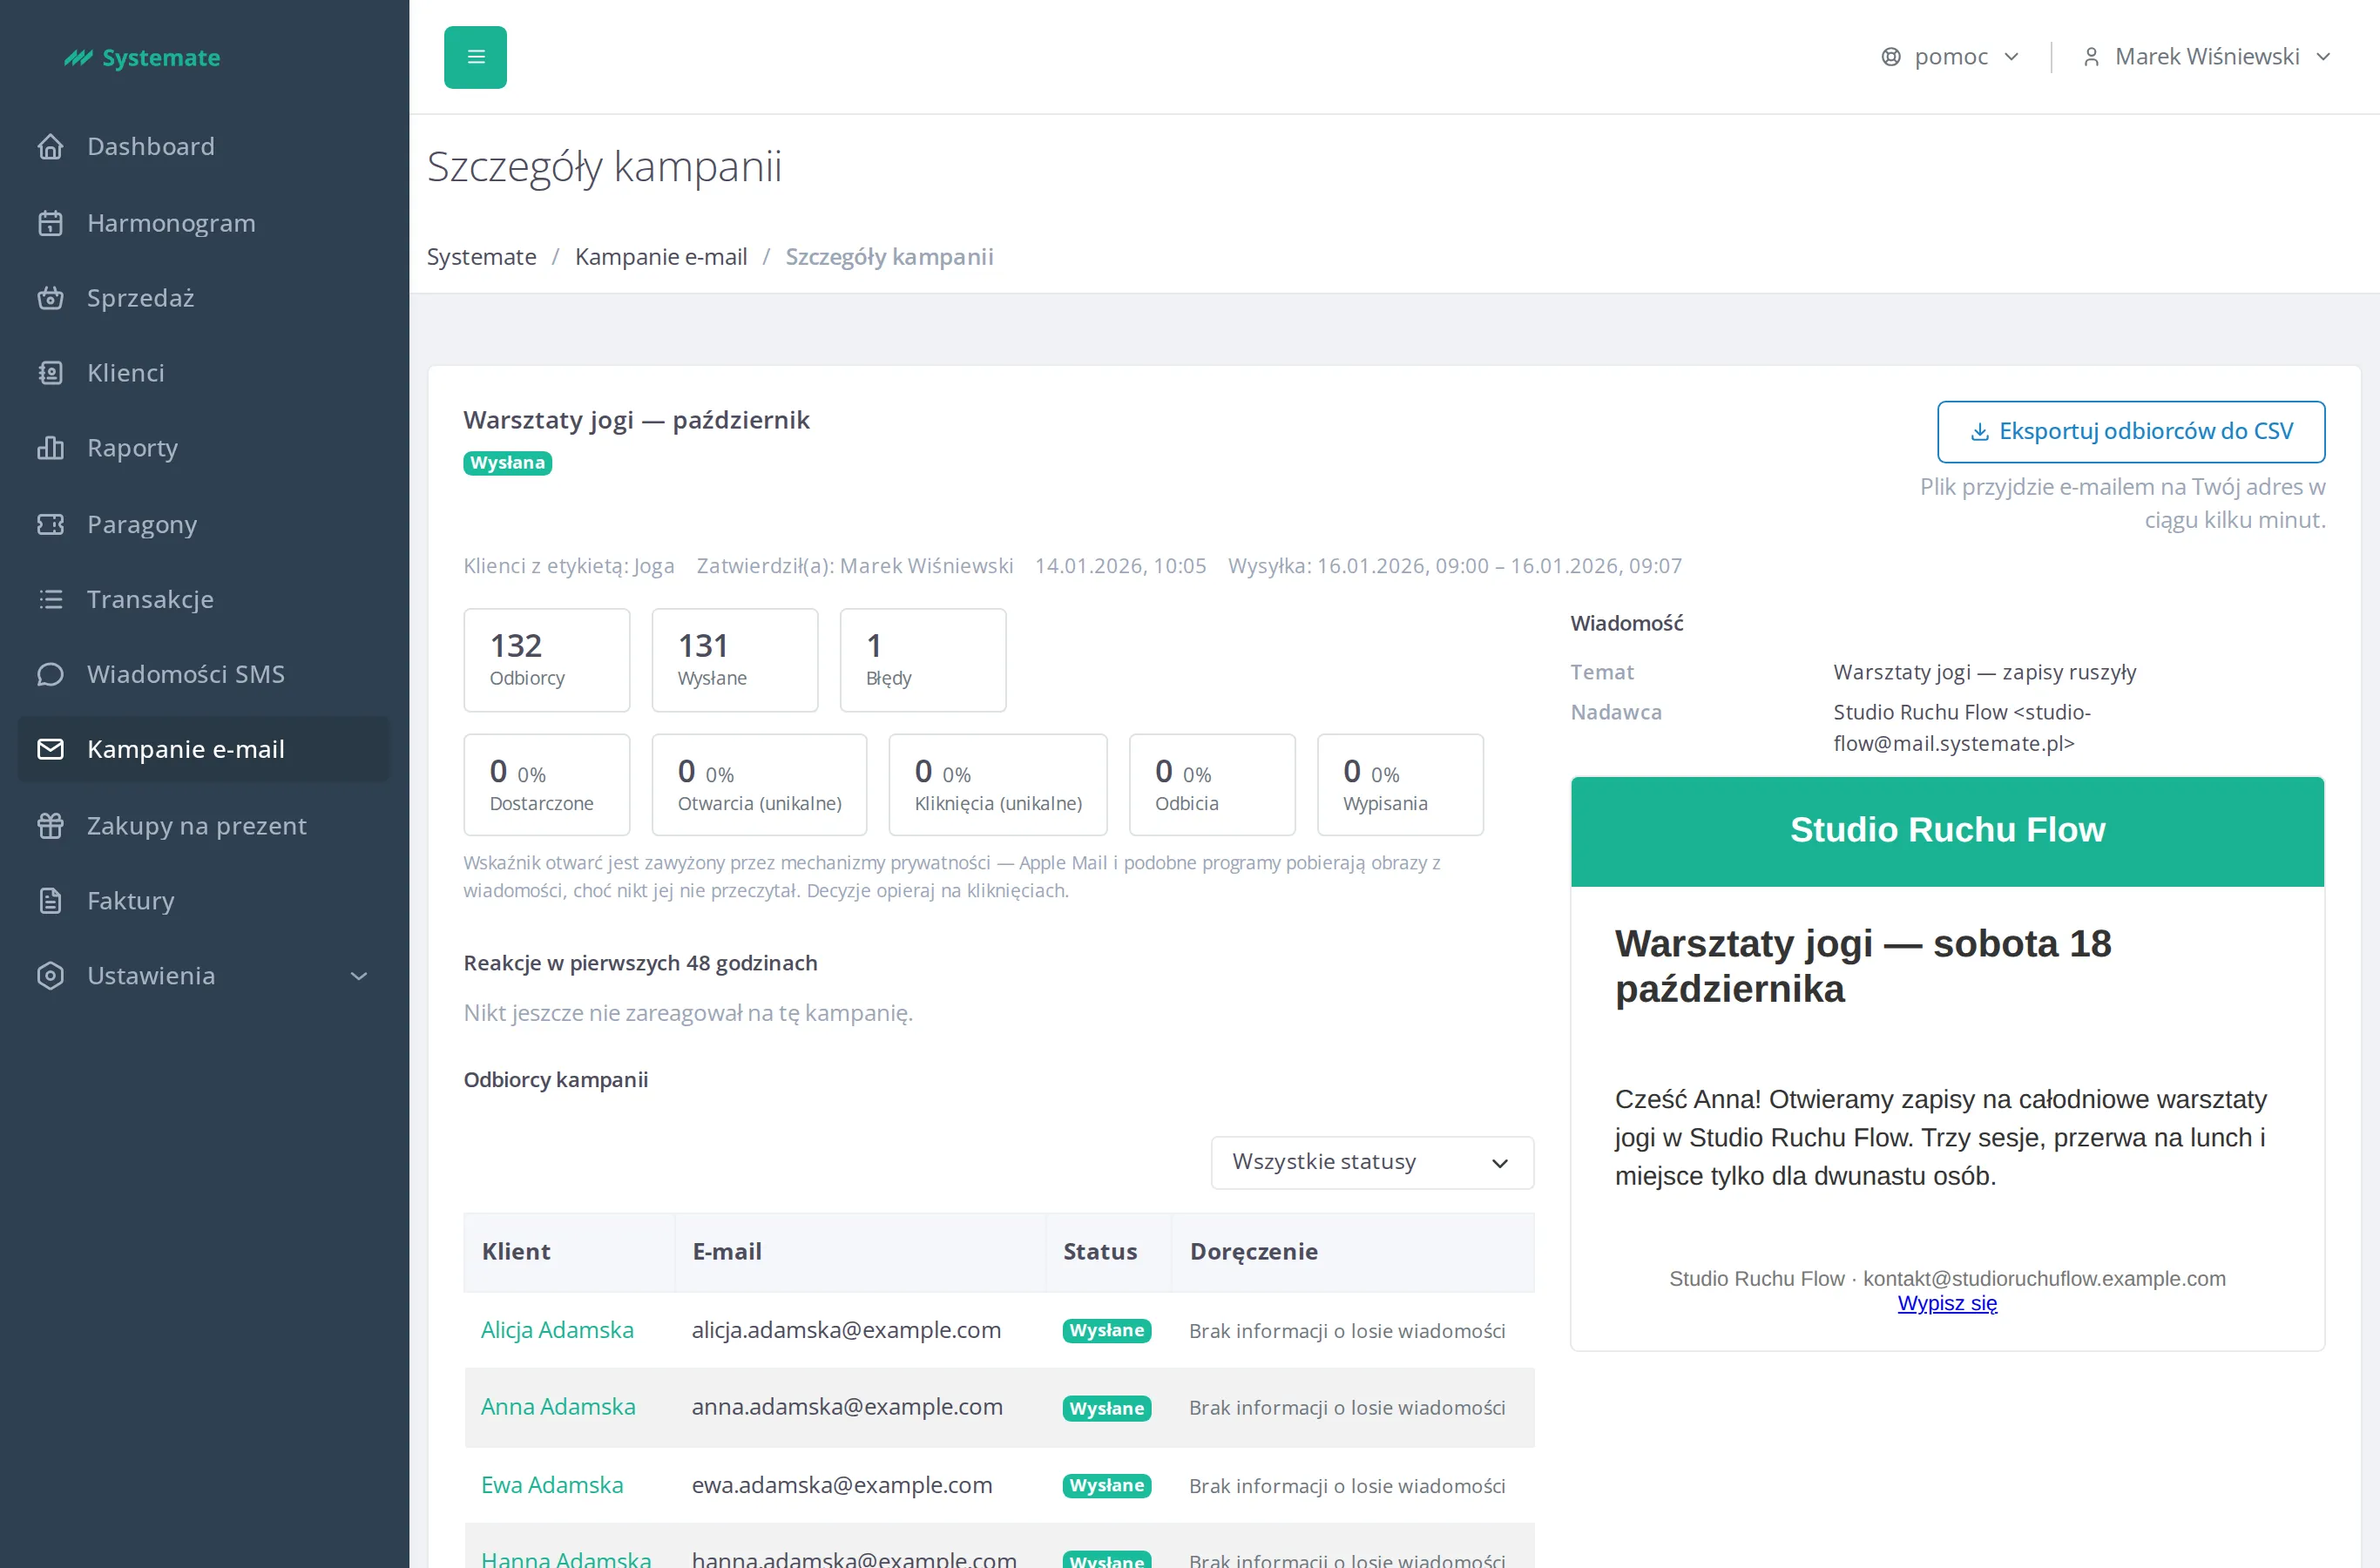
Section titled “5. He checks how the send went”On Tuesday afternoon Marek opens the campaign list — the status has changed to Sent. He opens the details and sees the Recipients, Sent, and Failed counters, and below them the recipient list, which he can filter down to the failures only. The header also records who approved the sending and when.
Below the counters sit the Delivered, Opens (unique), Clicks (unique), Bounces, and Unsubscribes cards. Marek clicks the Clicks (unique) card — the recipient table narrows to the customers who followed a link, and that is a ready call list for the reception desk: they have already shown interest. He then clicks Bounces and reads in the Delivery column what each bounce was: a Permanent bounce means the address does not exist, so he corrects it in the customer’s record, while a Temporary bounce he leaves alone — the next send may get through.
Finally he looks at the Clicked links table: more people followed the sign-up button than the schedule link, so next time the invitation will lead with the button. The Show clients button next to a link expands the list of those who clicked it.
Step by step: Track a campaign send.
The result: the invitation reached the customers who come to yoga, and only those who agreed to marketing contact; the send went out at the planned time; and the campaign details tell Marek how many messages actually made it and who clicked them.