Create a predefined discount
-
In the office panel go to Settings → Discounts.
-
Click Add.
-
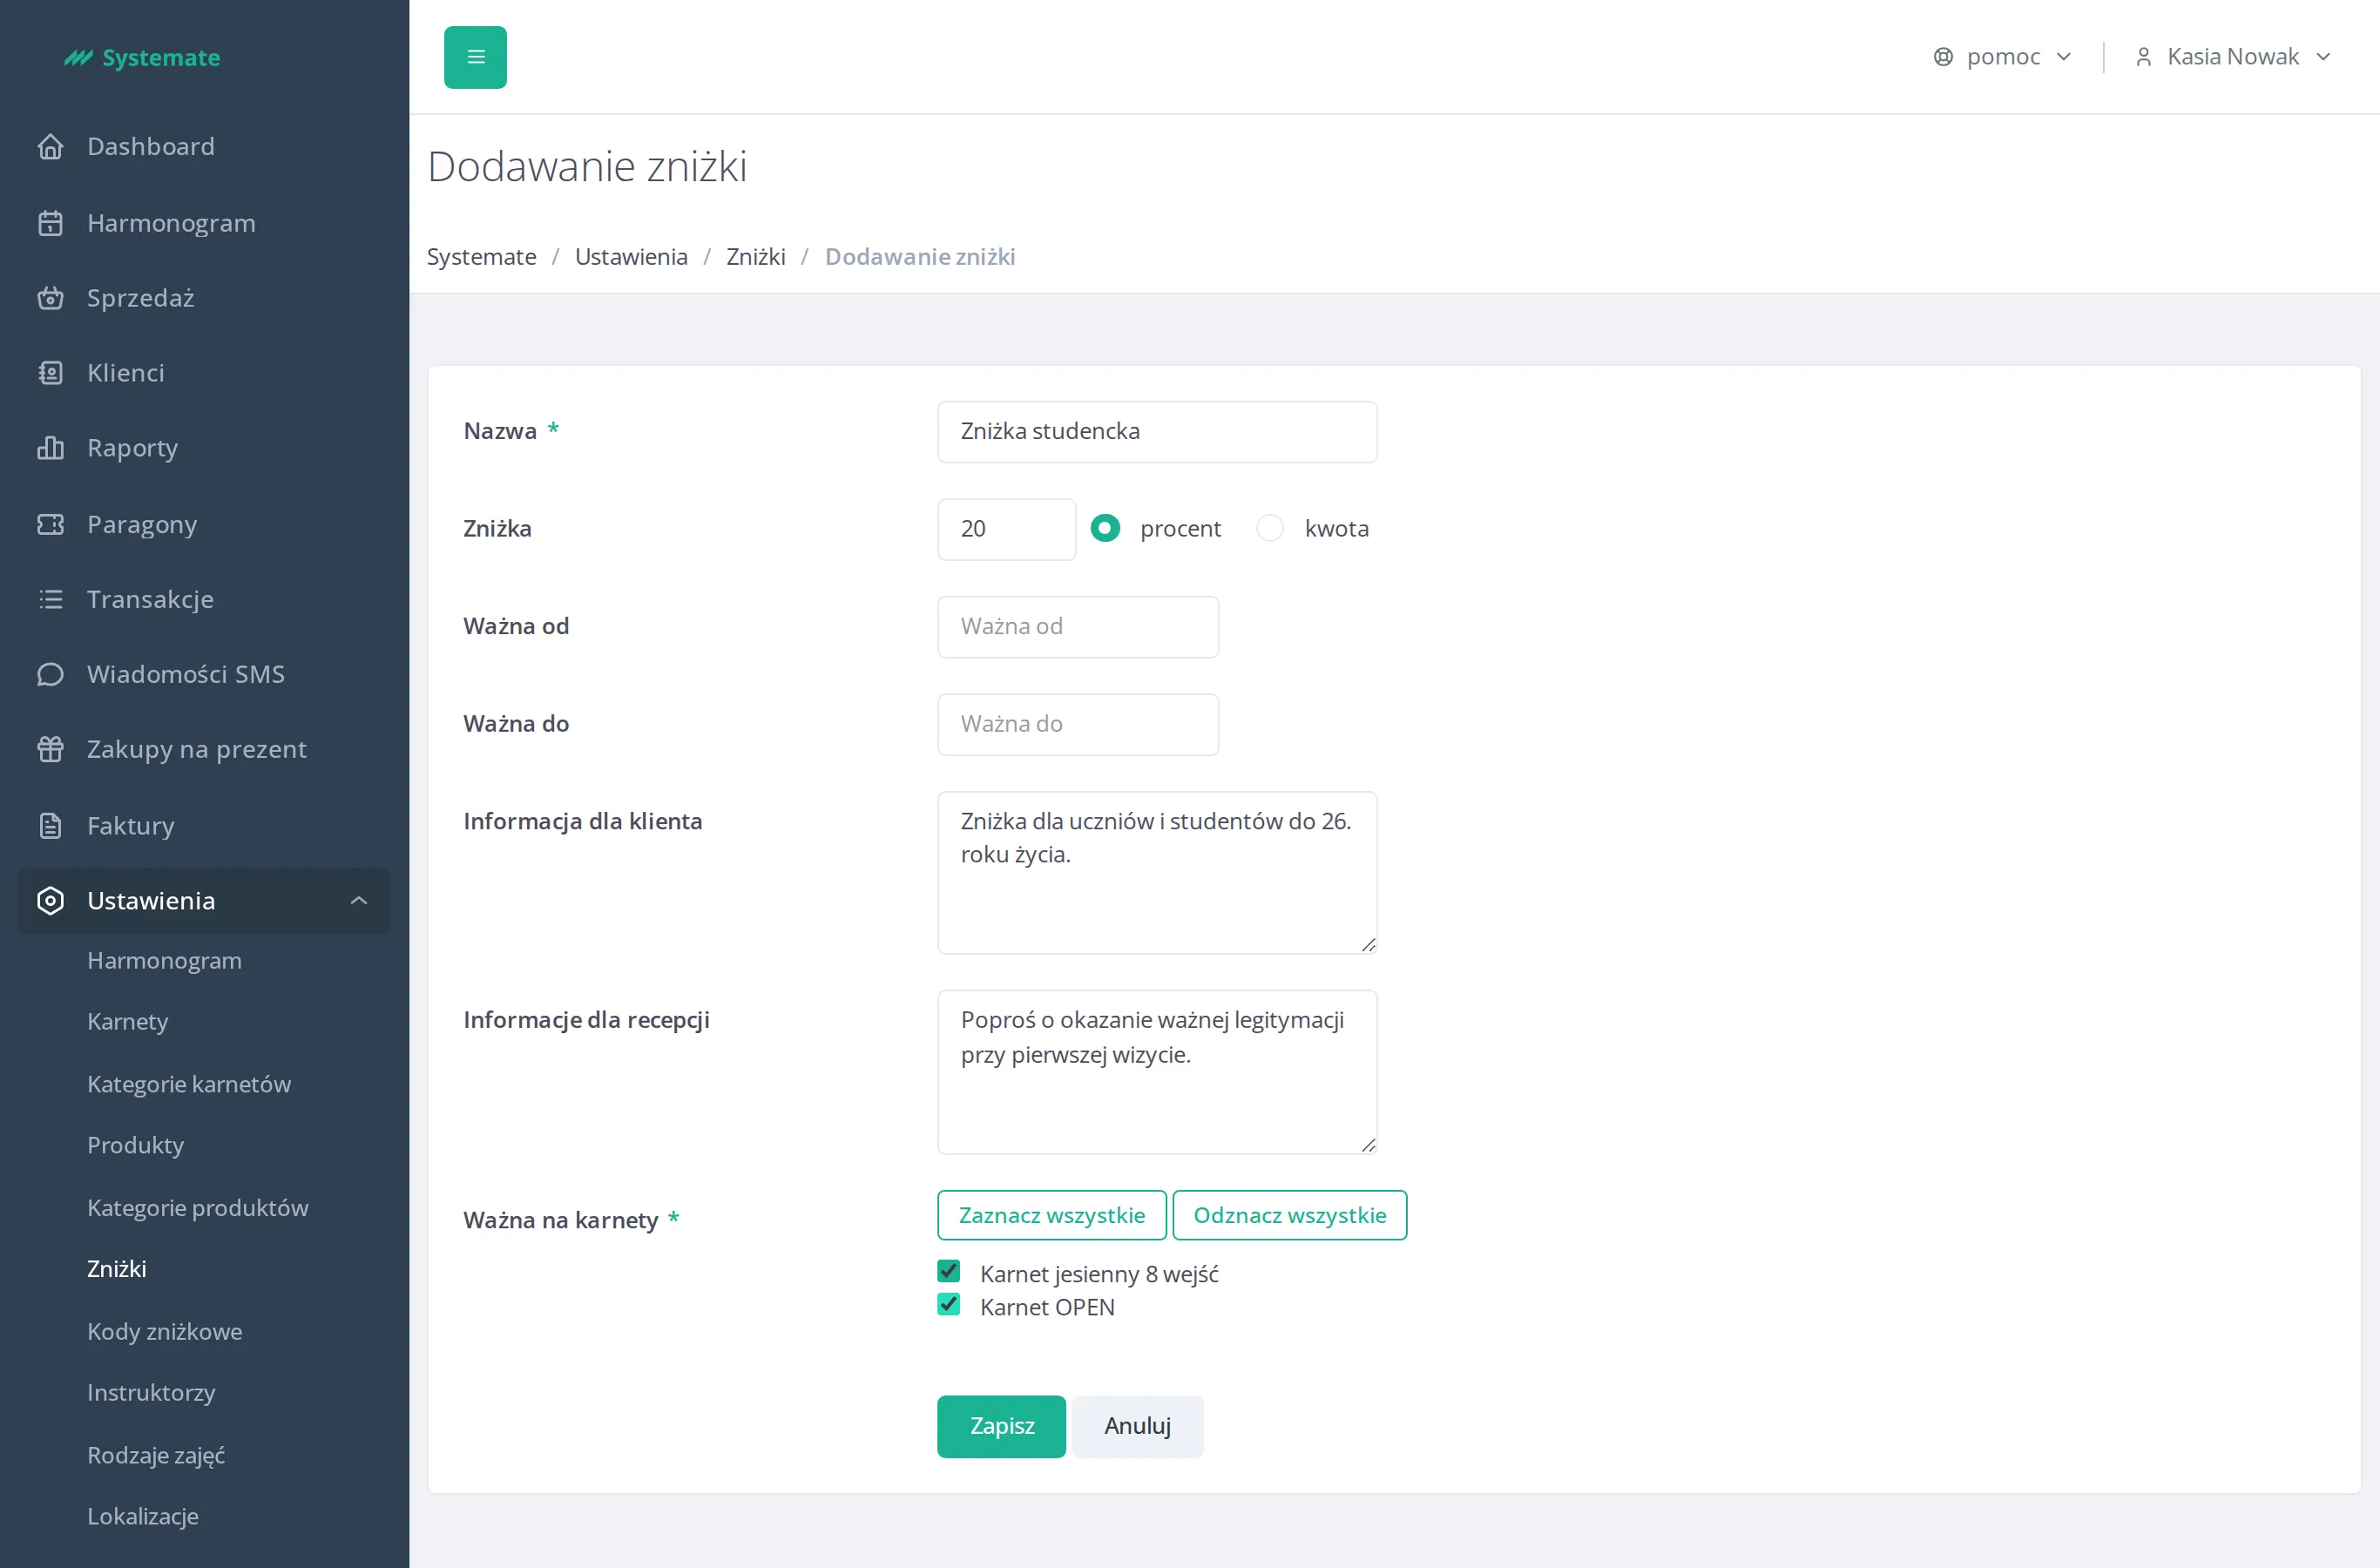
Fill in the form:
- Name — the discount name staff and customers will see,
- Discount — enter the value and choose percent or Amount,
- Valid from / Valid to (optional) — the period the discount is available,
- Client information (optional) — conditions of using the discount; this text is visible in the client panel,
- Information for the reception (optional) — e.g. how to verify entitlement to the discount; shown once, at the first visit of the client with this pass,
- Valid for passes — check the passes the discount applies to (use Select all / Deselect all to speed this up).
-
Click Save.
Where the discount is applied:
- At the front desk — when adding a pass to an order in Sale, pick the discount in the Discount dropdown (defaults to no discount); the reception note appears under Terms. See Sell a pass at the front desk.
- Online — when buying one of the selected passes in the customer panel, the customer can pick the discount on the purchase screen; the Client information text is shown next to it.