Getting Started in a New Studio
After logging into the office panel for the first time, you’ll see the Getting Started card on the Dashboard, above the statistics. The card shows what needs to be done before clients can sign up for classes, and each button opens the relevant page immediately.
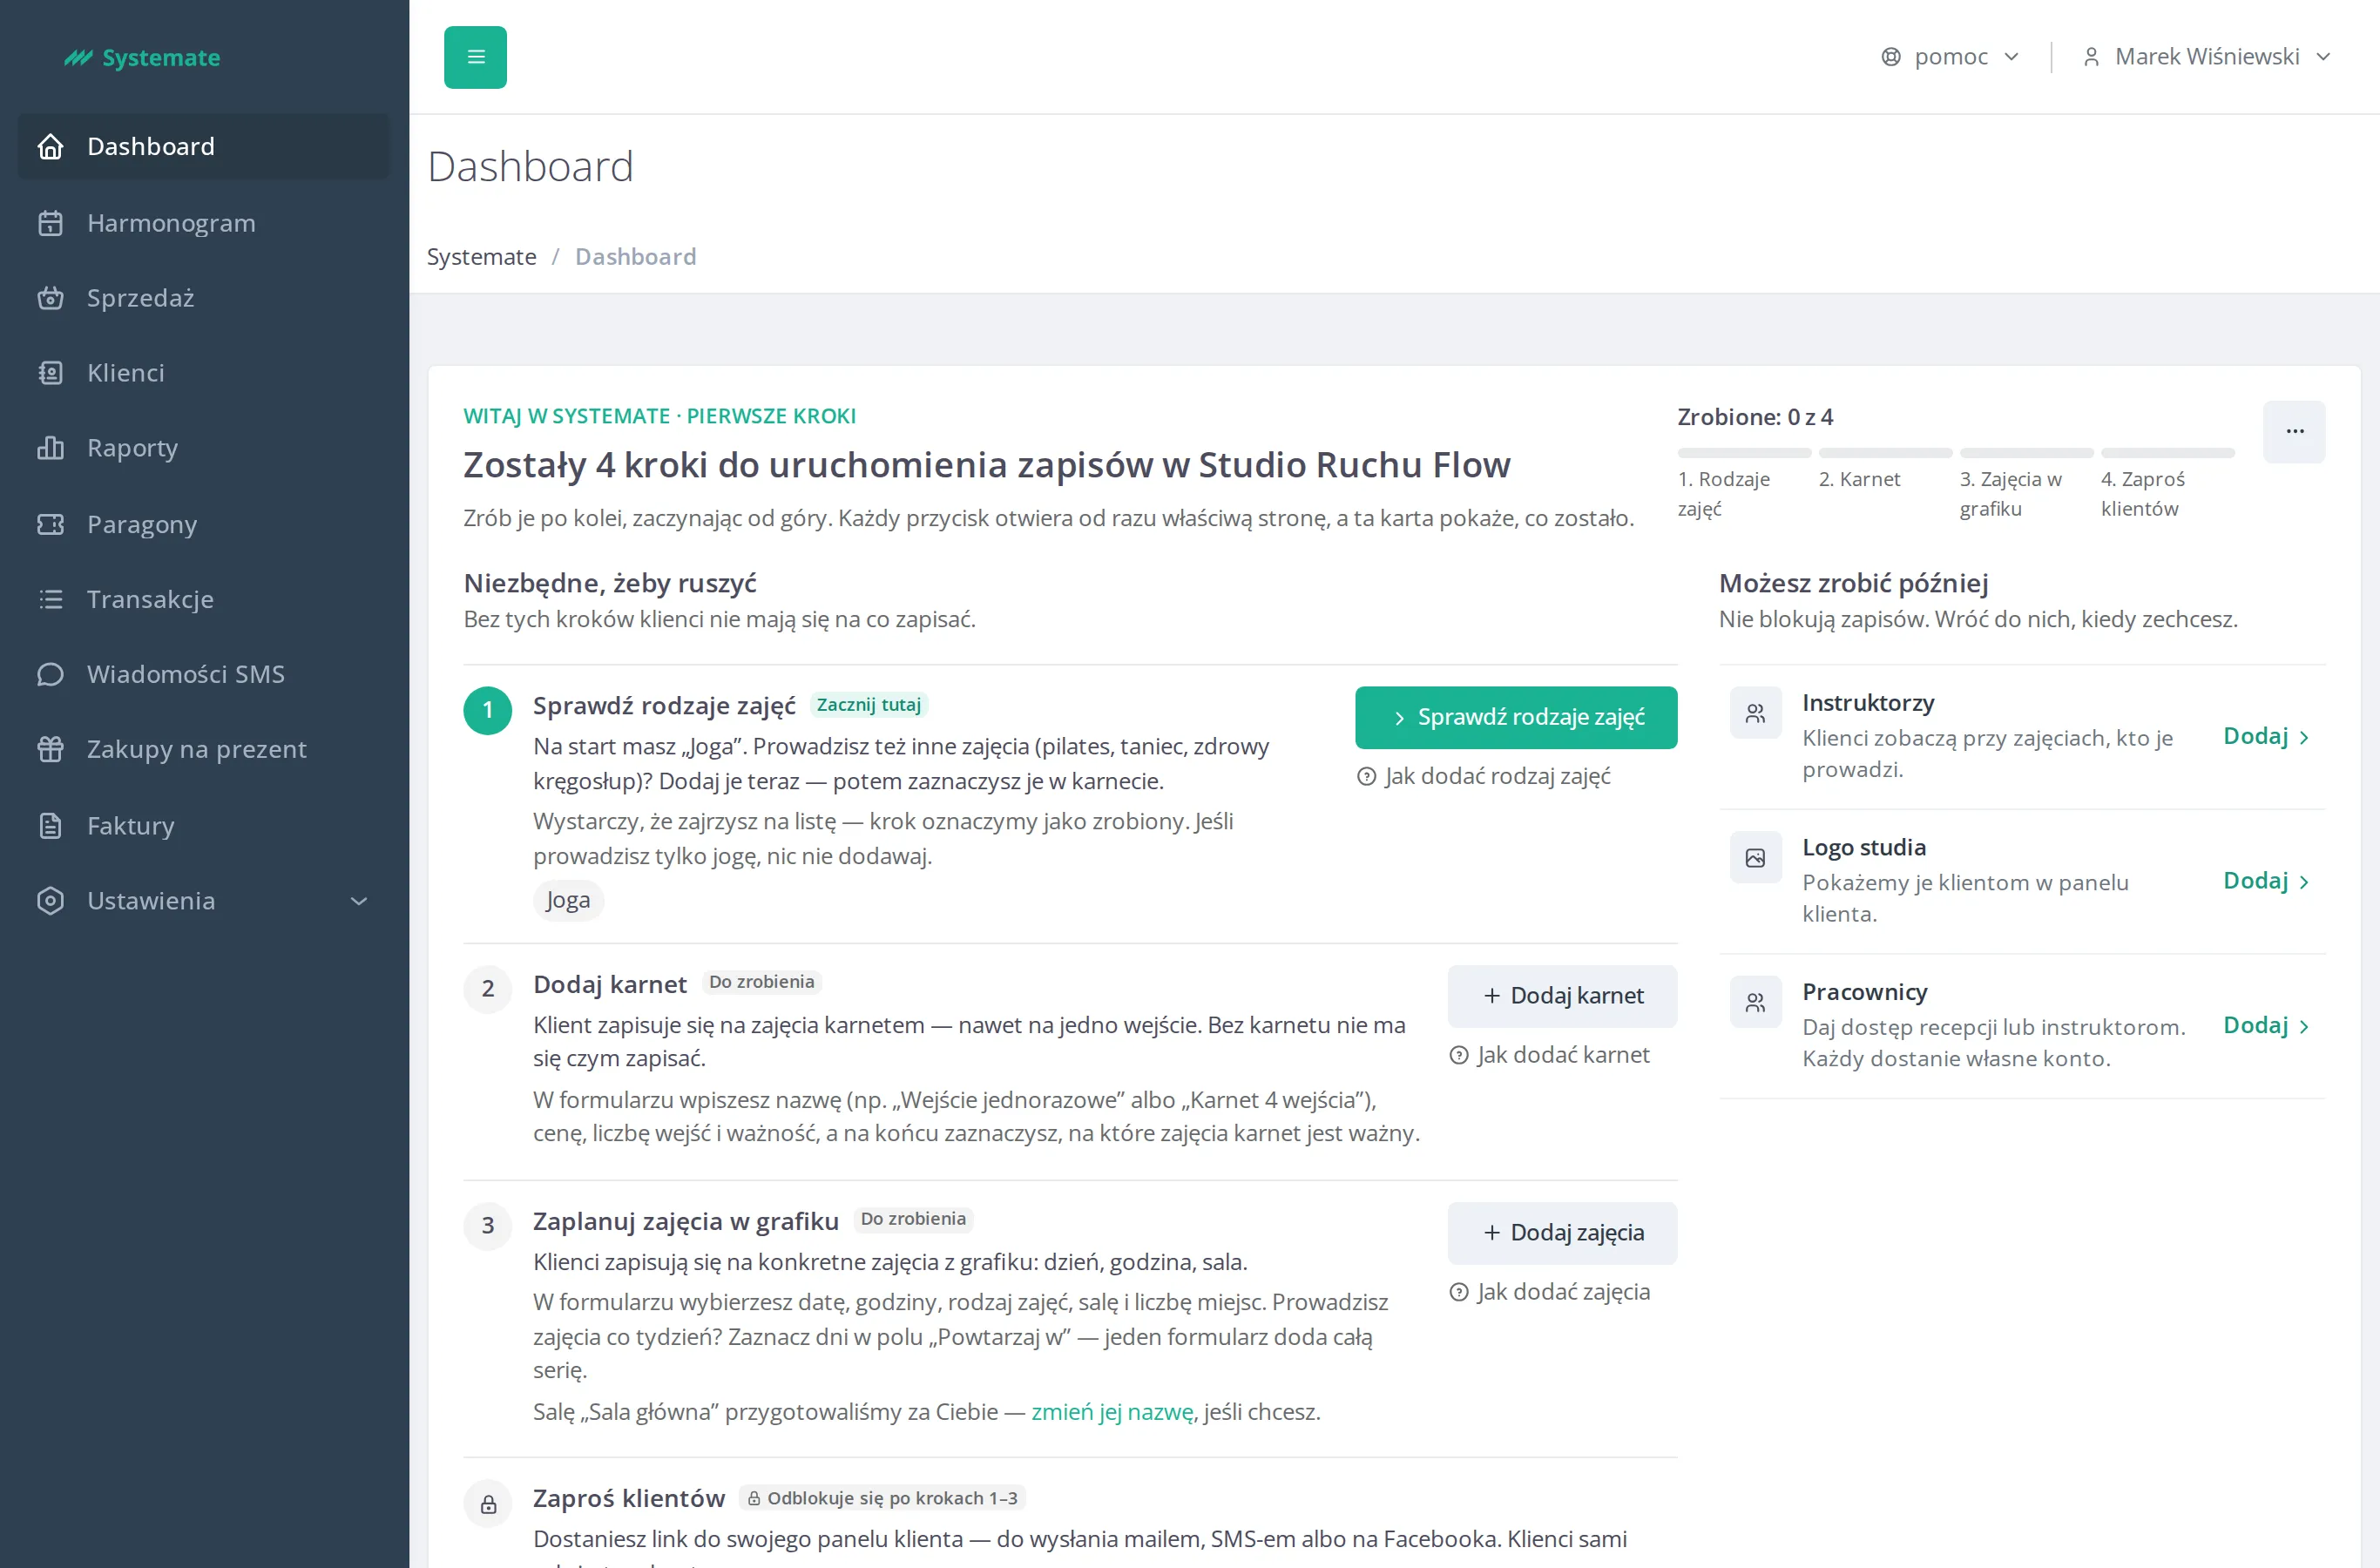
The card is visible to the staff member who can manage class types, passes, and the schedule — usually the studio owner. The card header features a Done: N of 4 counter and a bar with four segments, one for each step.
Only a newly created studio gets this card. In a studio that was already running classes or had clients before the card was added to the panel, the card does not appear.
Four steps
Section titled “Four steps”You complete the steps one by one, starting from the top. Each step has a label indicating its status: Start here or Now for a step you should tackle next, To Do, For improvement, and Done.
1. Check class types
Section titled “1. Check class types”The new studio has a class type already set up (e.g., “Yoga”). Click Check class types and add the other classes you teach. If you only teach those, don’t add anything — just look at the list. This step is complete once you’ve opened the list from the card or once you already have a pass. The list of class types opened from the card has a ← Back to the first steps link.
2. Add a pass
Section titled “2. Add a pass”A client signs up for classes using a pass — even for a single entry. Click Add pass, fill out the form, and in the Valid for classes field select which classes the pass covers. After saving the pass, you return to the dashboard. This step is complete once you have a pass and every class type is covered by a pass that is currently on sale. Workshop passes do not count.
3. Schedule classes
Section titled “3. Schedule classes”Clients sign up for specific classes: day, time, and room. Click Add classes — this opens the class form in Settings → Schedule. Classes held weekly can be added with a single form by selecting the days in the Repeat on field. After saving, you return to the dashboard. This step is complete when the schedule has classes from today onward; the card then shows the nearest class.
4. Invite clients
Section titled “4. Invite clients”The final step unlocks after steps 1–3. Here you get the address of your client panel with the Copy the link and Open the client panel buttons. Send the link to clients — via email, text message, Facebook, or Instagram — or embed it on your website. This step has no “Done” status: once the link has been sent, click Done, close.
If your studio doesn’t have online payments connected, a client can sign up for classes only with a pass sold at the front desk (Sales menu). See Set up online payments.
The “For improvement” status
Section titled “The “For improvement” status”If you have a pass, but some class type isn’t covered by any pass currently on sale, step 2 gets the For improvement status. The card lists these classes — clients won’t be able to sign up for them. The button in this step opens the pass form immediately, where you can select the missing classes, or — if you have several passes — the list of passes. You can also add a separate pass for these classes.
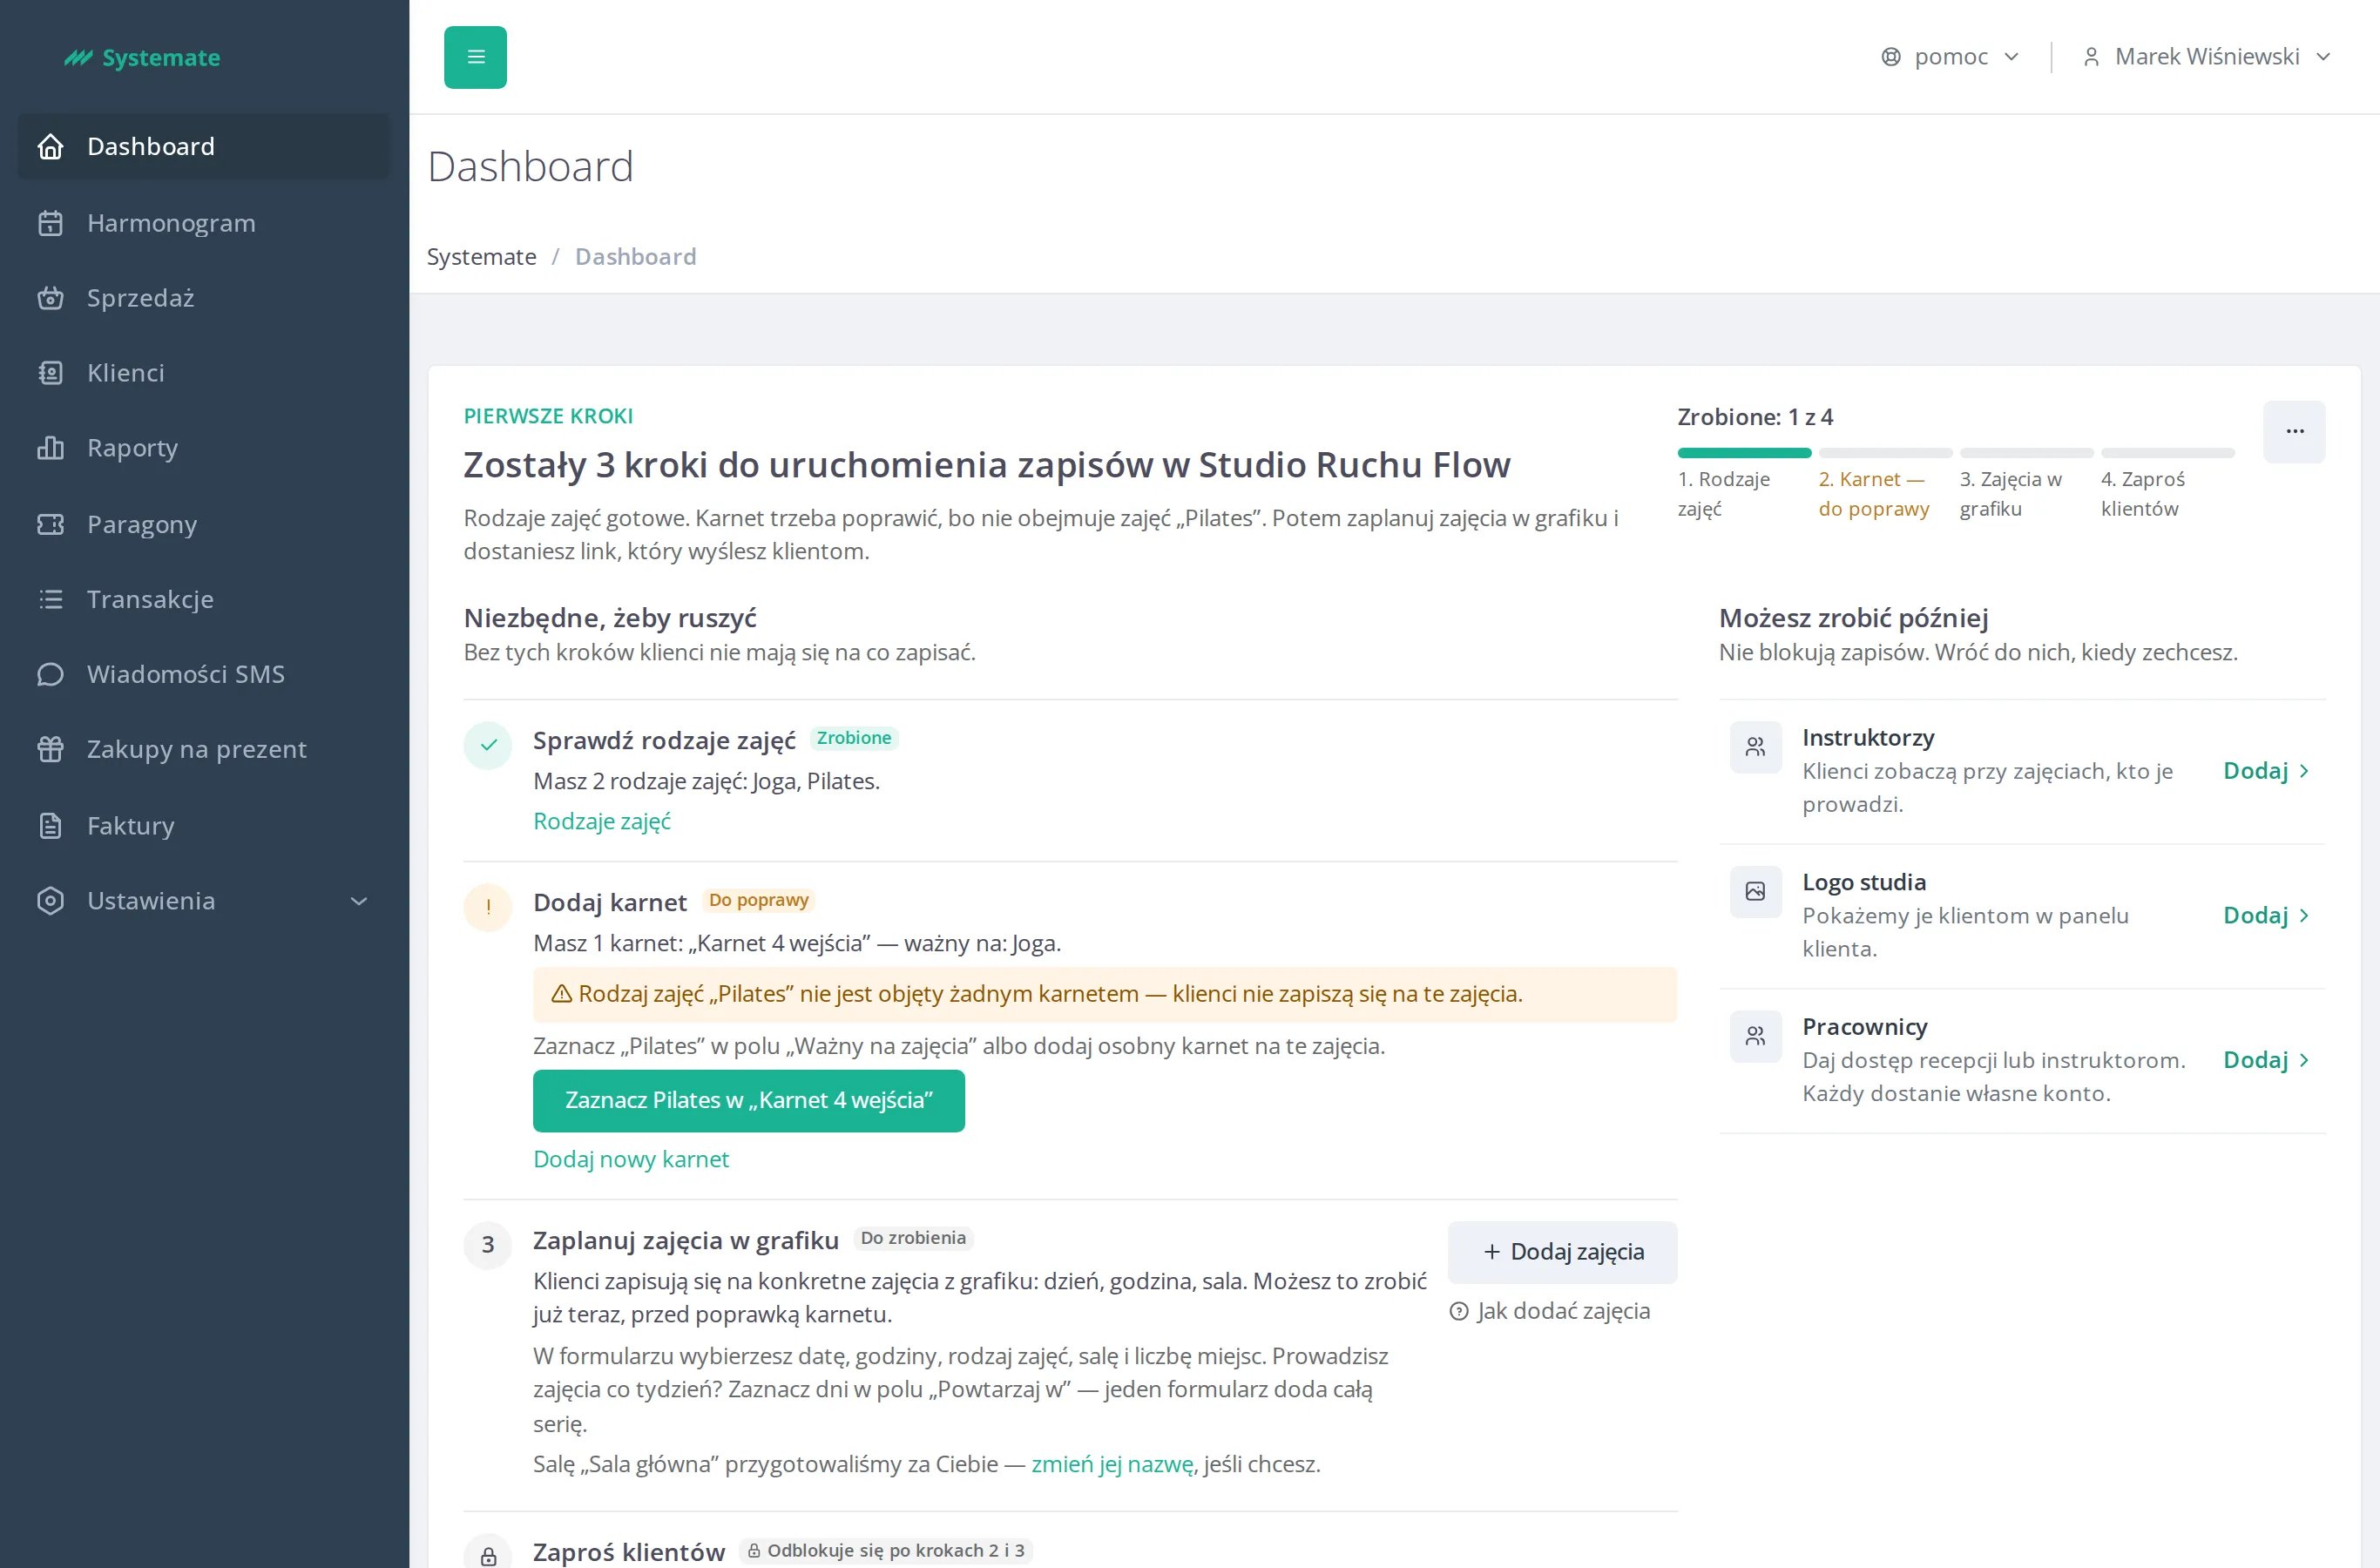
A completed step can become not completed again — for example, if you add a new class type without a pass or if the last scheduled class has passed. The card shows this immediately.
You can do this later
Section titled “You can do this later”The right column of the card lists items that do not block sign-ups: Online payments, Instructors, Your first and last name, Studio logo, and Staff. You only see the items you have permission for. For online payments, the card shows whether they’re already connected.
Collapsing and hiding the card
Section titled “Collapsing and hiding the card”The ⋯ menu in the corner of the card has two options:
- Show again later collapses the card into a narrow bar. The bar shows the counter or — after steps 1–3 — a link to the client panel with a Copy the link button. Show all expands the card again.
- Hide the first steps hides the card. The card is also hidden by Done, close in step 4 and Close on the bar.
The card collapses automatically 14 days after you first see steps 1–3 completed, provided they are still completed. If you expand it with Show all, it no longer collapses on its own.
How to bring the card back
Section titled “How to bring the card back”You can restore a hidden or collapsed card from the Help → Getting Started menu on the top bar of the panel. The dashboard opens with the full card.
Saved progress
Section titled “Saved progress”The card reads steps 2 and 3 from the studio’s data, so they are the same on every device. Opening the class types list, collapsing and hiding the card are remembered by the browser — separately for each employee. On a different computer or after clearing your browser data, the card is visible again, and step 1 without a pass returns to not completed.