Connect a fiscal printer
Receipts from the office panel are printed by the Systemate Paragony program, installed on the computer to which the fiscal printer is connected. The wizard in the office panel guides you through the installation and activation of the program.
You can find the wizard under Settings → Fiscal Printer. It is visible to employees with Fiscal Printer Management. Systemate enables the fiscal printer for your studio— if you don’t see this menu item, please contact us.
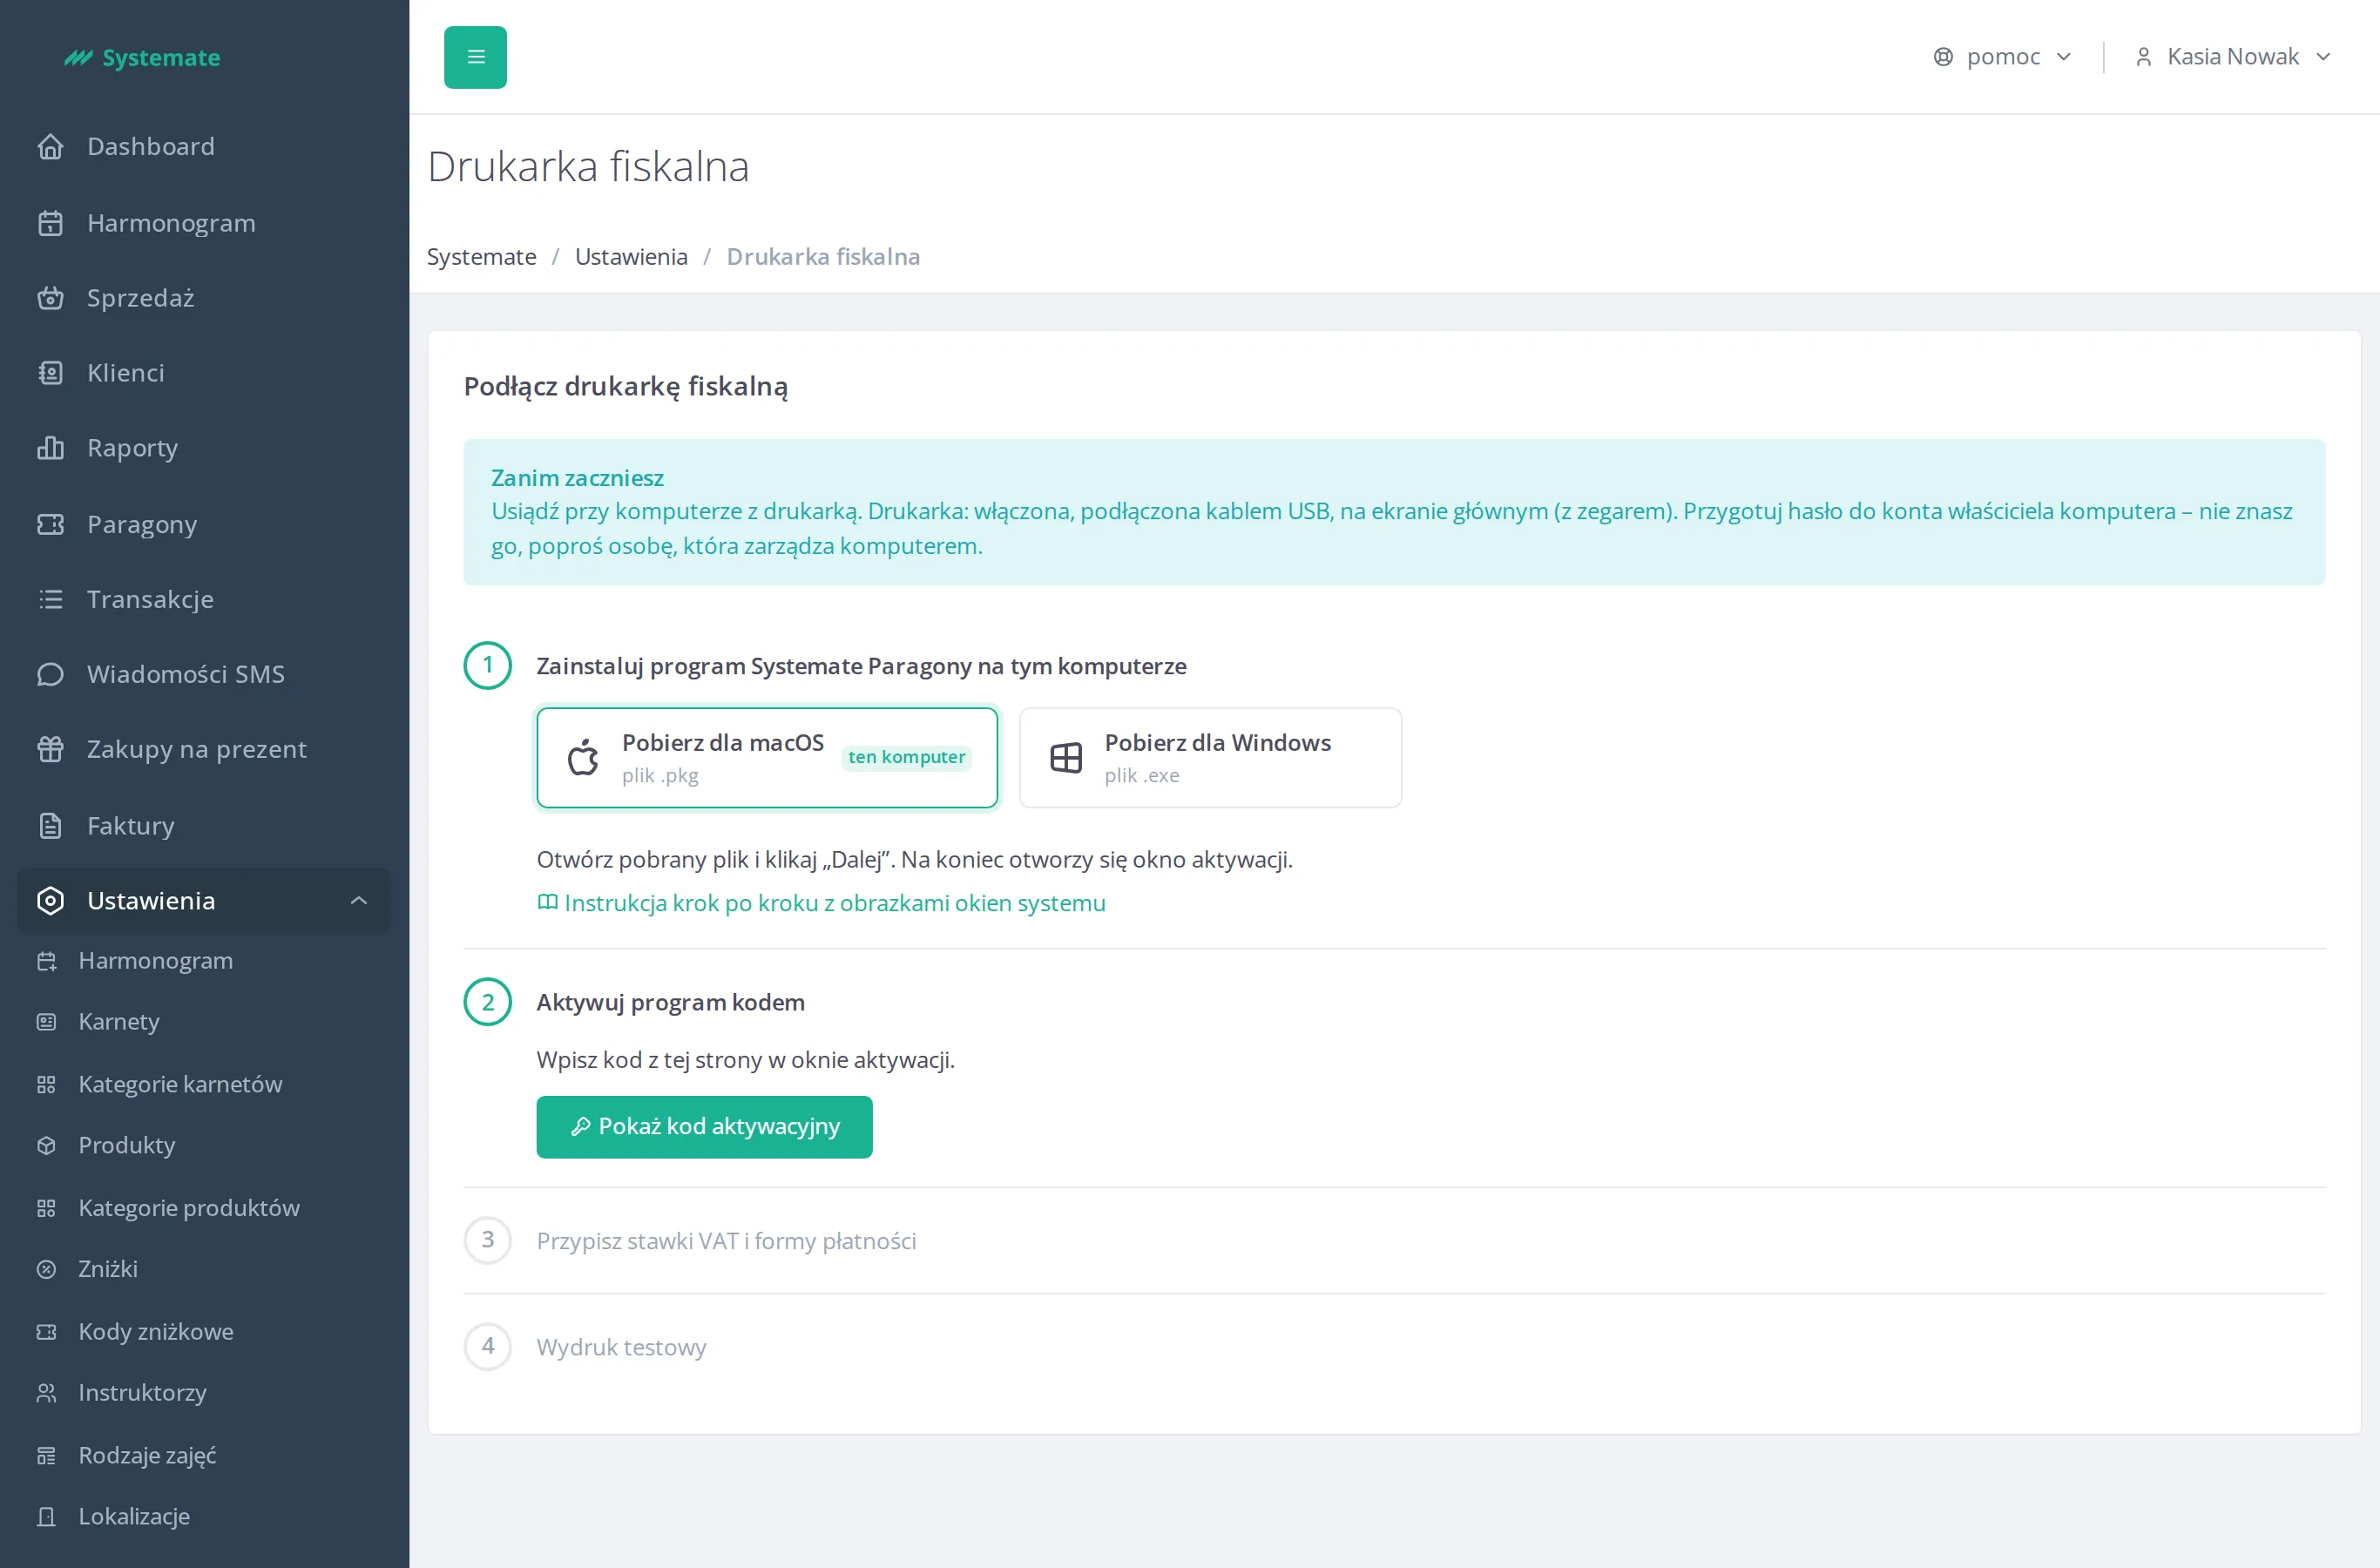
Before You Begin
Section titled “Before You Begin”Sit down at the computer with the printer. The printer should be turned on, connected via a USB cable, and displaying the home screen (with the clock). Have the password for the computer’s owner account ready—if you don’t know it, ask the person who manages the computer.
Step 1. Install the program
Section titled “Step 1. Install the program”- Open the office panel on the computer connected to the printer and go to Settings → Fiscal Printer.
- Click Download for macOS (.pkg file) or Download for Windows (.exe file). This computer’s system is labeled this computer.
- Open the downloaded file and click Next. At the end, the Systemate Paragony icon appears next to the clock — clicking it opens the activation window.
Every installer window is described on the pages Install Systemate Paragony on macOS and Install Systemate Paragony on Windows.
If the download buttons are grayed out, the installer is currently unavailable—report the issue in the Help menu.
Step 2. Activate the program with a code
Section titled “Step 2. Activate the program with a code”- In the wizard, click Show Activation Code.
- Click Copy and paste the code into the program’s activation window (or type it in manually). The code is valid for 15 minutes—you can see the expiration time below the code—and works only once.
- If the code has expired, click New Code. The new code replaces the previous one, and the previous one stops working.
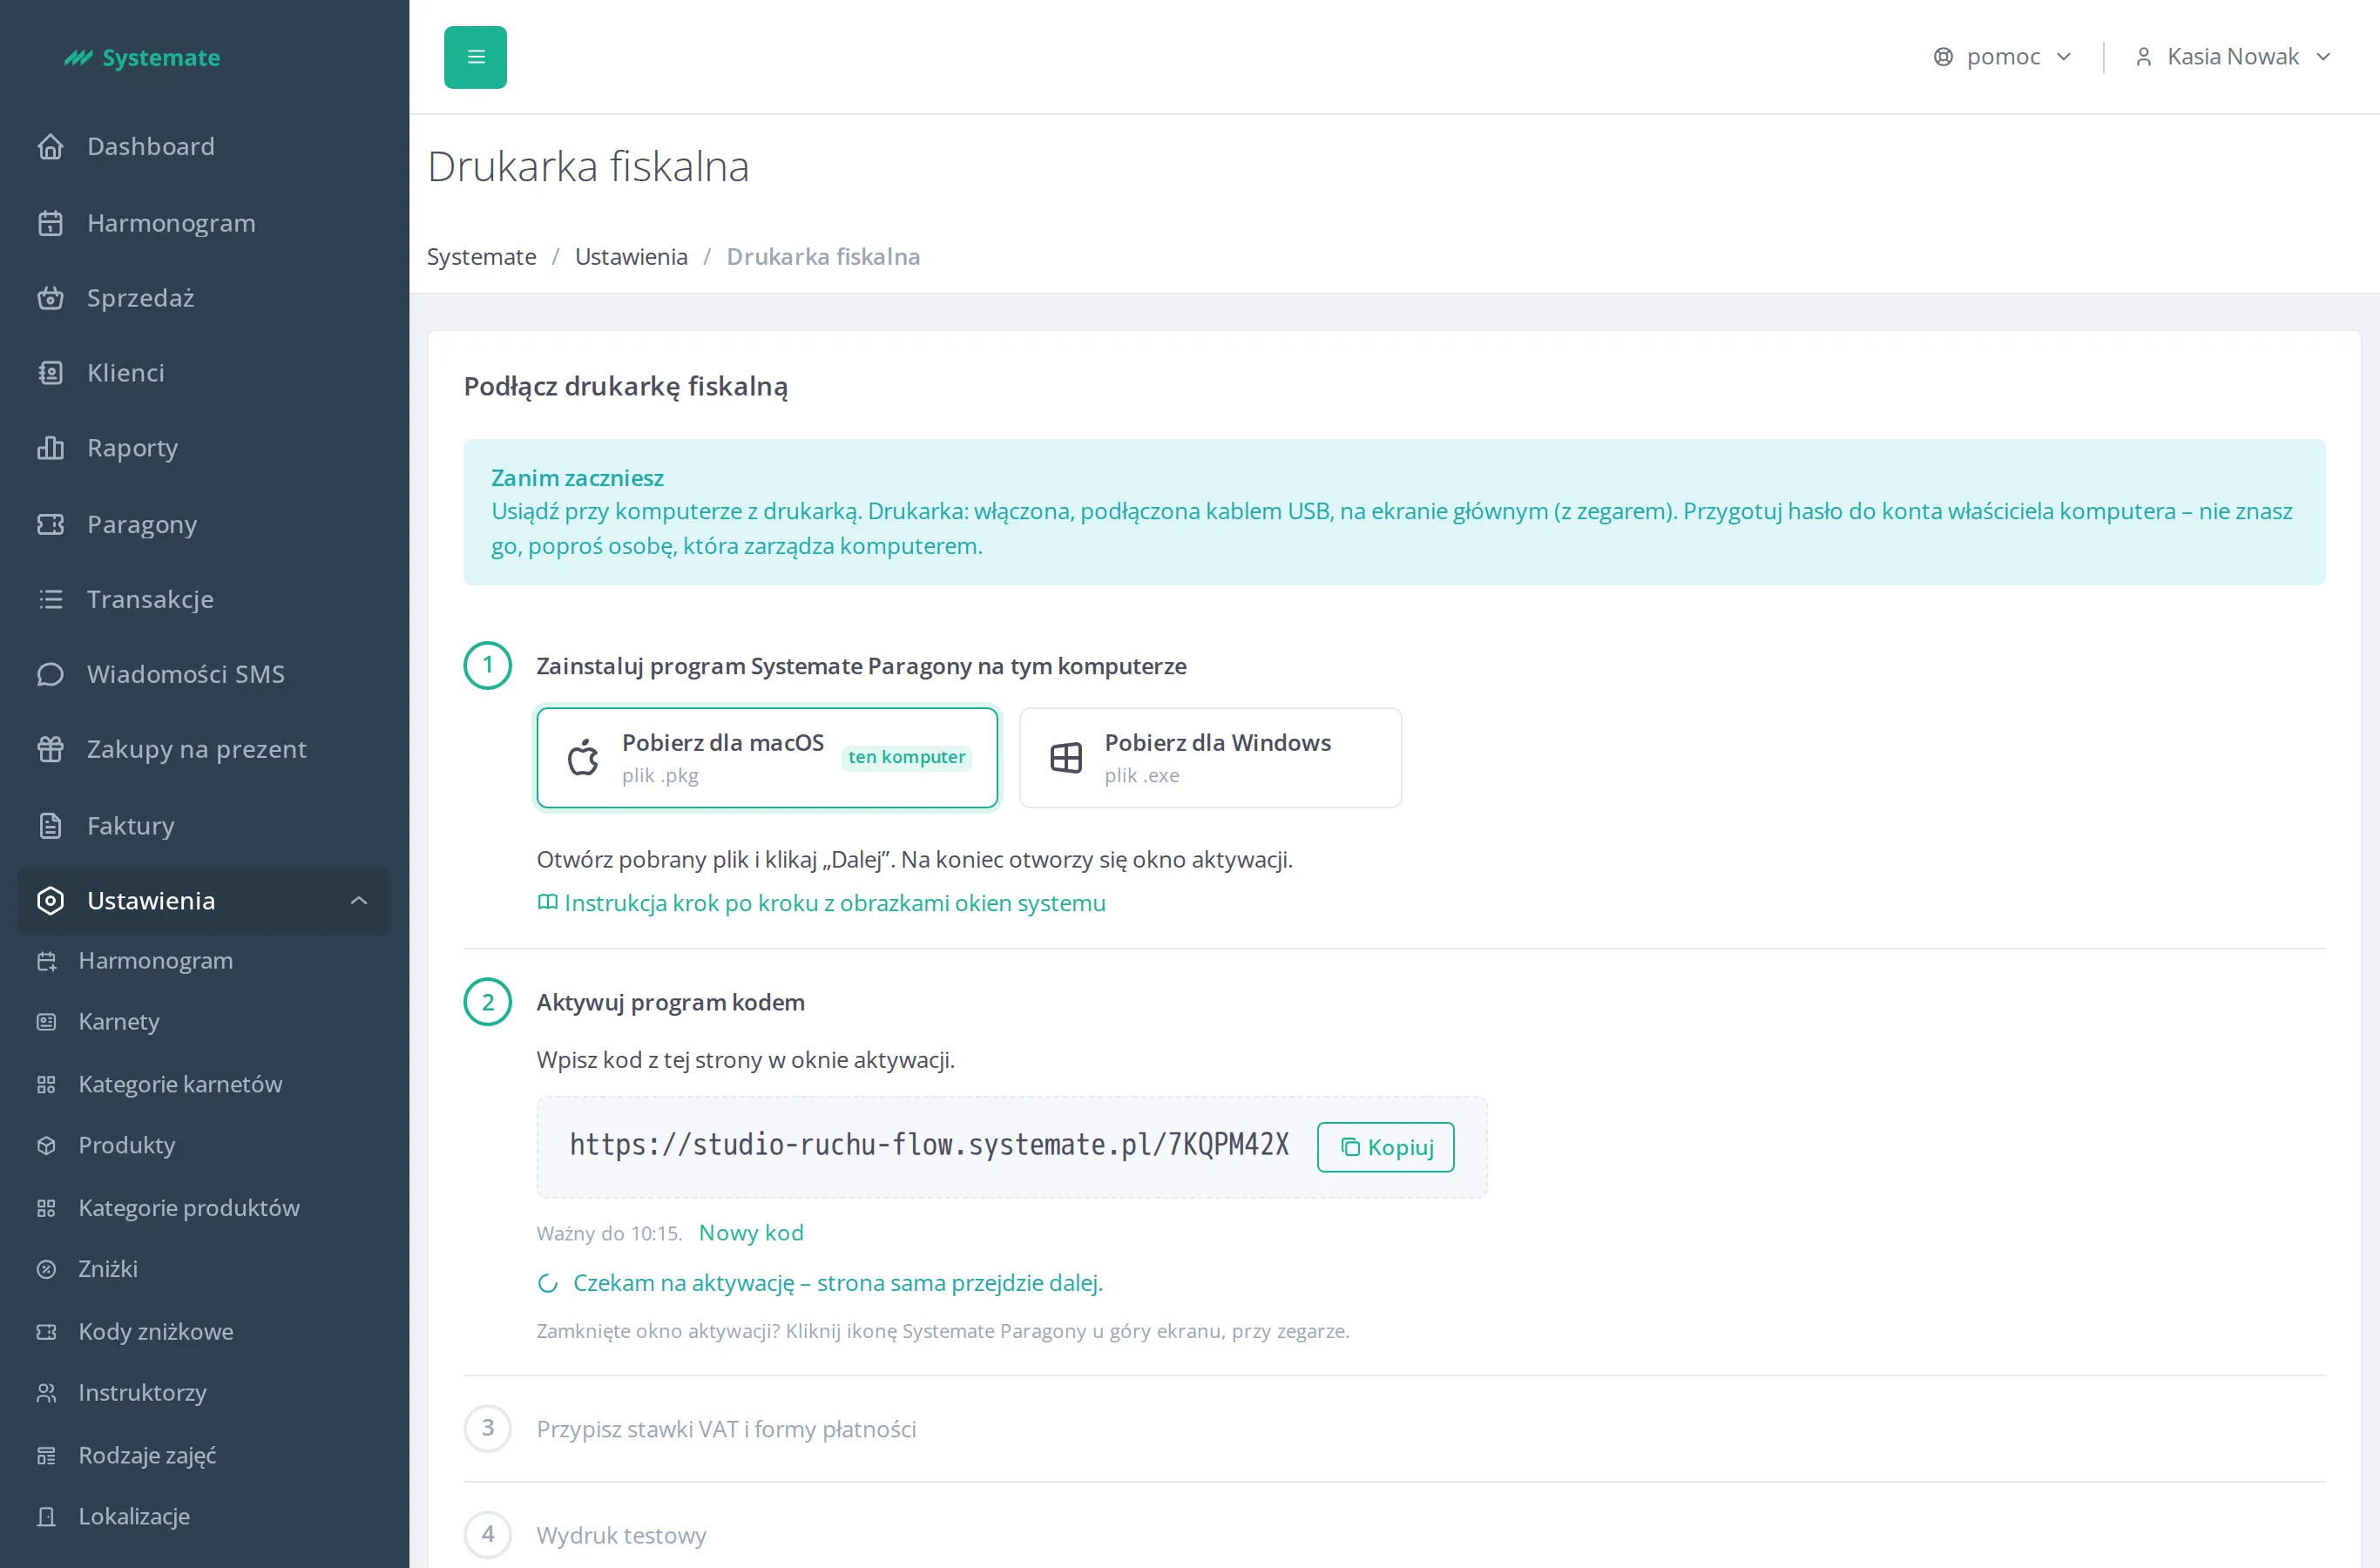
If you close the activation window, you can reopen it using the Systemate Paragony icon: on a Mac, at the top of the screen next to the clock, and on Windows, on the taskbar next to the clock.
The activation step by step, with the program’s messages, is described on the page Activate Systemate Paragony with a code. Where to look for the icon is described on the page Find the Systemate Paragony icon.
After activation, you don’t need to click anything in the panel: the wizard will automatically proceed to the next step once the program connects to Systemate.
Message about the previous printer application
Section titled “Message about the previous printer application”If another printer application has been printing receipts so far, after activation the wizard will display the message The previous printer application has been disabled. Receipts are now printed by the Systemate Paragony program. This means that the previous application no longer prints receipts, and you do not need to launch it.
Step 3. Assign VAT rates and payment methods
Section titled “Step 3. Assign VAT rates and payment methods”After activation, the wizard displays tables where you assign a printer letter to each VAT rate, and a printer payment method to each payment method. Instructions on how to do this are available on the page Assign VAT Rates and Payment Methods to the Printer.
Step 4. Test printout
Section titled “Step 4. Test printout”Once you save the assignments, the wizard sends a test printout to the printer by itself. The test printout is not a receipt. The wizard shows the time it was sent and asks whether the printout came out of the printer.
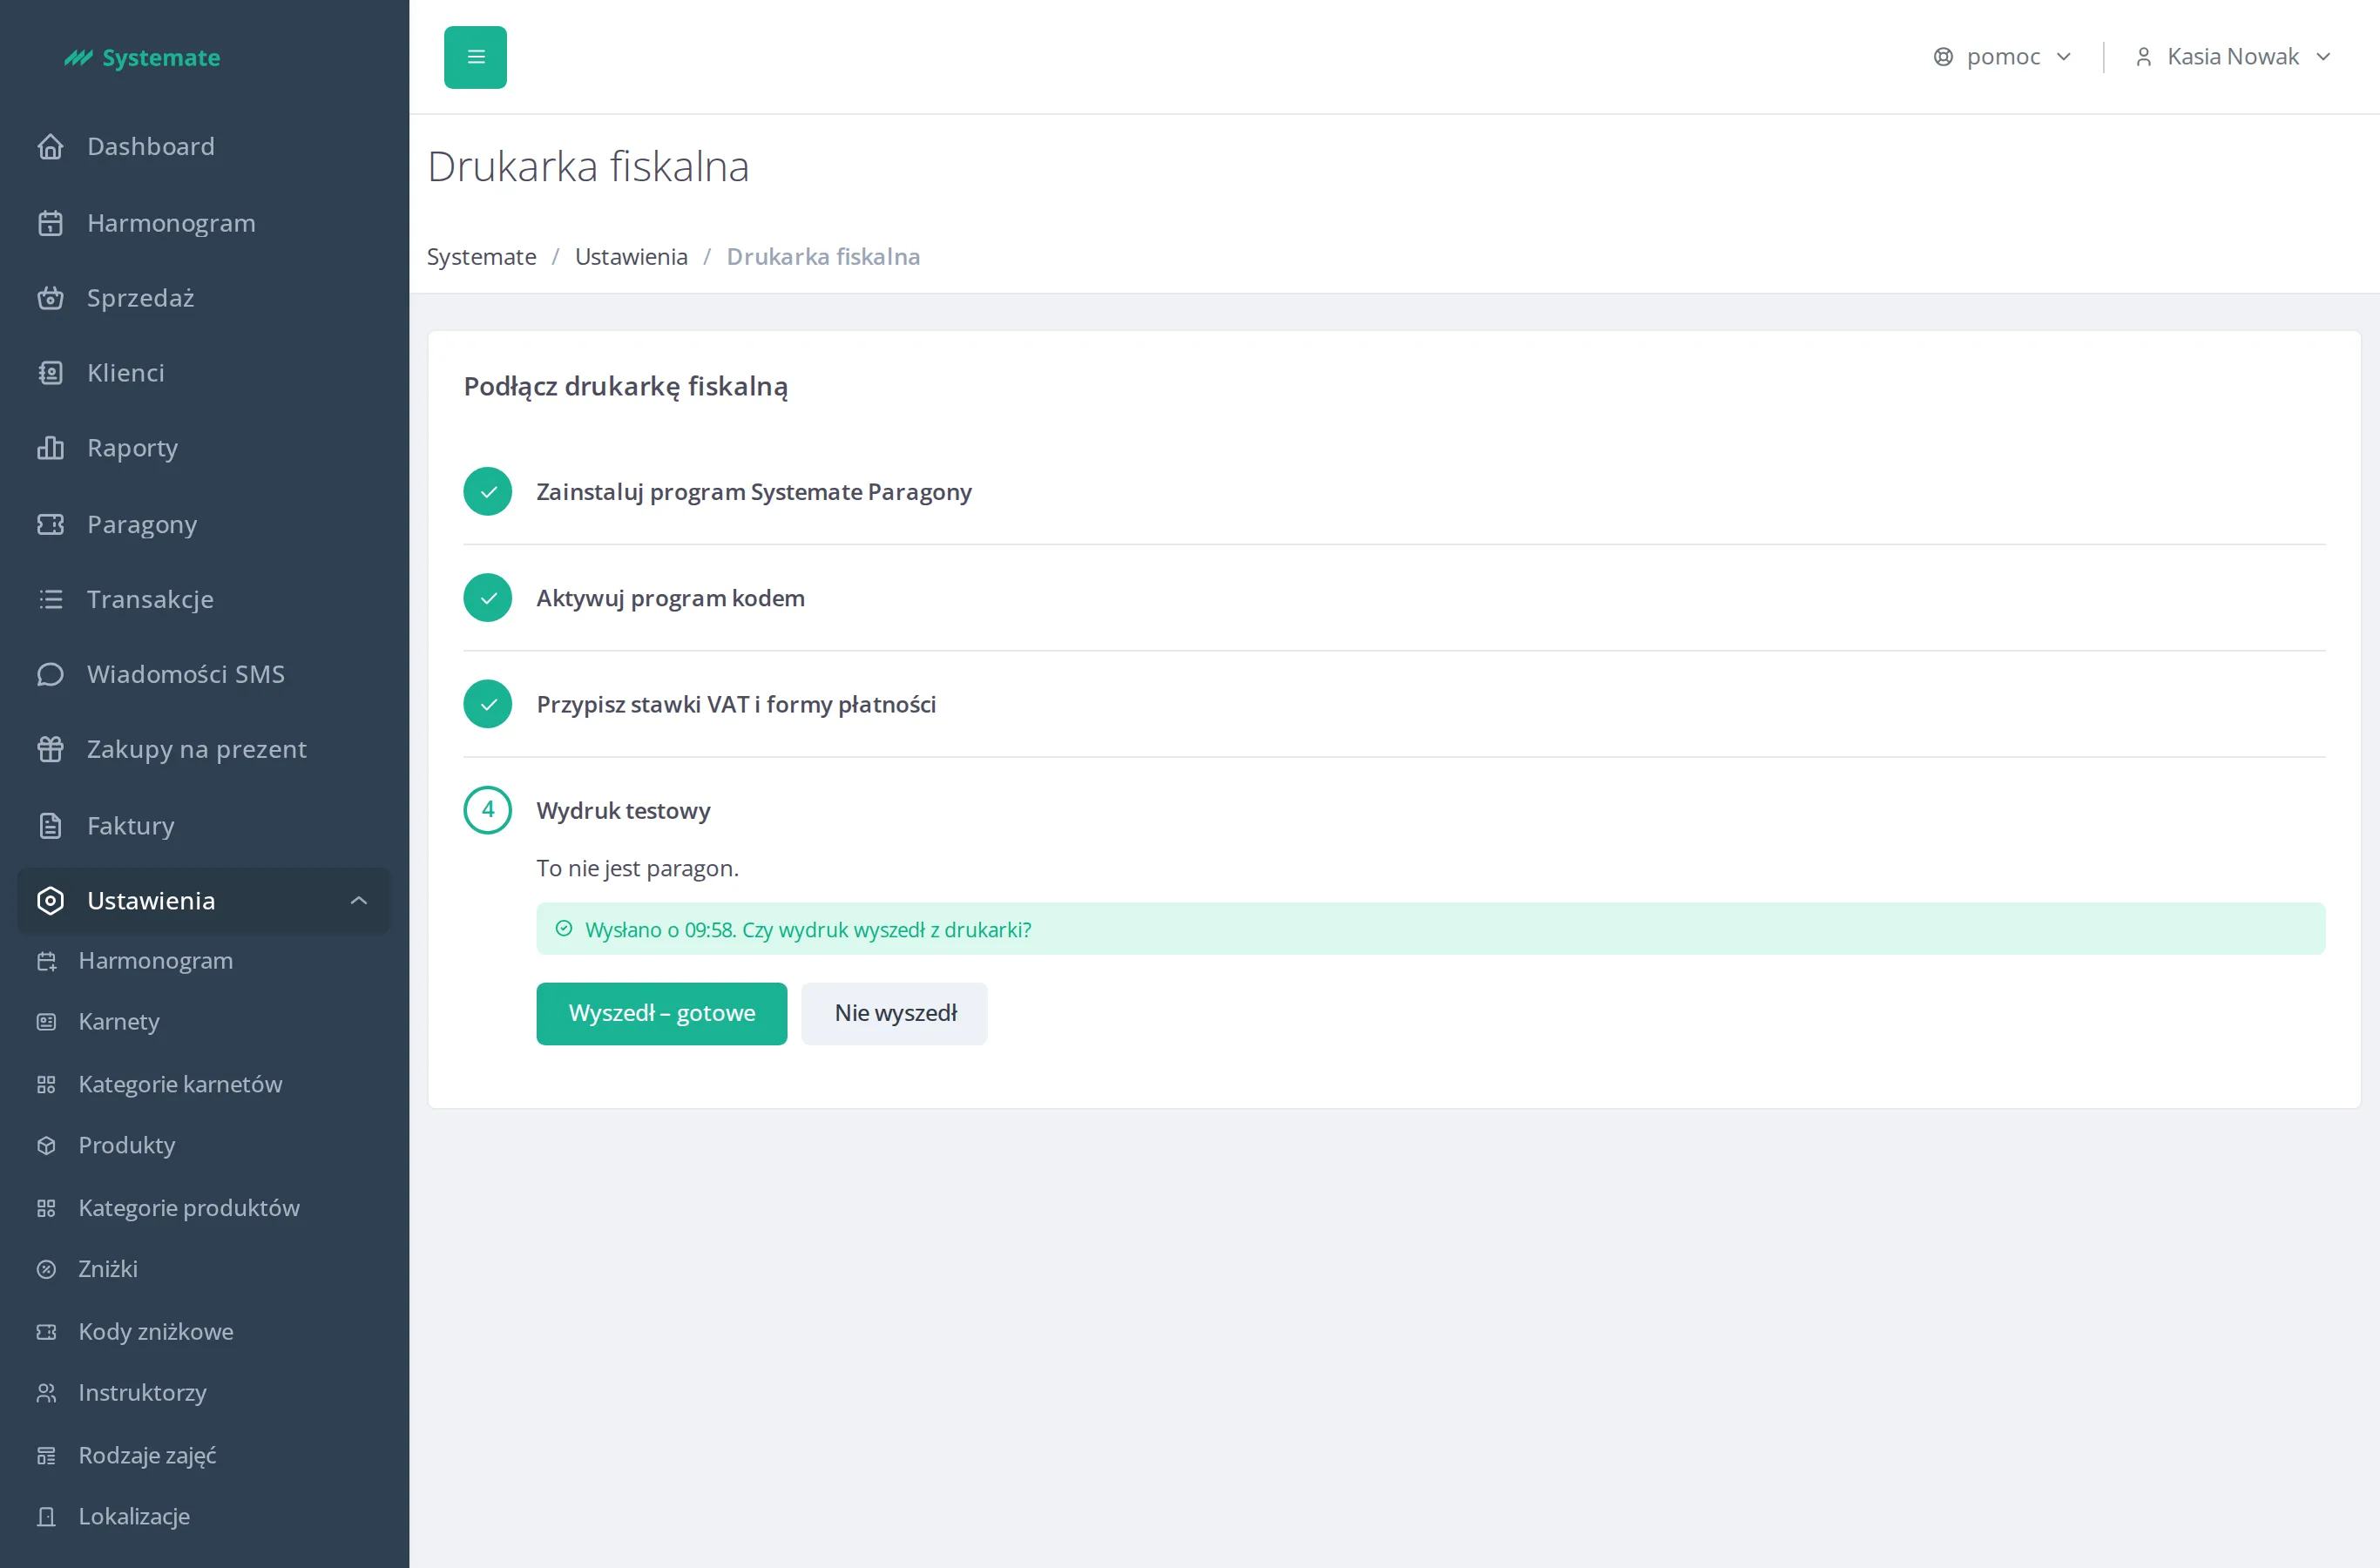
- Click It came out – done if the printout came out. The wizard ends and you see the fiscal printer screen.
- Click It didn’t come out if there is no printout. The wizard asks you to check the printer: whether there is paper in it, whether the cover is closed and whether a message on the display is waiting to be confirmed with the OK button.
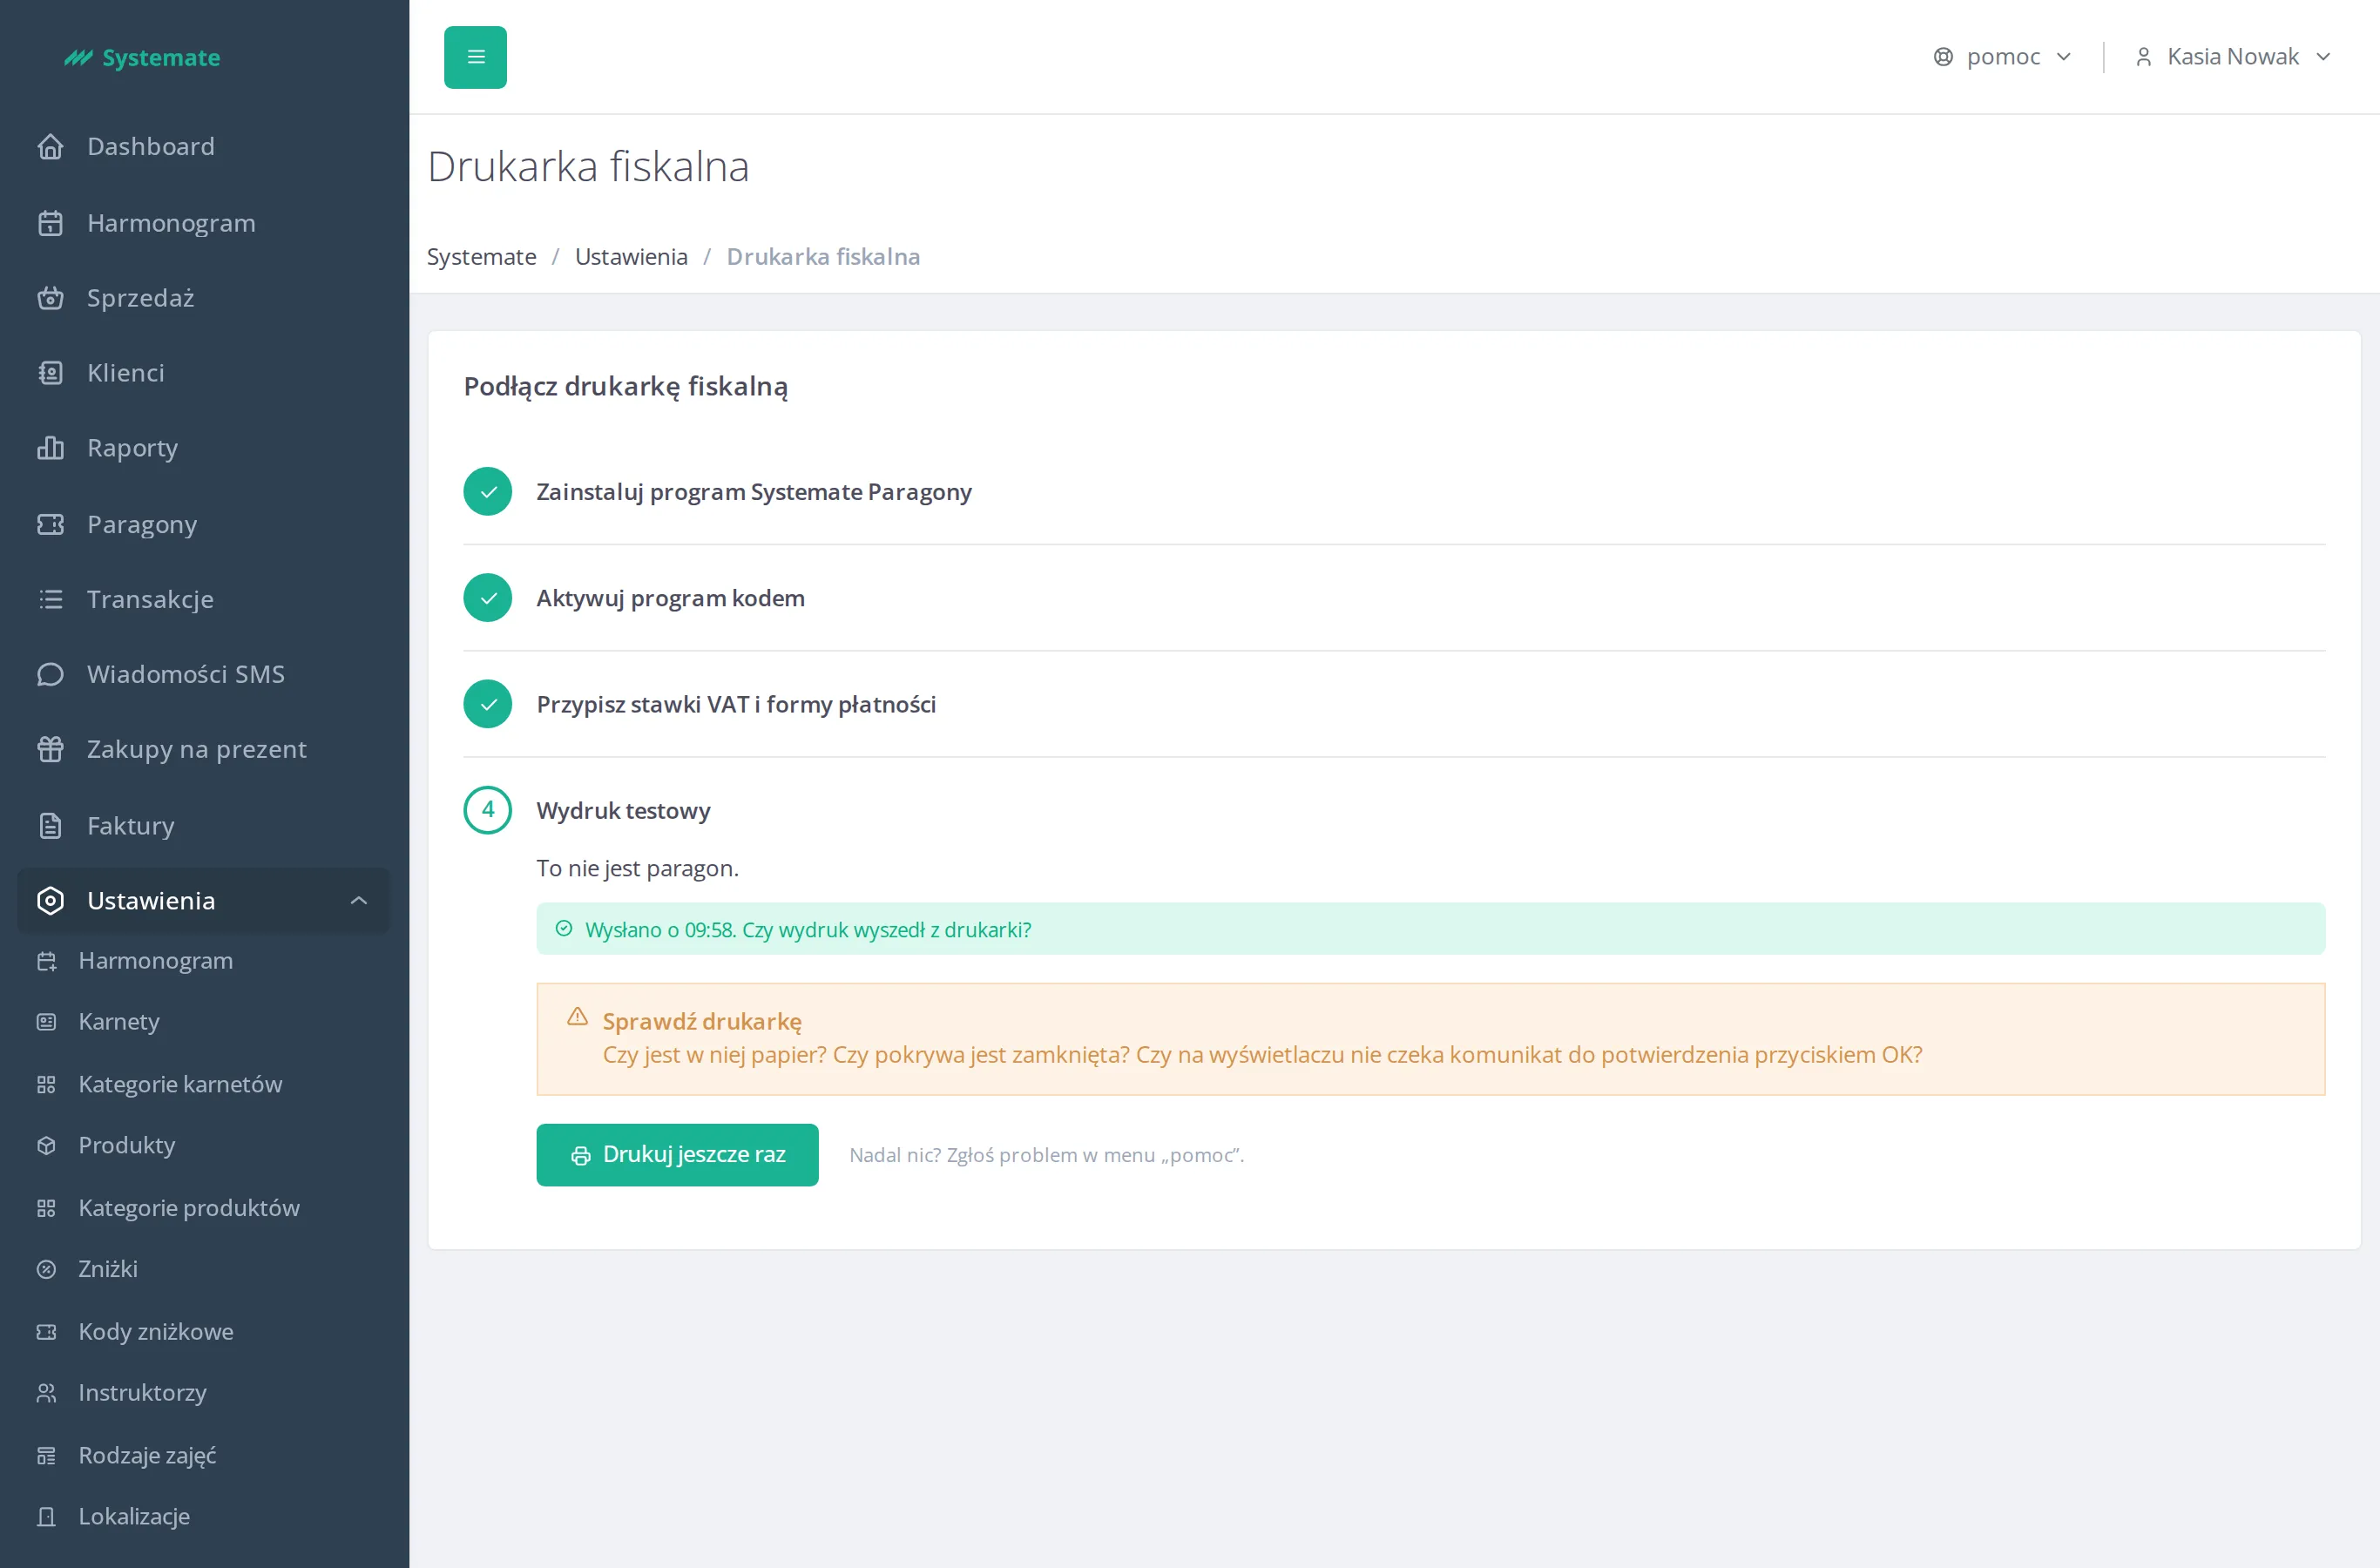
Once you have fixed the printer, click Print again — the wizard sends the printout again and asks once more whether it came out. If still nothing comes out, report the issue in the Help menu.
After setup
Section titled “After setup”When the setup wizard finishes, you’ll see the Program and printer box on the fiscal printer screen. The page Check the status of the program and the printer explains how to read it. Next to it is the box Test the printer remotely, described on the page Test the printer remotely.