Link people to a customer
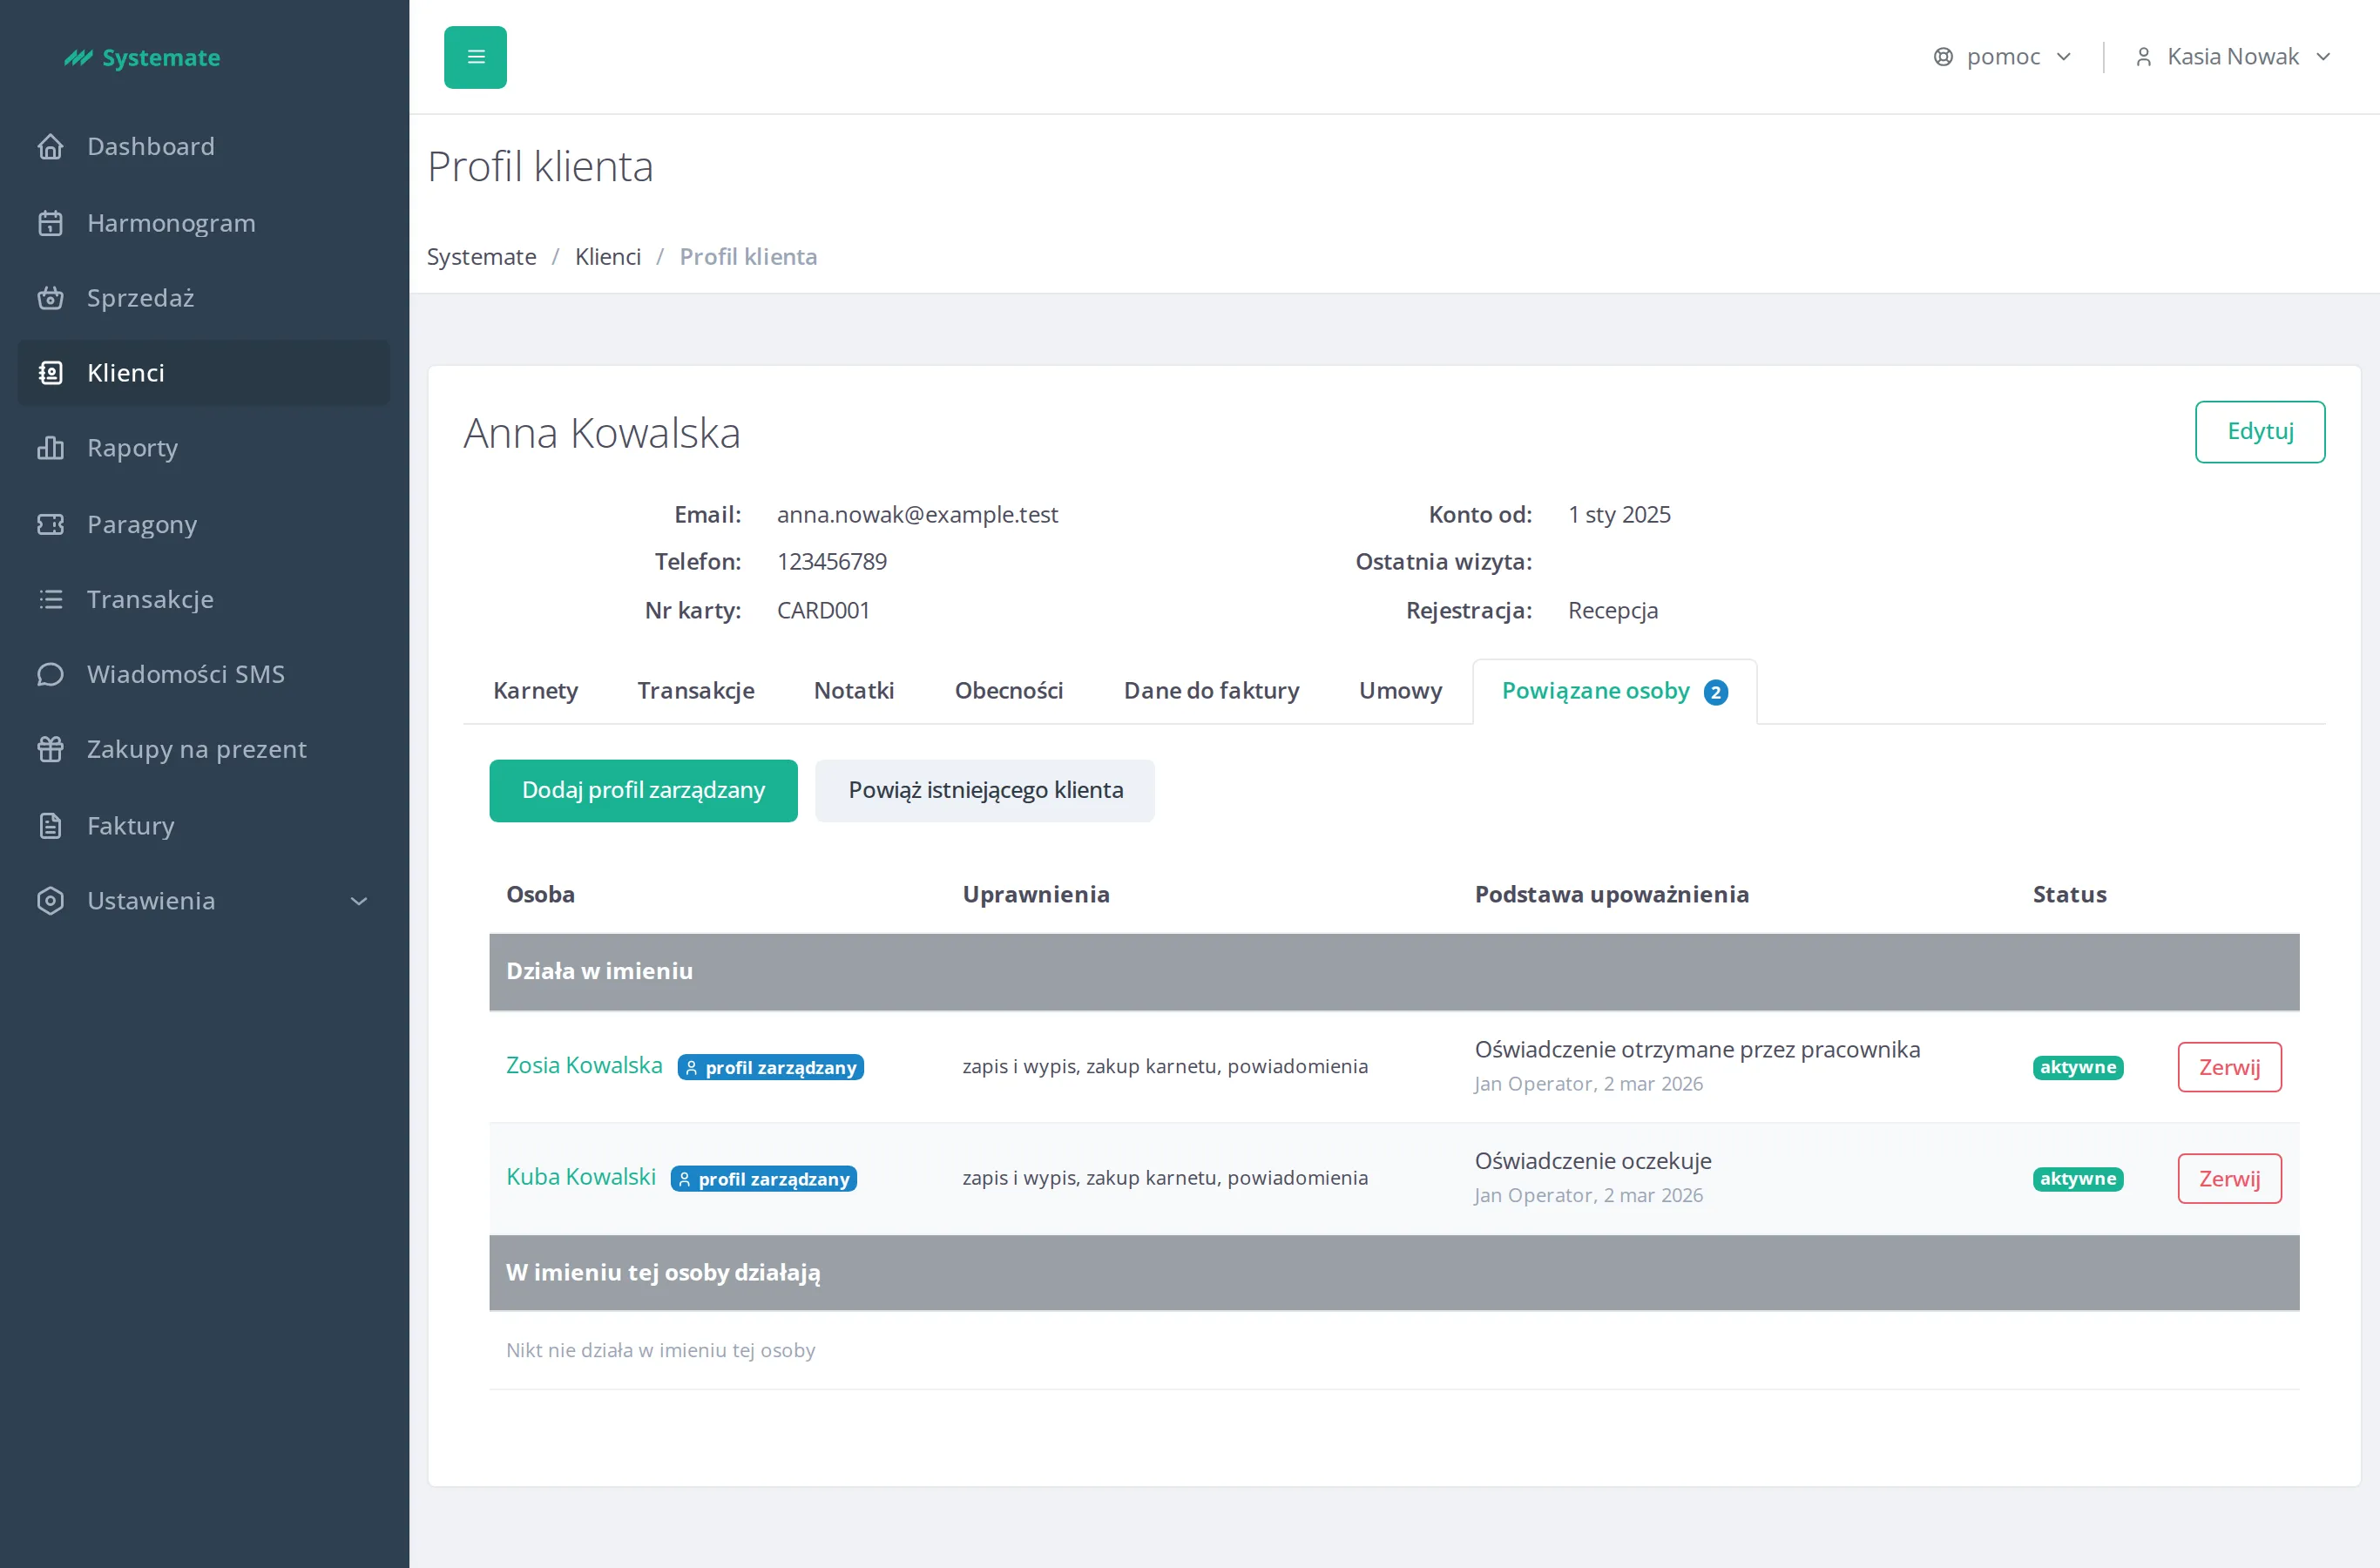
The Related People tab appears on the customer profile when the studio has family accounts turned on. It is the last tab, after Contracts; its name shows the number of people actively linked to the customer — a person linked in both directions counts once.
-
In the office panel open the profile of a customer who has a login and click the Related People tab. You’ll see the action buttons and a table with the groups Acting on behalf of and Acting on behalf of this person are.
Link an existing client
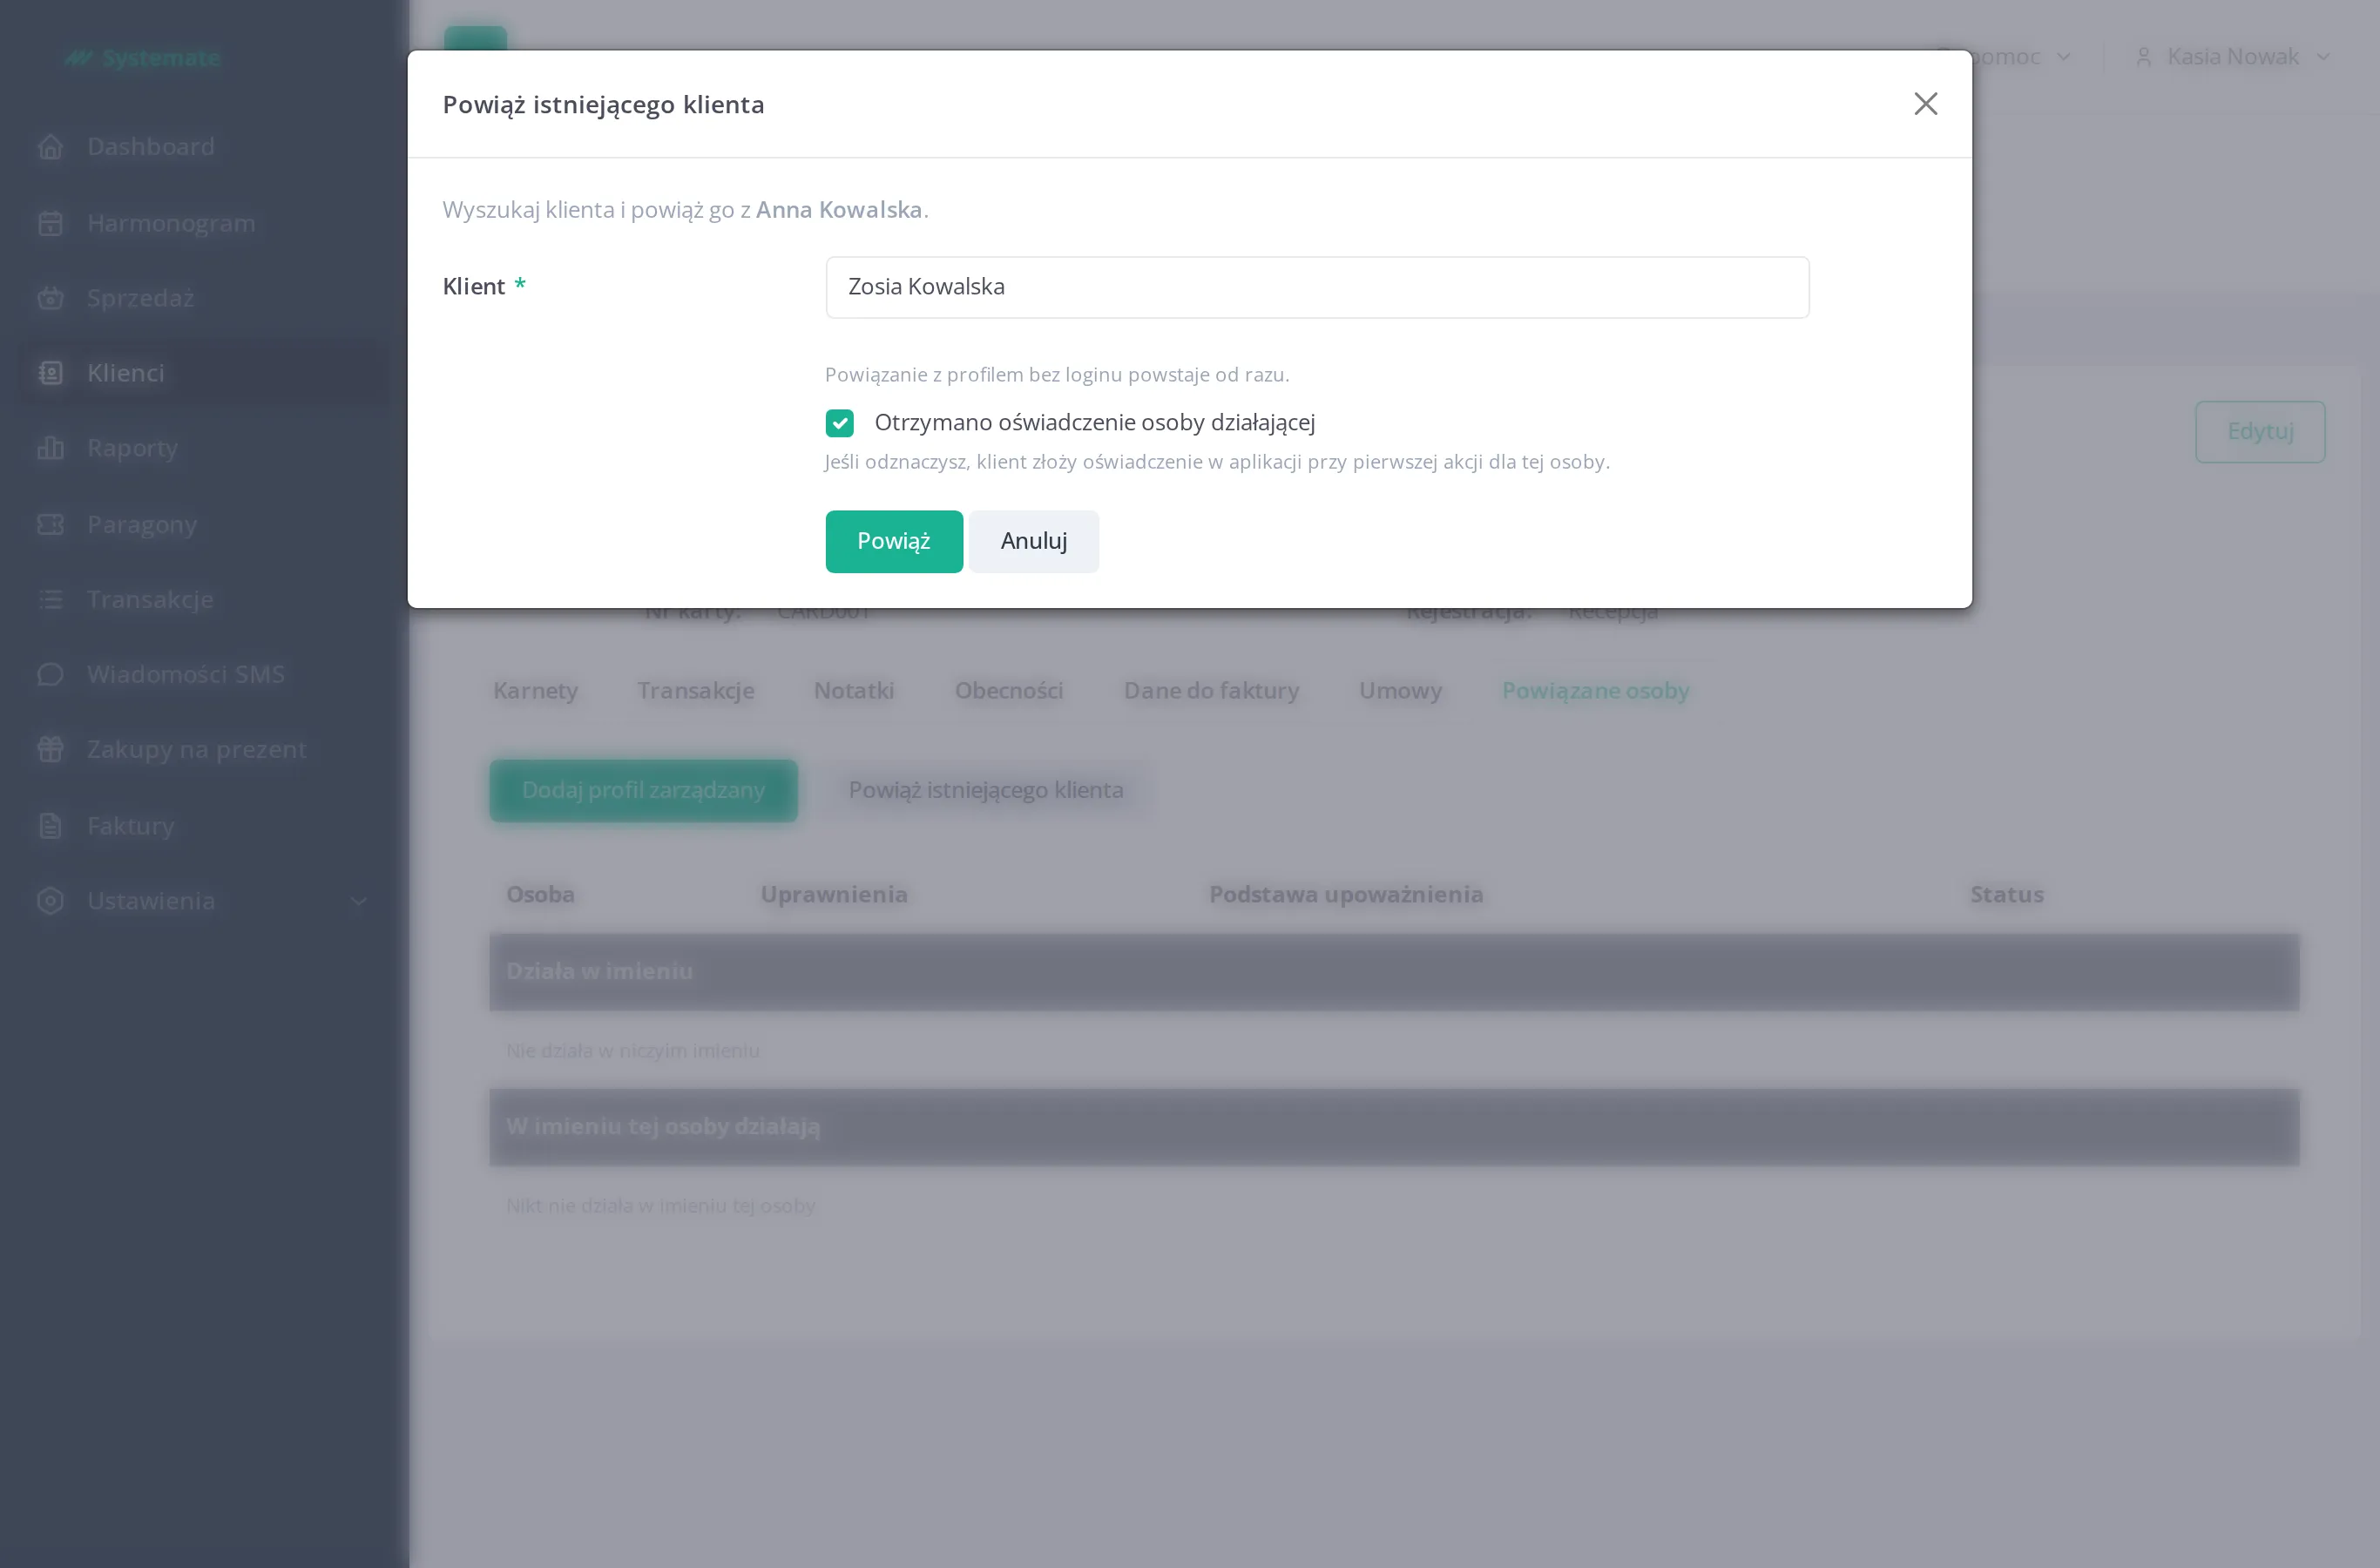
Section titled “Link an existing client”- Click Link an existing client.
- Type at least three characters of the first or last name — the search offers all customers, with and without a login, except the customer whose profile is open. Every result is marked has an account or no login.
- Choose the person. The rest of the form depends on whether they have an account.
A person without a login — linked immediately
Section titled “A person without a login — linked immediately”-
A link to a login-less profile is created immediately on submitting.
-
Leave A statement from the authorized representative has been received checked if the customer gave the declaration at reception. If you uncheck it, the customer gives the declaration in the app at their first action for that person.
-
Click Link.
A customer with an account — invitation
Section titled “A customer with an account — invitation”-
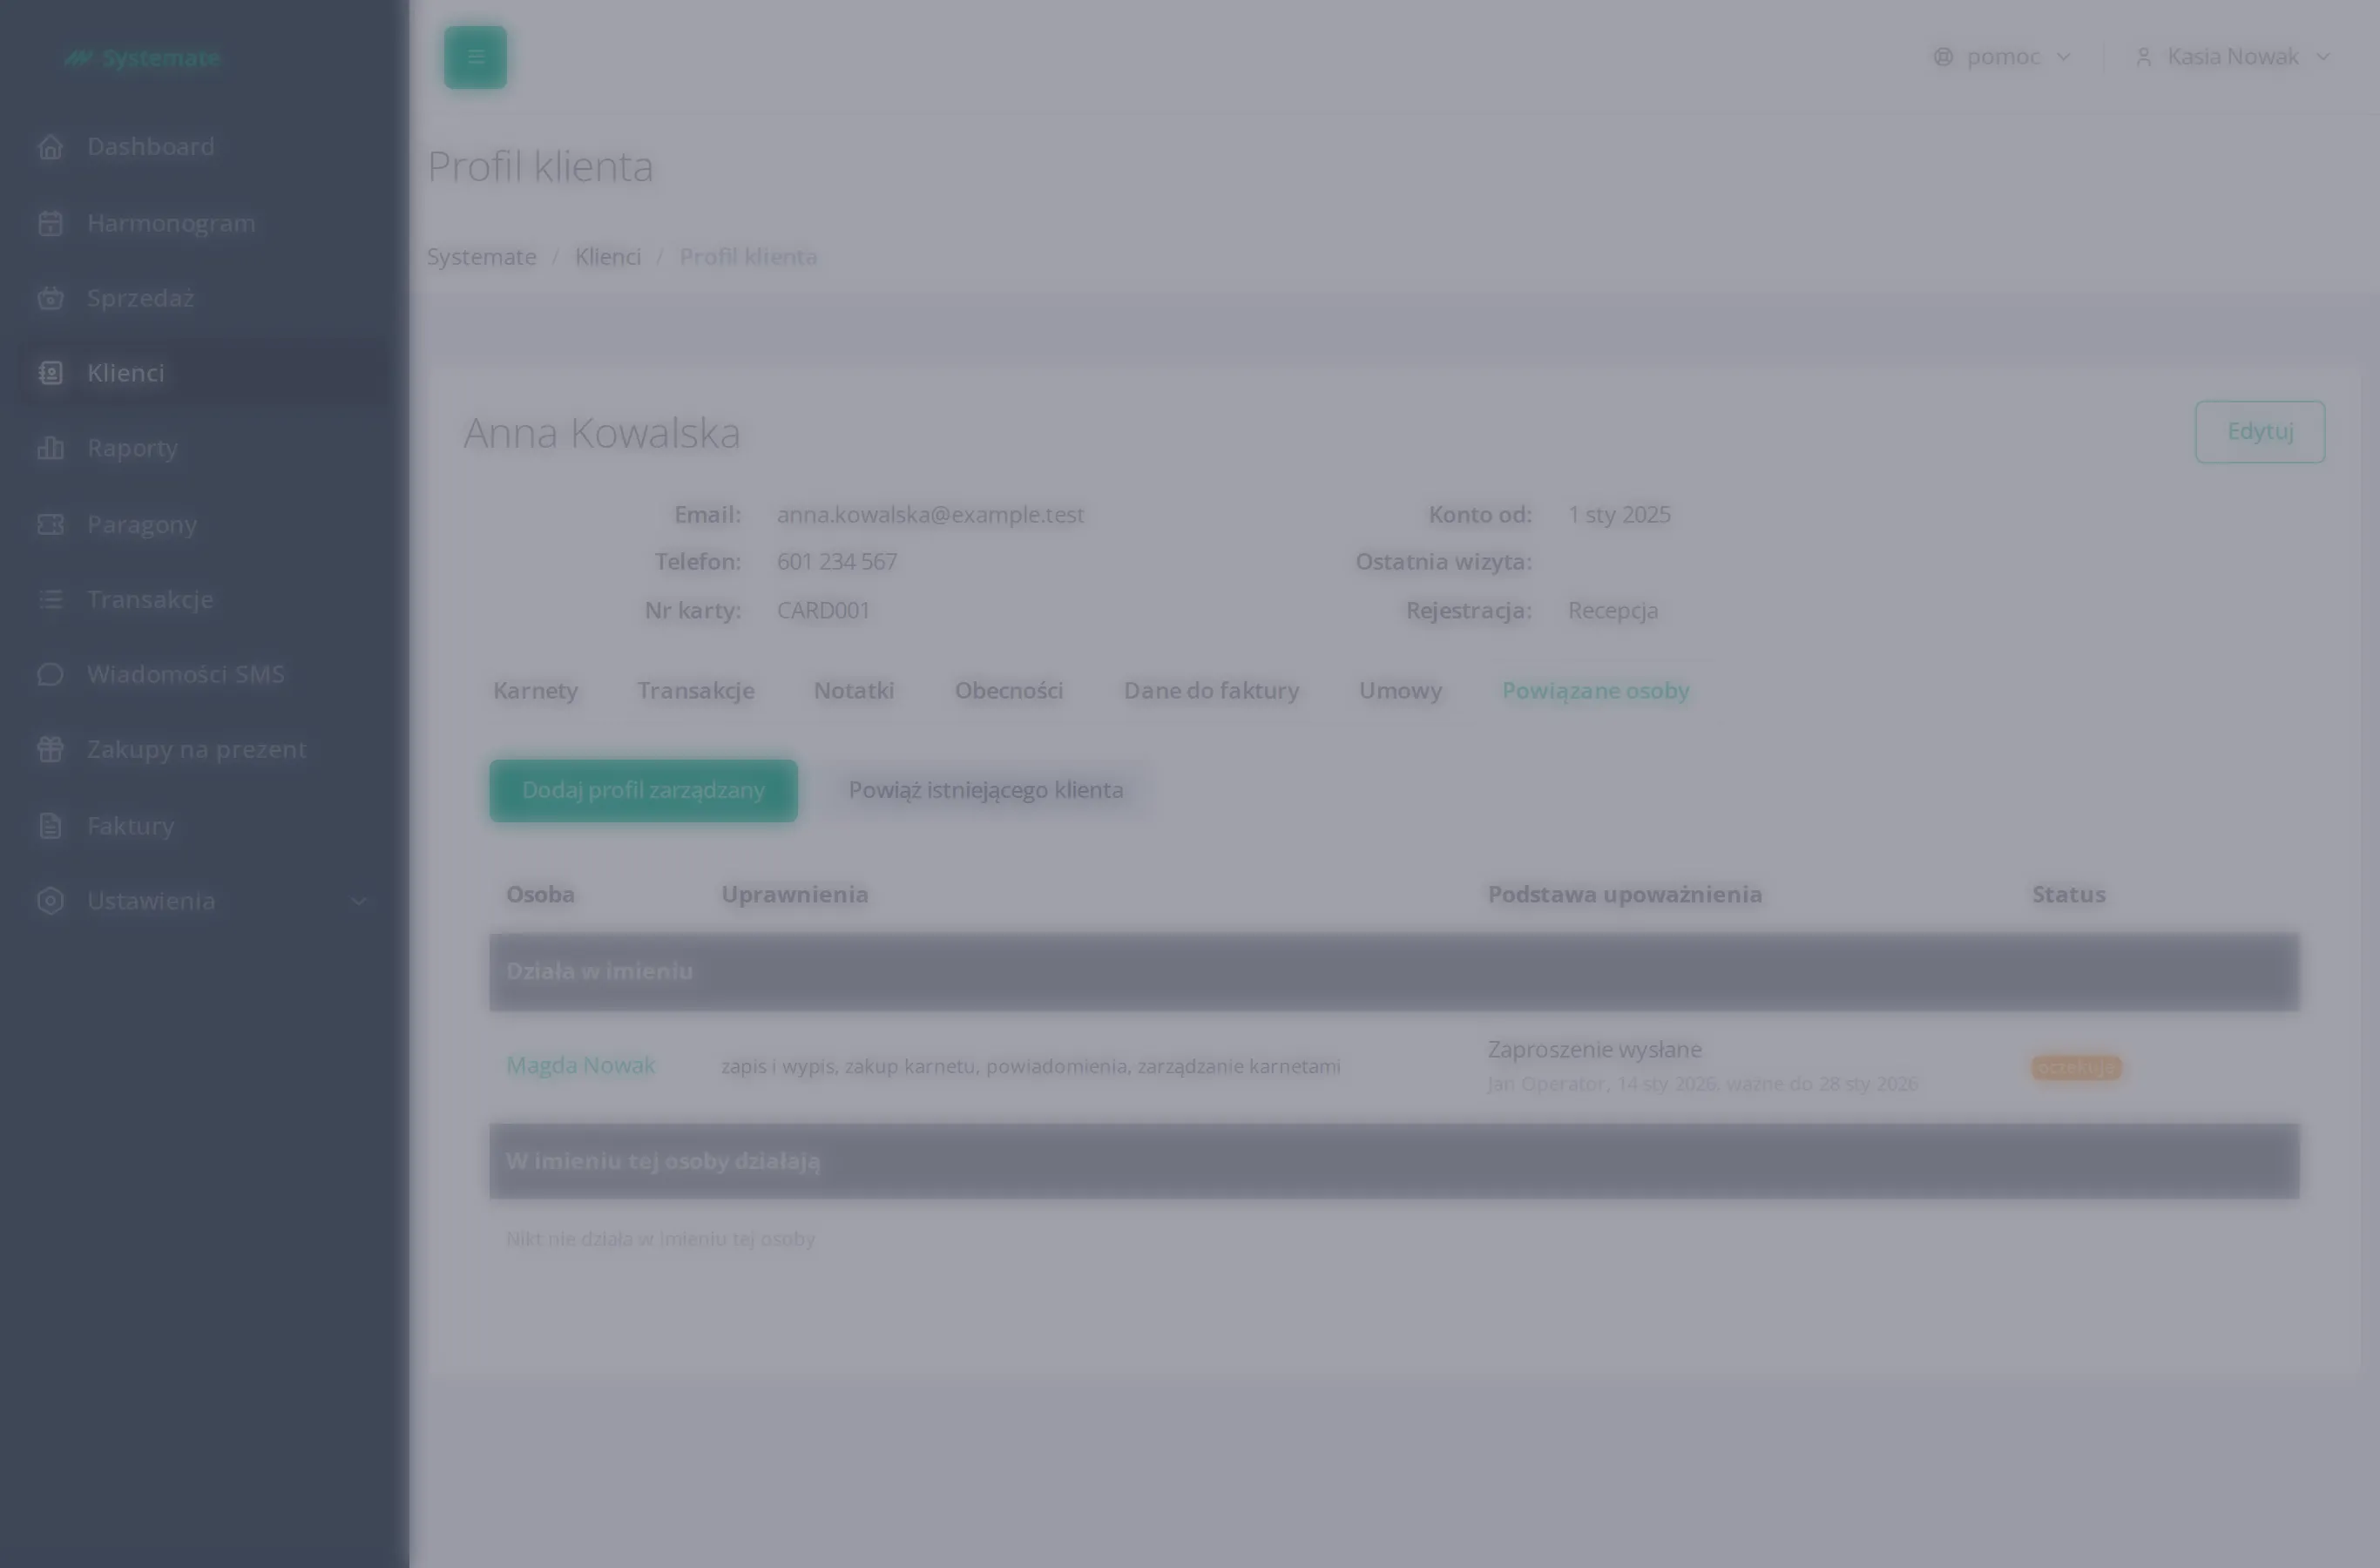
Leave checked the permissions the customer asked for — booking and cancelling, buying a pass, notifications, pass management — and mutual link, if the invited customer should get the same permissions back. The invitation must offer at least one permission — if you uncheck them all, the form shows “Select at least one permission.” and Send an invitation is blocked.
-
Click Send an invitation. The invited customer accepts the invitation from the Accept the invitation button in the e-mail, logging in to the customer panel first if needed; the link exists only after the acceptance and the invitation is valid for 14 days. Until then the invitation is a pending row of the Acting on behalf of list.
Add a managed profile
Section titled “Add a managed profile”- Click Add a managed profile.
- Enter the first name and last name of the person the customer will act for.
- Decide on A statement from the authorized representative has been received as when linking and click Save. The new profile appears on the Acting on behalf of list.
Read a link’s basis and status
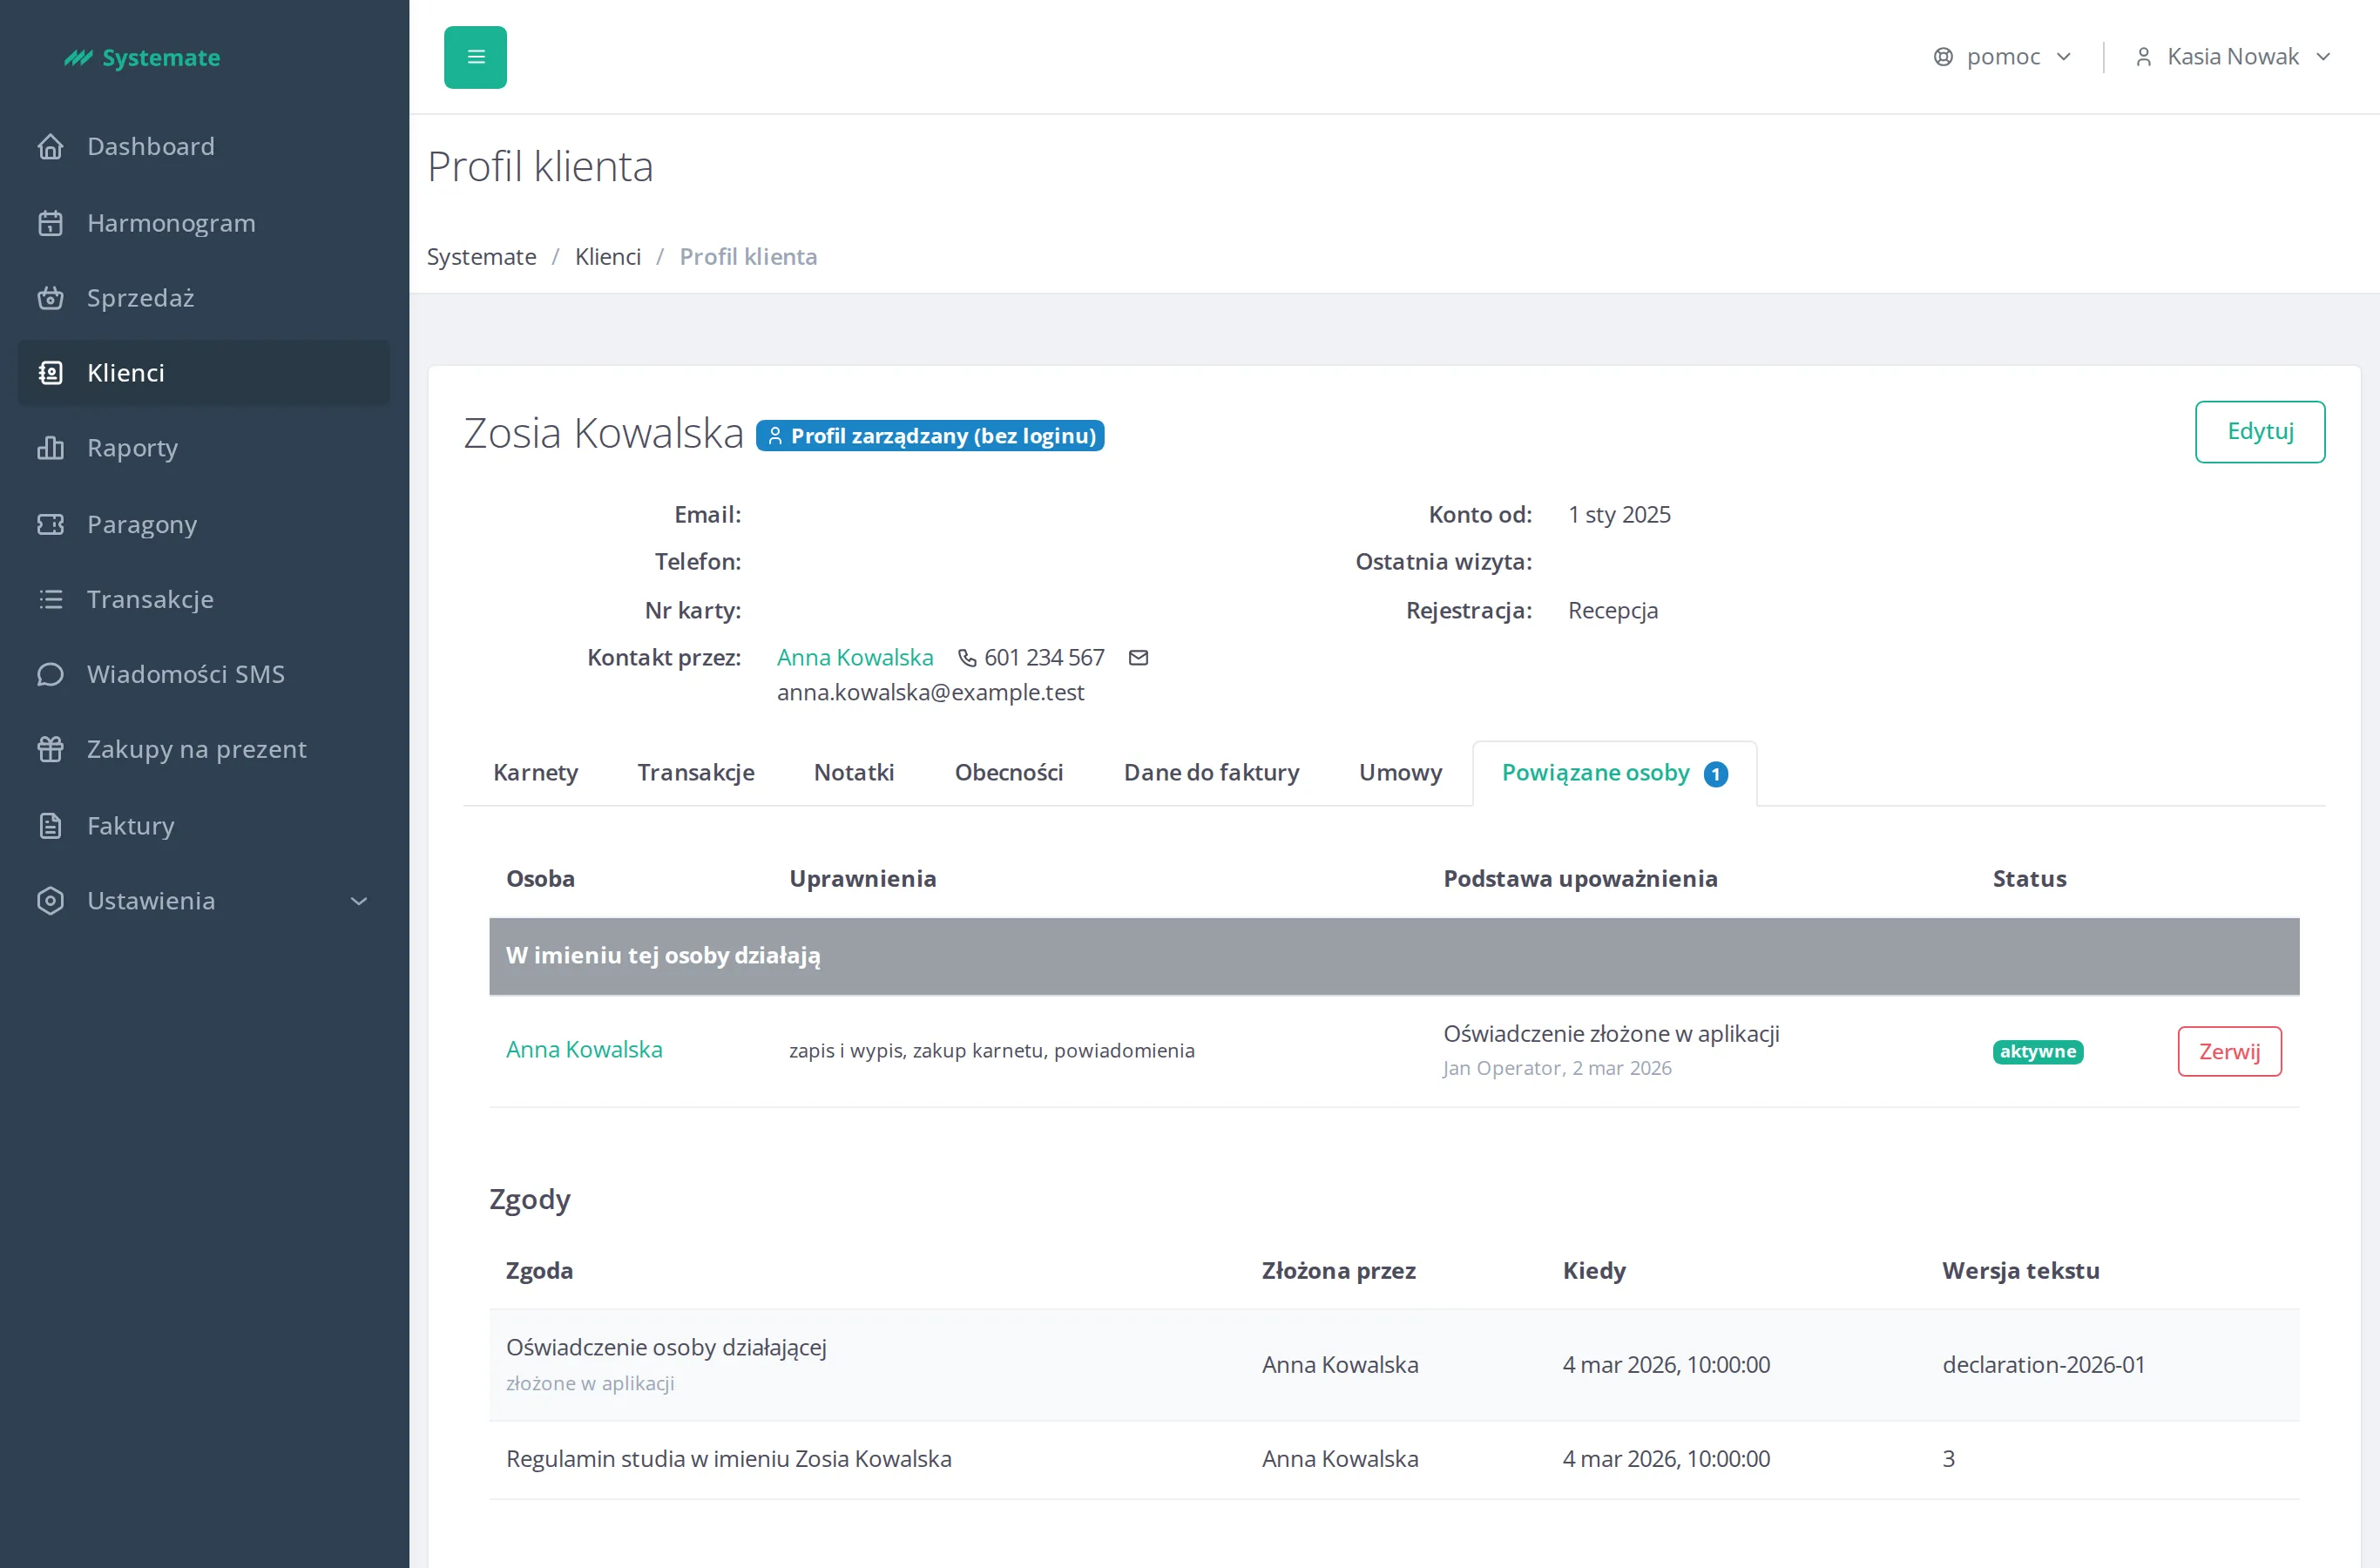
Section titled “Read a link’s basis and status”The table has the columns Person, Permissions, Basis for Authorization and Status:
- Person — the name linking to the profile, with the managed profile badge for a profile without a login,
- Permissions — e.g. booking and cancelling, buying passes, notifications, pass management,
- Basis for Authorization — received by an employee, submitted in the app, pending, invitation accepted, or confirmed by the customer — when the represented person confirmed the permissions at their first login; the second line names who created the link (an employee or the customer) and the creation date, or, when the front desk changed the permissions, Permissions changed: with the employee’s name and the date of the change,
- Status — active, awaiting confirmation (the link works, but the represented person who was given a login has not confirmed the permissions yet), revoked (with the note given when revoking), or pending for an invitation not yet accepted — such a row shows the basis “invitation sent”, with a second line naming who sent it, the sending date and the expiry date, and offers no revoke action.
Revoked links are hidden by default. To see them, tick show revoked (N) to the right of the buttons — N is the number of revoked links.
A managed profile carries the Managed profile (no login) badge in its heading and a Contact via row with the phone and e-mail of the people acting for it. Its Related People tab holds, below the table, the Consents section with the declaration history.
Grant a login to a managed profile
Section titled “Grant a login to a managed profile”When you enter an e-mail address while editing a managed profile’s data, a warning This profile has people acting on its behalf appears under the e-mail field. After saving, the customer receives an activation e-mail and, at their first login, confirms or narrows the permissions of each of those people. Until then the links work as before, the acting persons can manage the customer’s passes, and the links table shows them with the status awaiting confirmation. After confirmation the basis for authorization becomes confirmed by the customer.
Change a link’s permissions
Section titled “Change a link’s permissions”Permissions are granted by the person on whose behalf someone acts. Change them only at that person’s request — for example when a customer without access to the app asks for it at the front desk.
- In the row of an active link click Change permissions (before Break). The action appears in both groups, but only when the person on whose behalf someone acts has a login: in Acting on behalf of that is the row’s person, in Acting on behalf of this person are it is the customer whose profile is open. Links to a managed profile, revoked links and pending invitations do not offer it.
- The dialog shows who acts on whose behalf and four permissions: booking and cancelling classes, purchasing passes, pass management, receiving notifications. Tick the ones the customer asks for. At least one must stay ticked — when you untick all of them, Save is disabled; if the customer wants none, revoke the link instead.
- Enter the Basis for the change, for example “Customer’s request at the front desk” — without it the dialog shows Required and saves nothing.
- Click Save. The table shows the new permissions, and the second line in the Basis for Authorization column changes to Permissions changed: with your name and the date. Both people see the change in the customer panel (Family).
Revoke a link
Section titled “Revoke a link”- In the row of an active link click Revoke.
- Enter a note with the reason — the form can’t be submitted without it.
- Click Revoke. The row leaves the table and joins the revoked links — you see it with the revoked status after ticking show revoked.
Find managed profiles on the customer list
Section titled “Find managed profiles on the customer list”-
Go to Customers.
-
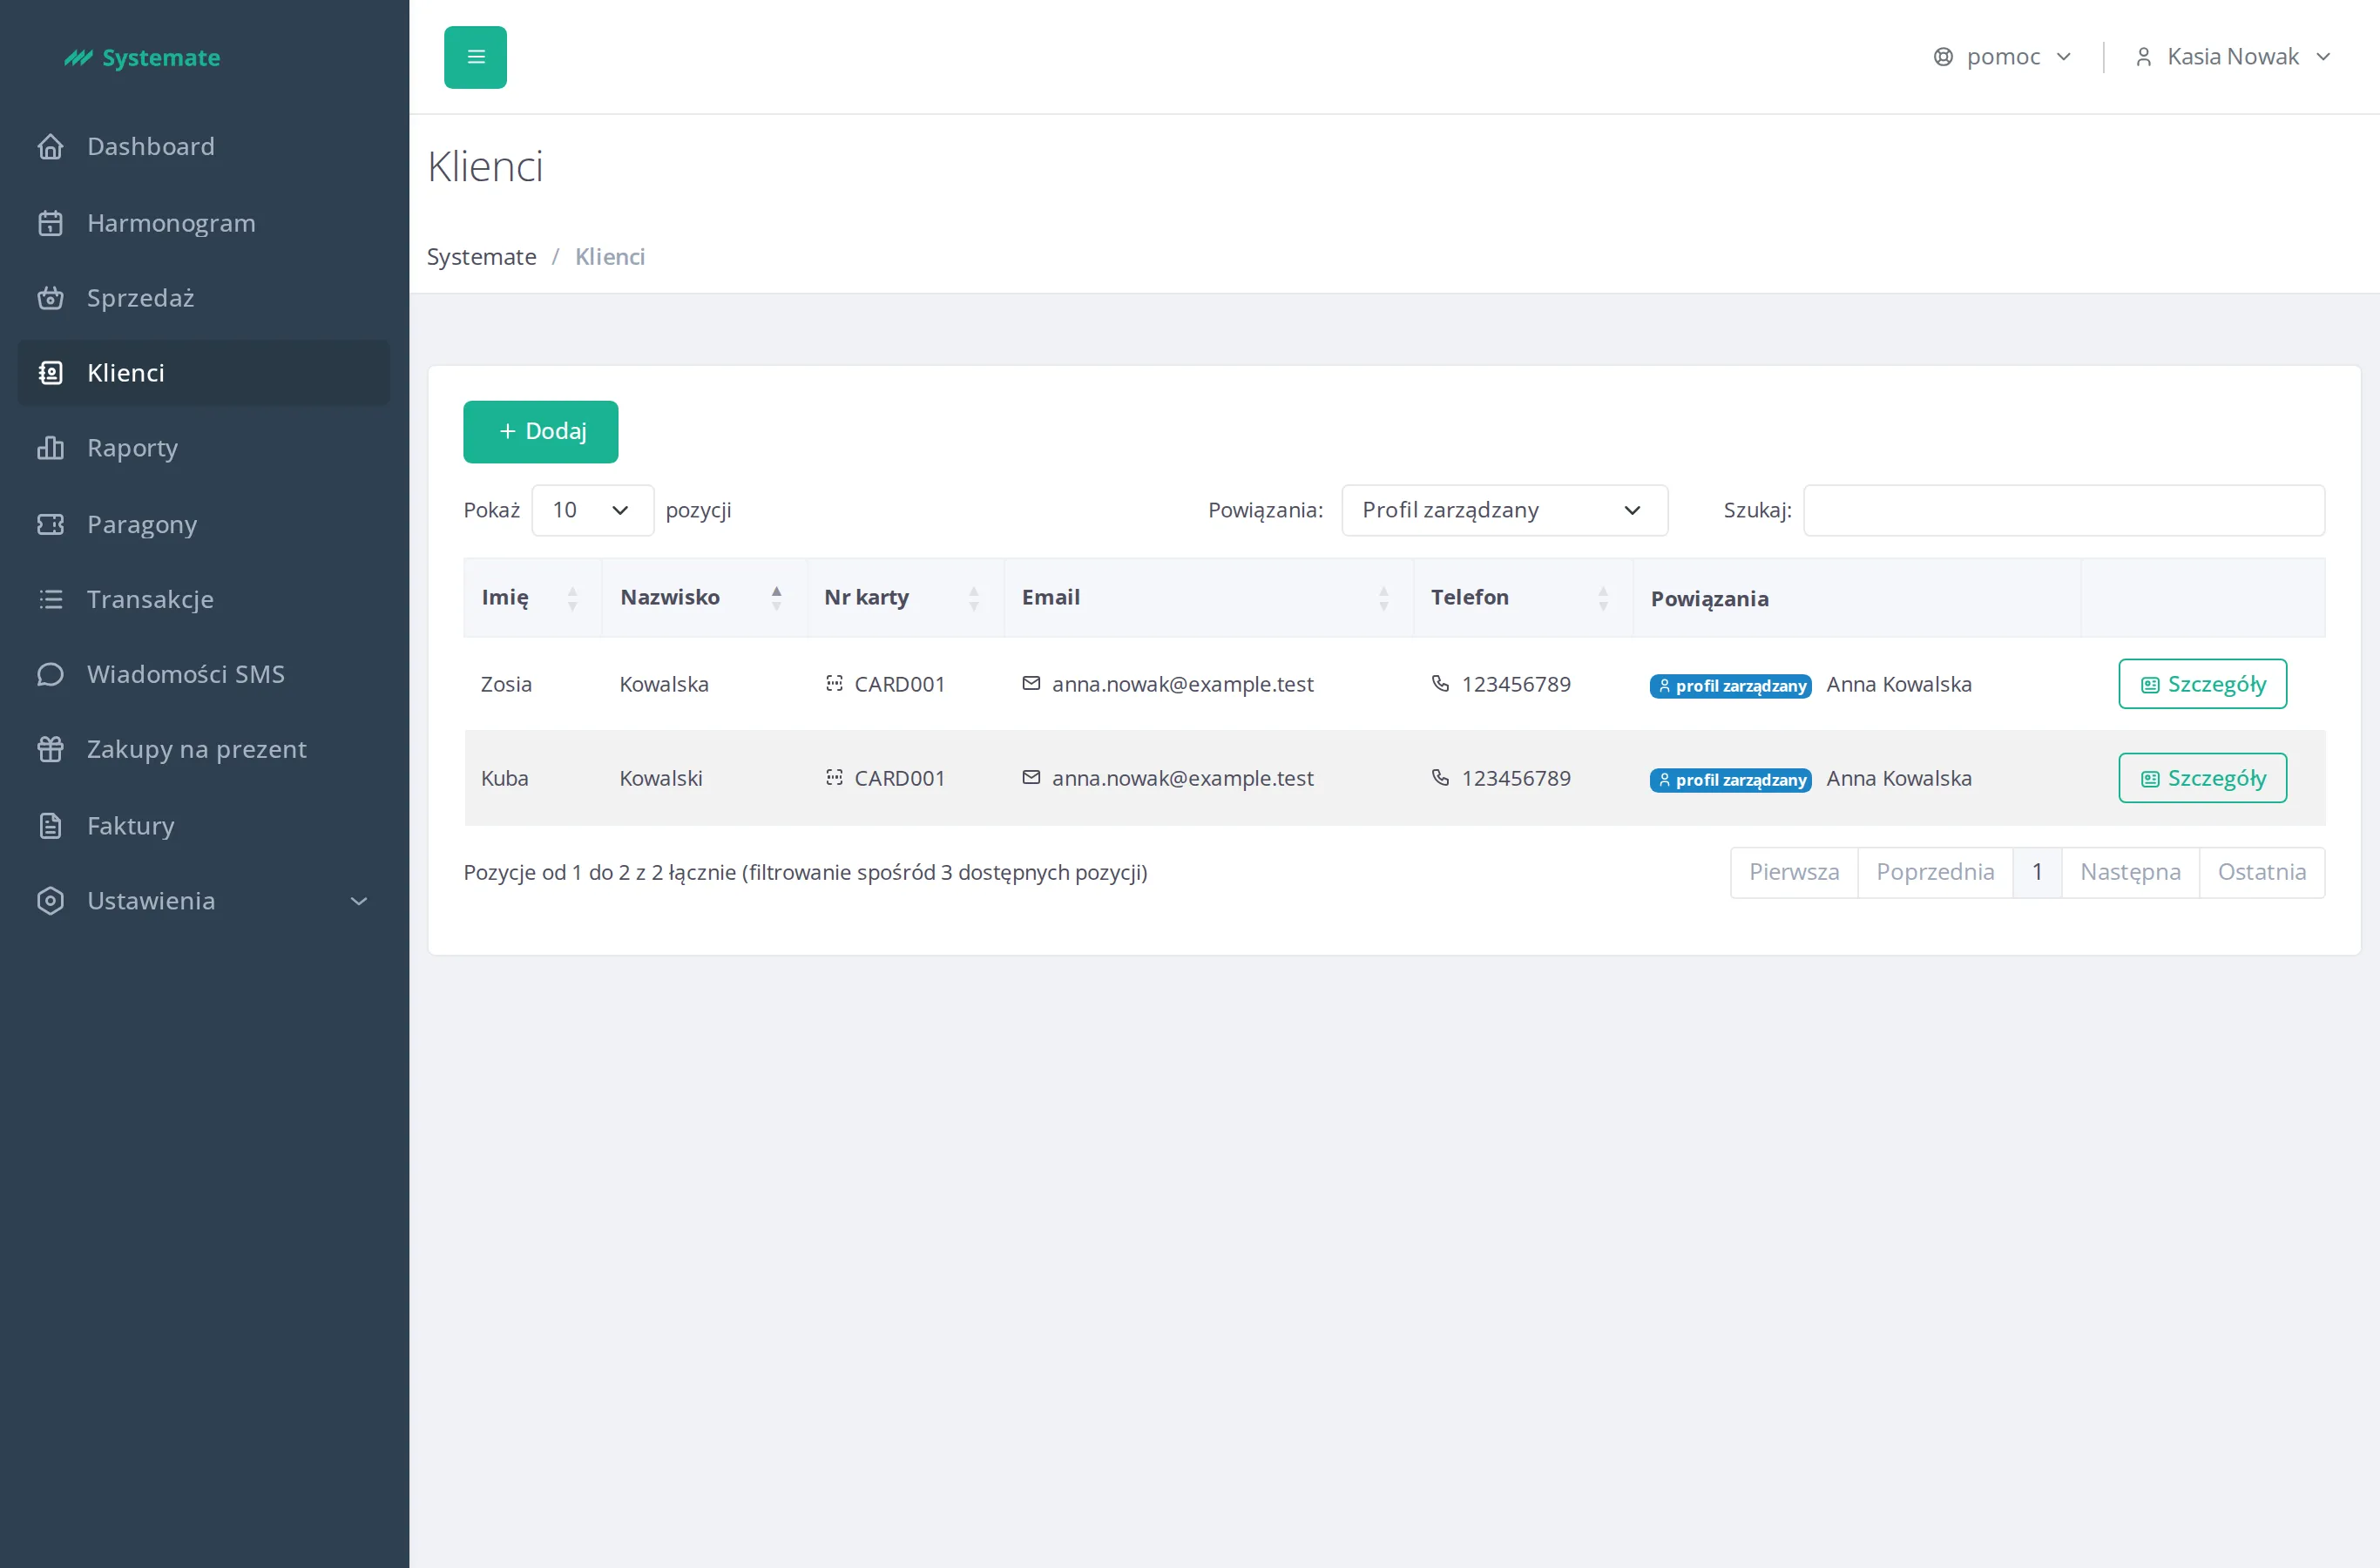
In the Relations filter choose Managed profile or Acts on behalf of others. The filter combines with the text search.
-
The Relations column shows the managed-profile badge with the names of the acting people, or the number of people the customer acts for.
Merge a duplicate managed profile
Section titled “Merge a duplicate managed profile”When a login-less profile has the same first and last name as an older login-less profile, the customer list shows the badge Possible duplicate: the same first and last name in the Relations column, and the profile shows the warning Possible duplicate with the older profile’s name (a link to it) and the date it became a customer.
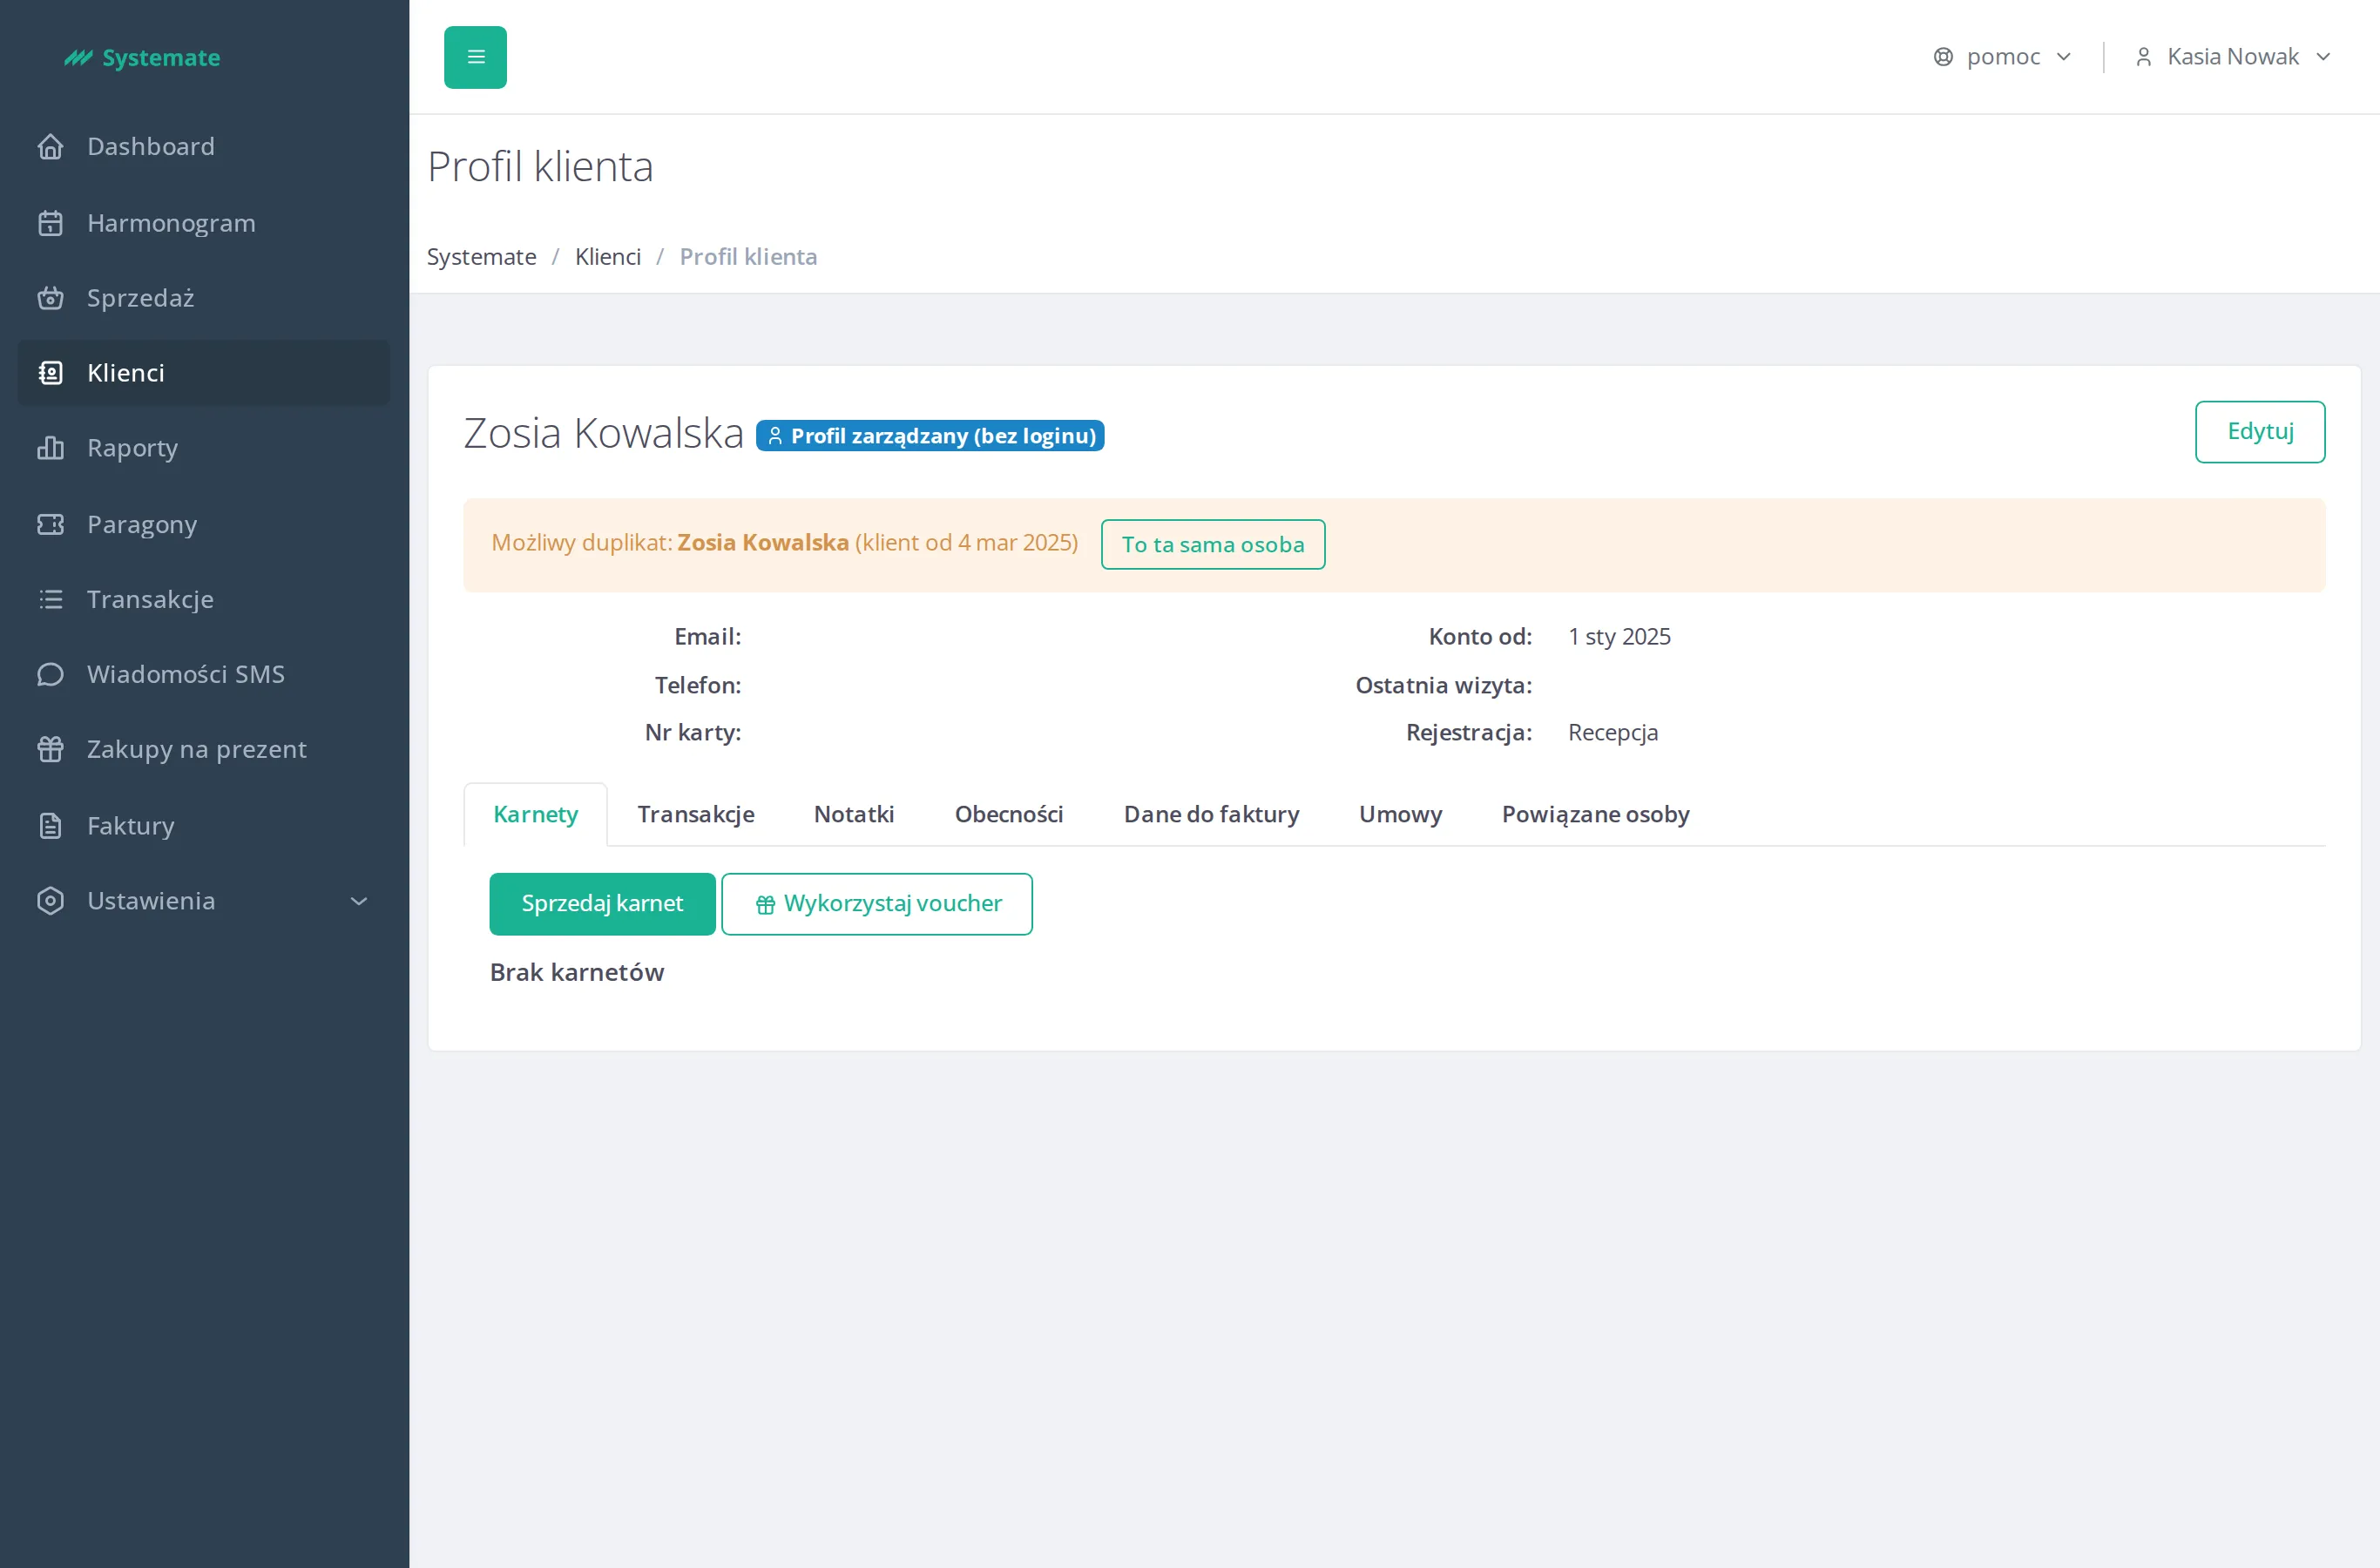
- Check that it really is the same person — the warning relies on the name only.
- Click It’s the same person and confirm. Links and consents move to the older profile, the newer profile is deleted, and the panel opens the older profile.
Share a pass with a related person
Section titled “Share a pass with a related person”A pass of a product marked as Shareable pass can be shared with people related to its owner — everyone’s visits come off one counter.
-
On the owner’s profile open the Passes tab. The Sharing column lists the people the pass is shared with, with the date of sharing.
-
Click Share…, tick the people and click Share. The list holds only related people the pass is not yet shared with.
-
To revoke a share, click Revoke in the person’s row.
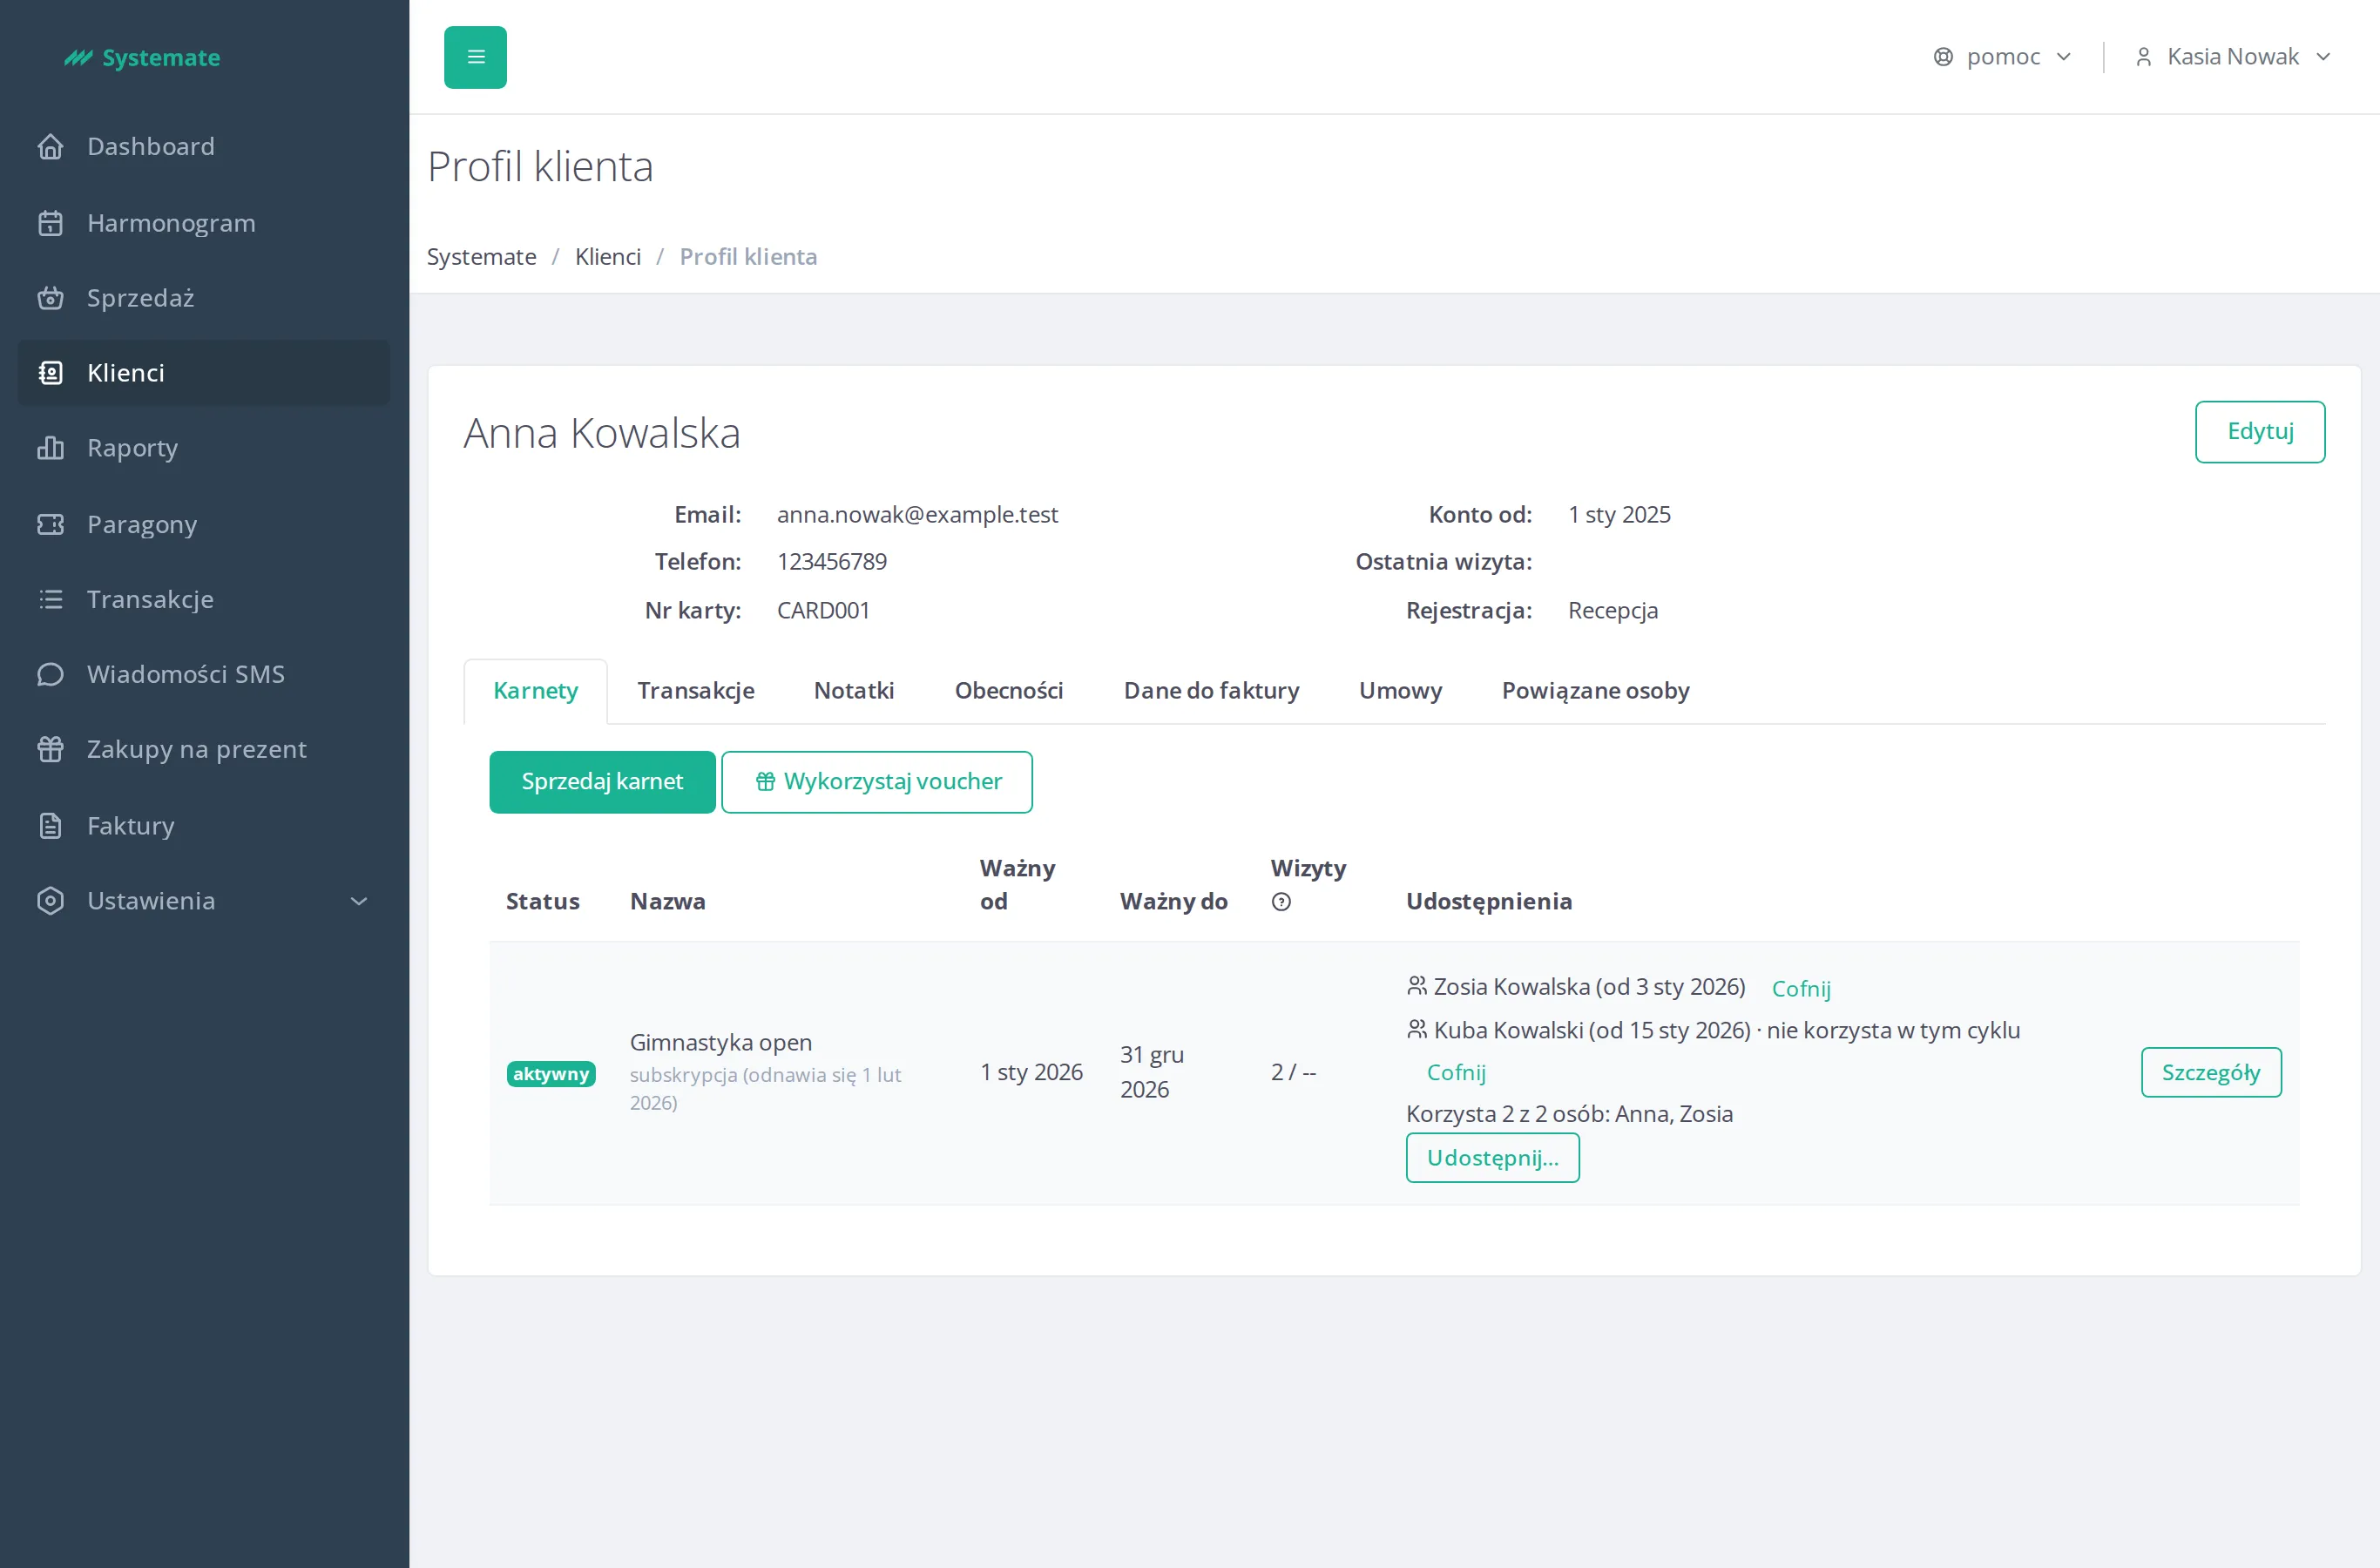
When the product has a person limit, a line Used by X of Y people names the people who drew a visit, and a person not using the pass is marked not using (for a subscription: not using this cycle). A subscription share carries over to the pass of every following cycle.
A pass shared with the customer by someone else appears in their Passes tab as {owner’s first name}’s pass, shared.
Reports
Section titled “Reports”When the studio has family accounts enabled, Reports holds two family-account reports in the Customers group.
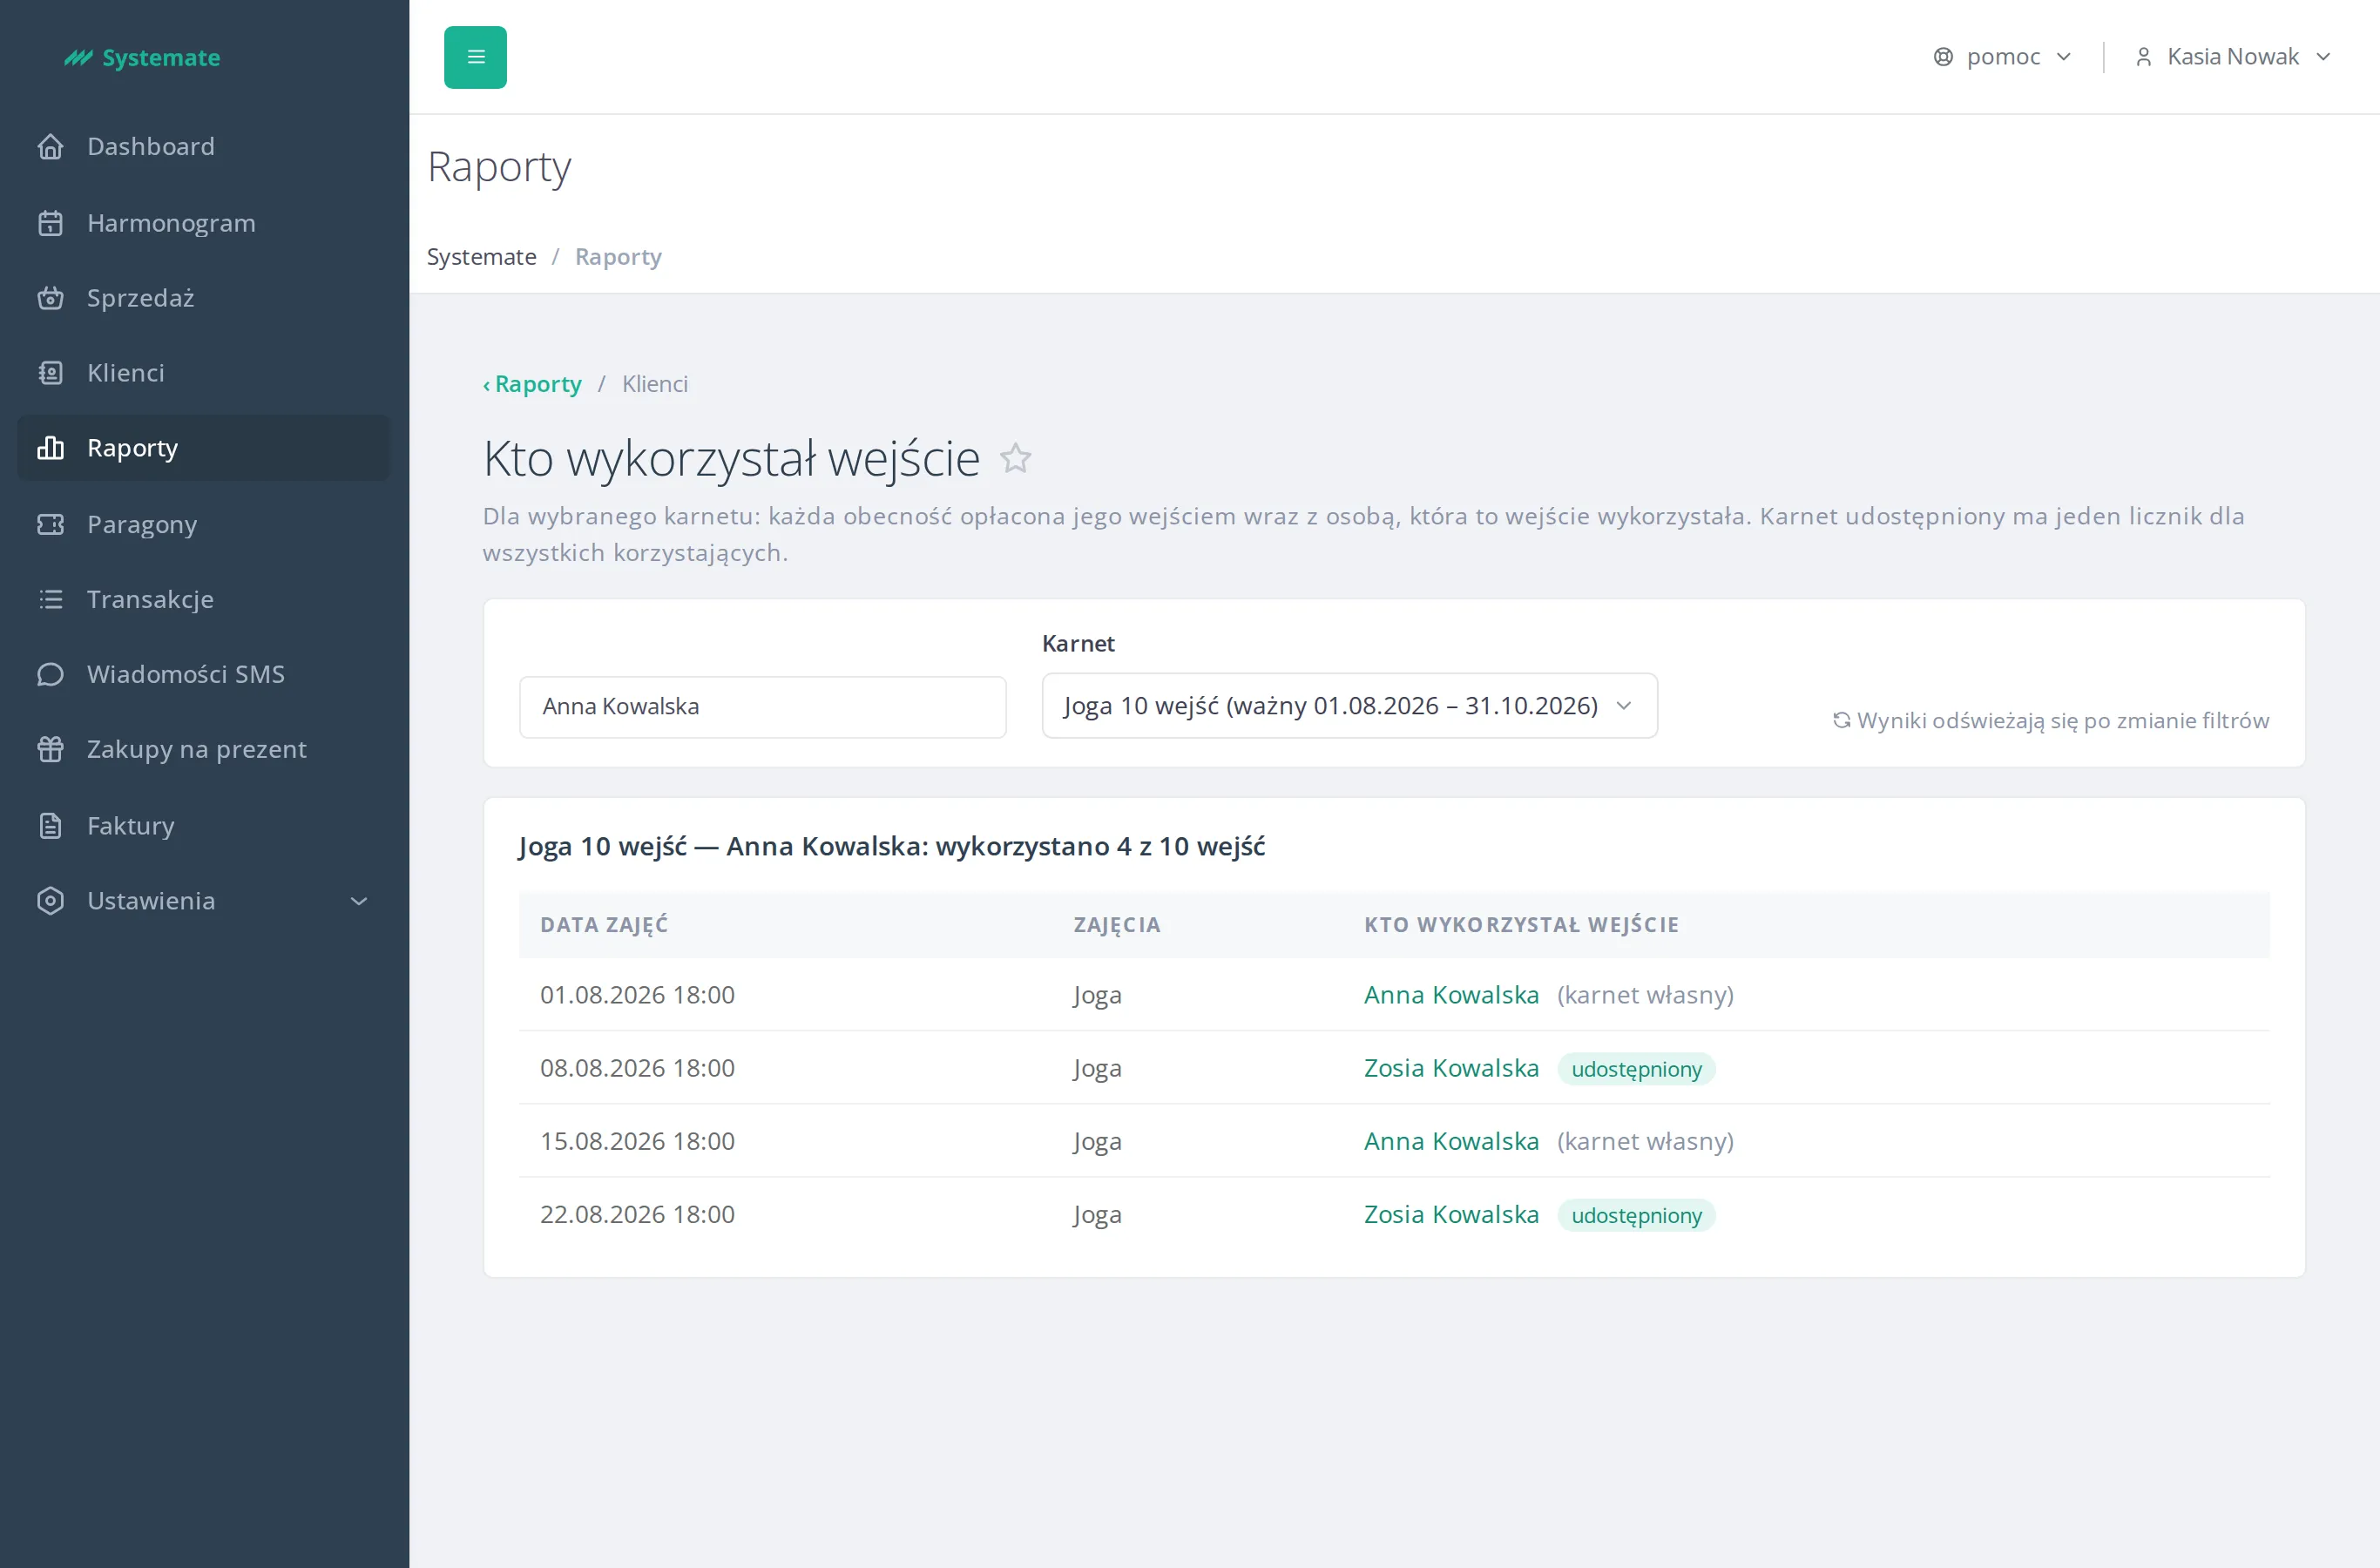
Who used the visit
Section titled “Who used the visit”-
Open the Who used the visit report.
-
Choose the customer, then their pass.
-
The header shows the pass counter — e.g. 4 of 10 visits used. The table lists every visit with the class date and the person who used it: the owner’s visit is marked (own pass), another person’s visit carries the shared badge.
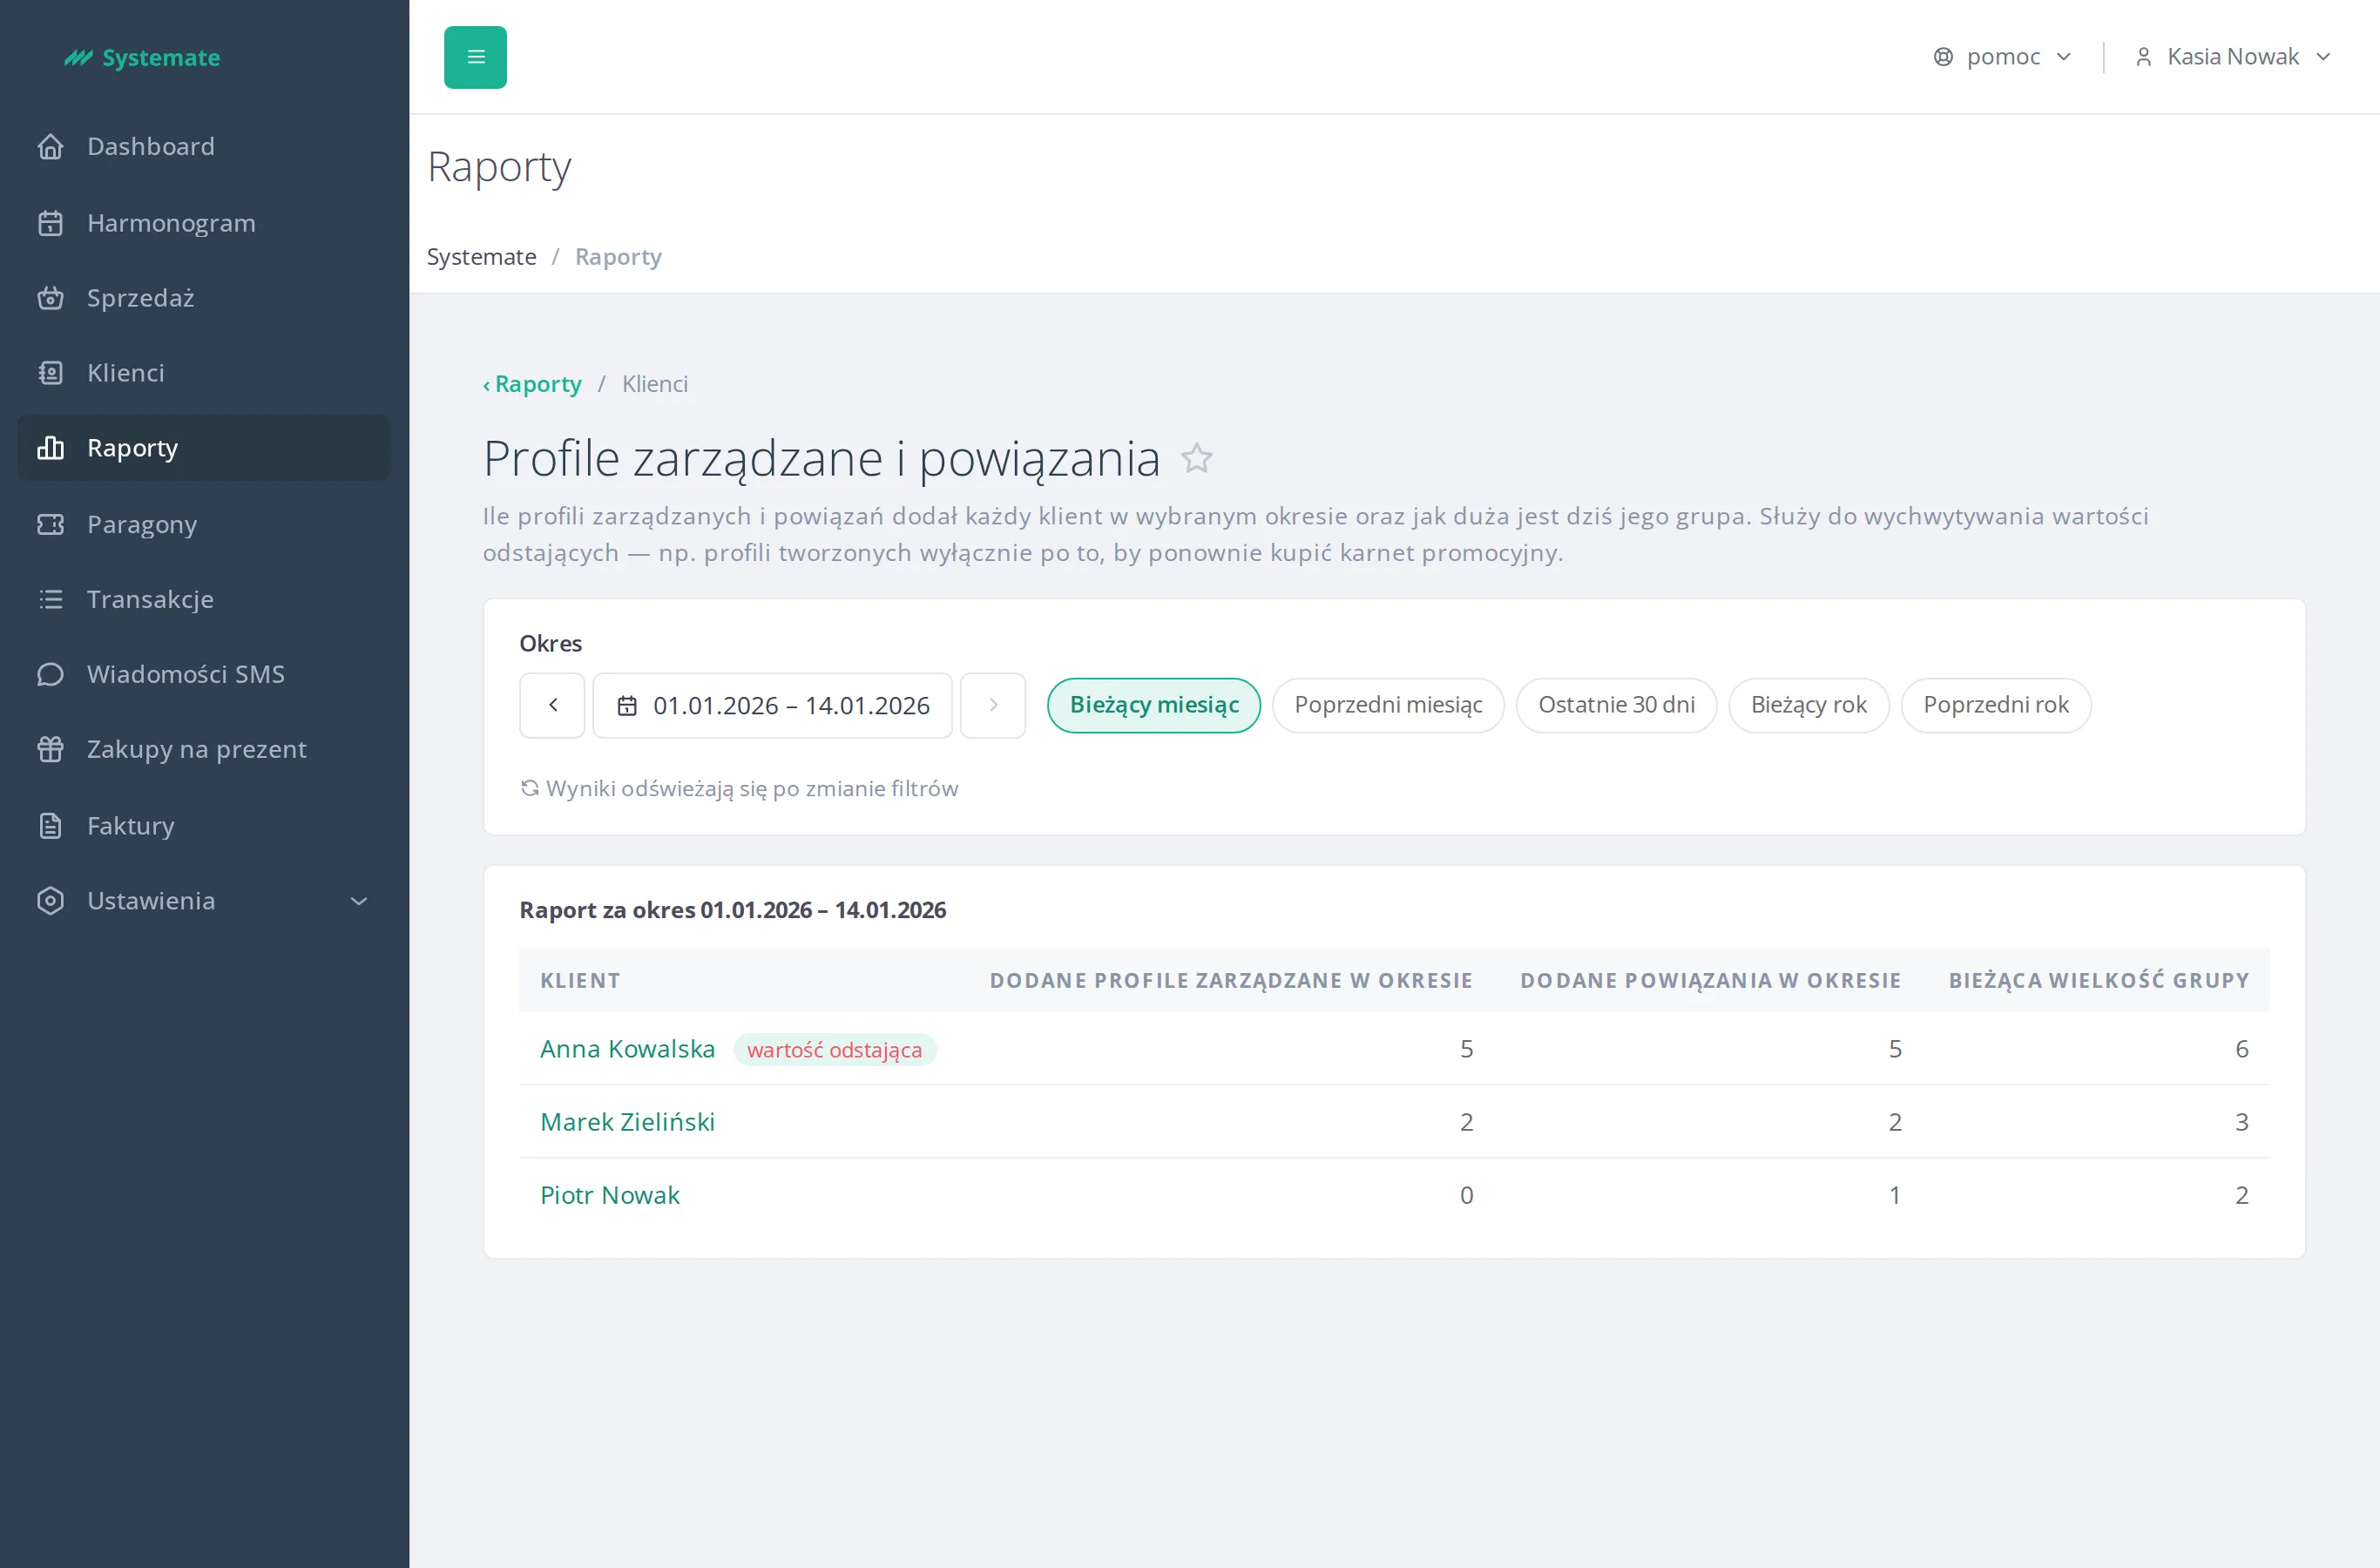
Managed profiles and relations per customer
Section titled “Managed profiles and relations per customer”-
Open the Managed profiles and relations report and choose the period.
-
For each customer read the three columns: Managed profiles added in the period, Relations added in the period and Current group size.
-
A customer who added an unusually high number of profiles carries the outlier badge. Click their name to open the customer card and review their relations — for example revoke a relation or merge a duplicate.